Is it possible to cut parts of videos in Windows Movie Maker?
Sure, you can cut or trim video in Windows Movie Maker for free. However, Windows Movie Maker is so compicated that you need to have a good understanding on the tools and features of this program. Here we will share useful tips on how to cut video in Windows Movie Maker. Read on and learn more.
- Part 1: The Easiest Way to Cut a video with Windows Movie Maker Alternative
- Part 2: How to Cut Video in Windows Movie Maker
Part 1: The Easiest Way to Cut a video with Windows Movie Maker Alternative
Filmora Video Editor for Windows (or Filmora Video Editor for Mac) is the best video editor in the market and provides the best methods, tools and techniques to perform the video editing easily. Filmora Video Editor enables you to easily make movies , edit audio, apply effects and share your new movie on YouTube, Facebook, Vimeo, DVD, TV, iPhone, iPad, iPod, and more!
Key Features of Filmora Video Editor:
- Filmora Video Editor has every video editing tools you might need for video cutting, rotating, trimming, splitting and joining;
- Full compatible with most of video, audio and image formats;
- After basic editing a video, there are lots of built-in filters, overlays, motion graphics and animated titles are ready to be added to the video;
- Supports saving video in multiple formats or directly optimize it for YouTube, Facebook, Vimeo, etc;
Tutorial on How to Cut WMV Video with Filmora Video Editor
Step 1. Launch the program
Install Filmora Video Editor to your computer if it's not pre-installed then proceed with the following steps to cut your video.
Step 2. Import WMV video to the program
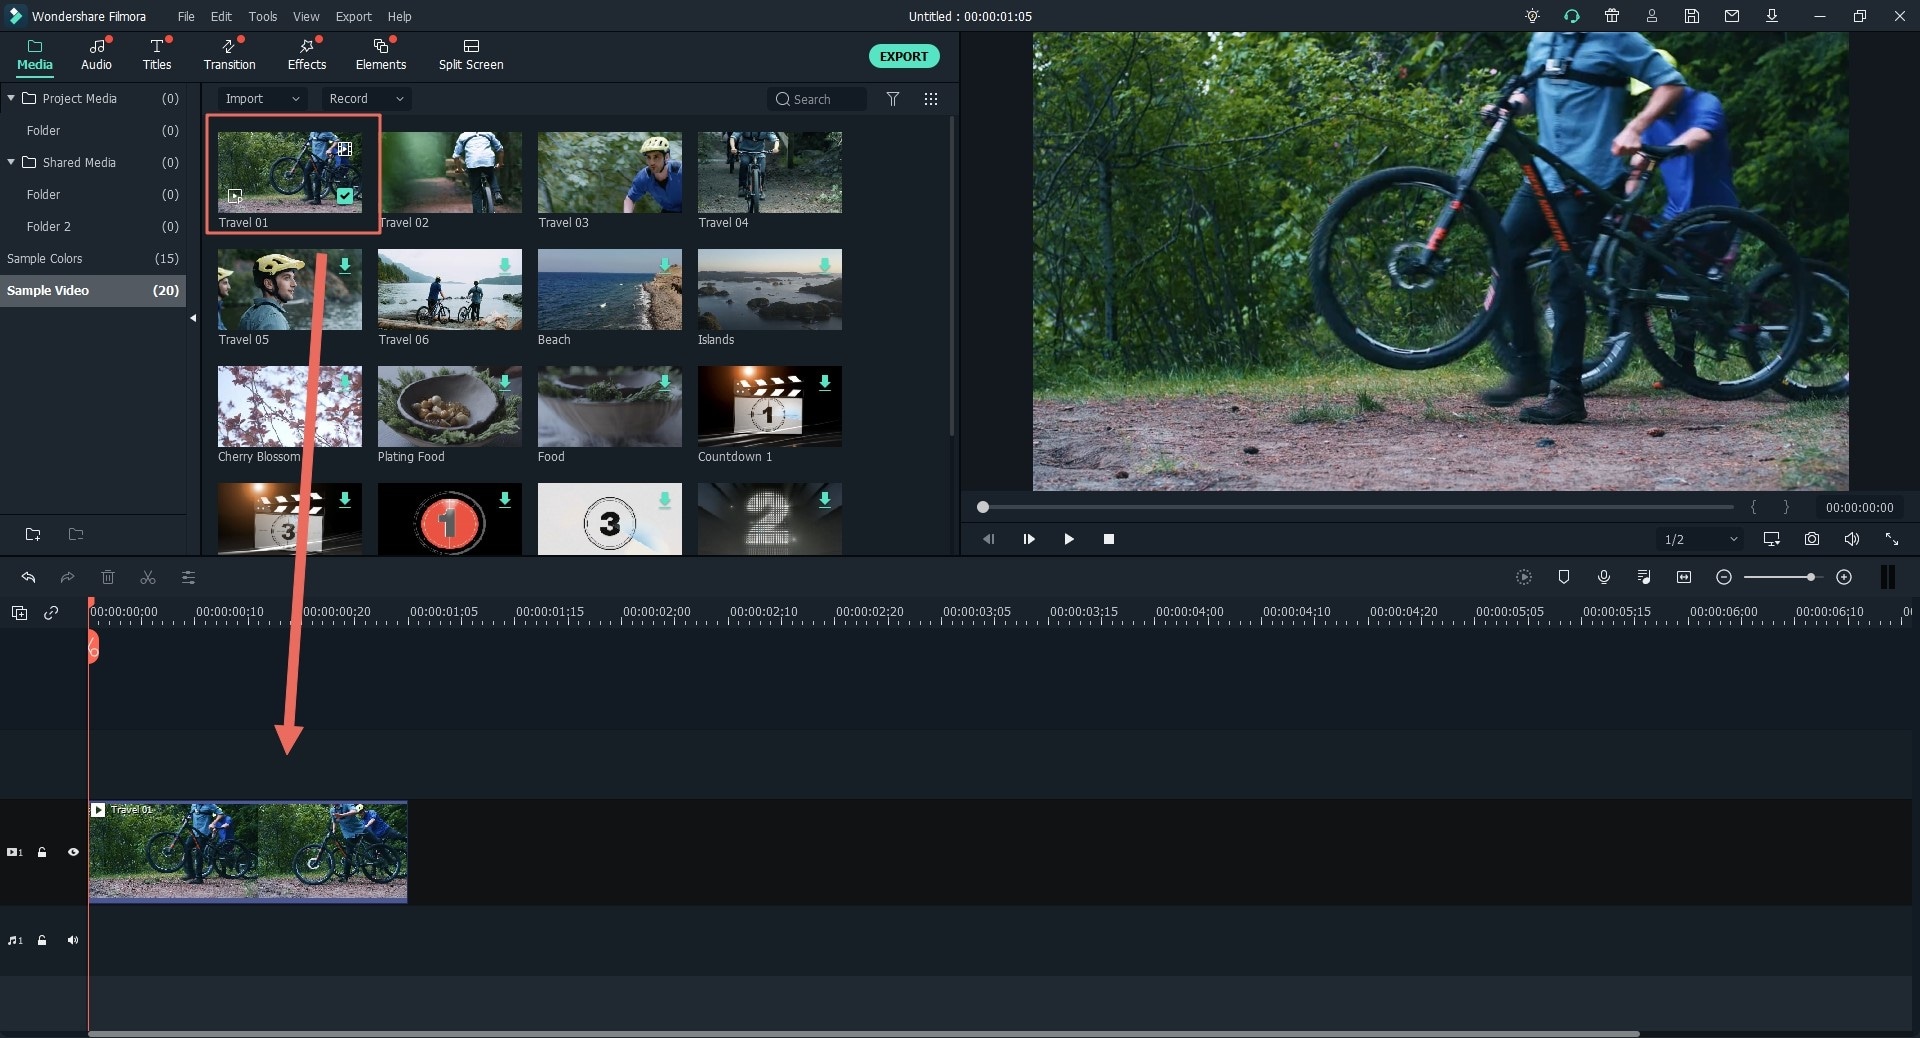
Add files- the video files to cut will be of no use sitting in your computer system. They will need to be in the program timeline for editing and this step will be useful in loading them. Drag and drop or go to "+" then import video. Drag and drop your video to the timeline.
Step 3. Trim WMV video from the beginning or from the ending part
After dropping video to the timeline, move the consor on the beginning or eding of the video until you see the pointer. Simple drag the pointer to cut the video at the length you want.
Step 4. Cut WMV video from a middle section of a video
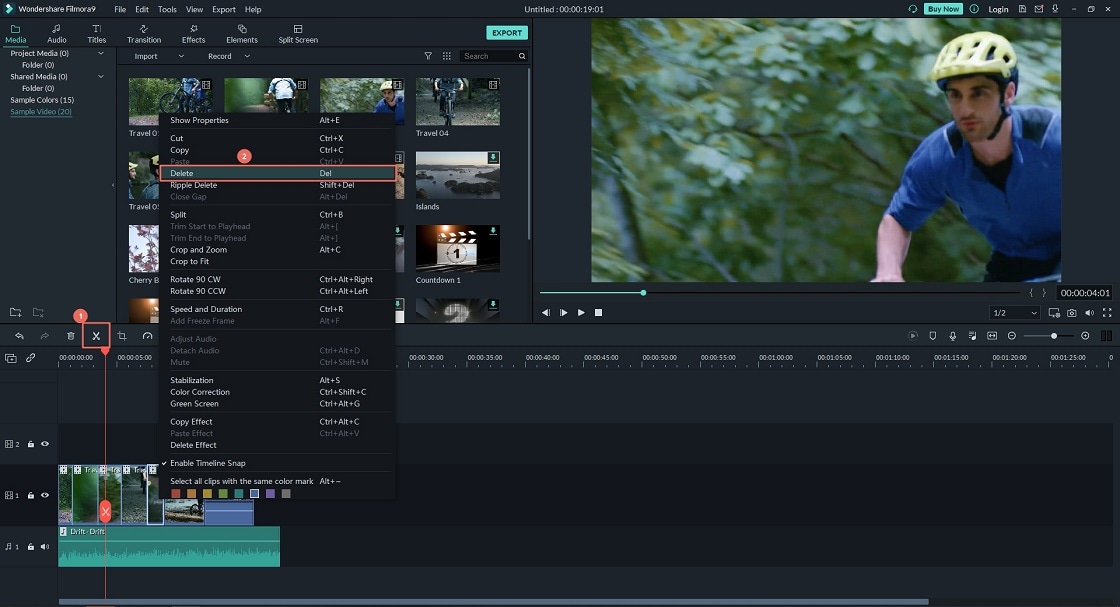
Right click the clip that you have cut from your video. Choose "Cut", then the selected clip will be deleted at once. Make sure you move them appropriately on the video not to end up cutting necessary parts and leaving useless ones.
Step 5. Save or export video
At last, you can click the "Export" button to save the left video clips to any device as you want.
Part 2: How to Cut or Trim Video in Windows Movie Maker
Using Windows Movie Maker cut video is very easy and in a very effective way. Be informed of that in case you never knew. The following steps will be helpful to you anytime you want to cut or trim a video in Windows Movie Maker.

Now you can follow the steps to cut movie with Windows Movie Maker in Windows 10:
Step 1. Start by launching the program and then click on "click here to browse for videos and photos". That will allow you to make addition of video files you are preparing to cut. If that process is tedious, you can just drag them and drop to the program timeline.
Step 2. The Movie Maker will take a few minutes to analyze the added videos before proceeding. Once it is complete, the video frame will appear on the right side of the timeline and then navigate through to where the starting point will be.
Step 3. When there, right-click to view options and select "set start point" and repeat the same process in marking out the end point on your video.
Step 4. Before the actual cutting, do a preview of the video to be sure the exact sections to be cut are properly marked.
Step 5. The last step will be saving your edited video using the "save movie" button that you will find at the main menu.


