Does Windows Movie Maker Support MTS Files?
Yes, Windows Movie Maker supports MTS file format. It guarantees high compatibility and will always be good for consideration when using Windows Movie Maker. With a software program you can trust, you will not have any problems importing MTS into Windows Movie Maker. Make sure that the latest version of Windows Movie Maker is downloaded and installed to your computer system. Here are tips and tricks on how to fix problems of cannot import MTS to Windows Movie Maker and how to edit MTS in Windows Movie Maker.
- Part 1: How to Solve "Windows Movie Maker Can't Import MTS"?
- Part 2: How to Convert Windows Movie Maker to MTS
Part 1: How to Solve "Windows Movie Maker Can't Import MTS"?
When there is a "Windows Movie Maker Can't Import MTS" error to deal with, Filmora Video Editor for Windows (or Filmora Video Editor for Mac) will be a good choice to import and edit MTS video files. It is the best Windows Movie Maker alternative with a user-friendly interface and is highly loaded with all vital features. You can solve your problem by following very simple steps.
Why Choose Filmora Video Editor
- You can import video files in any formats including MTS, WMM, MP4, and more.
- It is easy to cut, trim, crop, rotate, split, combine and enhance videos.
- You are able to apply 300+ free video effects to the video.
- It helps you to export the video to most popular formats or burn to DVD.
Step-by-Step Guide to Import and Edit MTS with Windows Movie Maker Alternative
Step 1. Launch the Windows Movie Maker Alternative
First download and install Filmora Video Editor. And double click on the program icon to launch it. In the main interface of the program, click on the "Full Feature Mode" to go to the video editing window.
Step 2. Import MTS video to the program
In this step, you have to import MTS video to the program. You can directly drag and drop the video to the program interface. Alternatively, you can click on the "Import Media Files Here" button to select the MTS file and add to the program. When it is done, drag the video to the timeline for editing.
Step 3. Edit MTS video file
Now you can use the video editing tools to trim, crop, rotate, split and enhance the MTS video. You can also add effects including filters, overlays, elements, transitions, text/title, and more to the video.
Step 4. Export the Video
When you complete the video editing task, you can click on the "Export" button to save the MTS video to your desired format, or directly upload the video to YouTube or other sites.
Part 2: Step-by-step Guide on How to Convert Windows Movie Maker to MTS
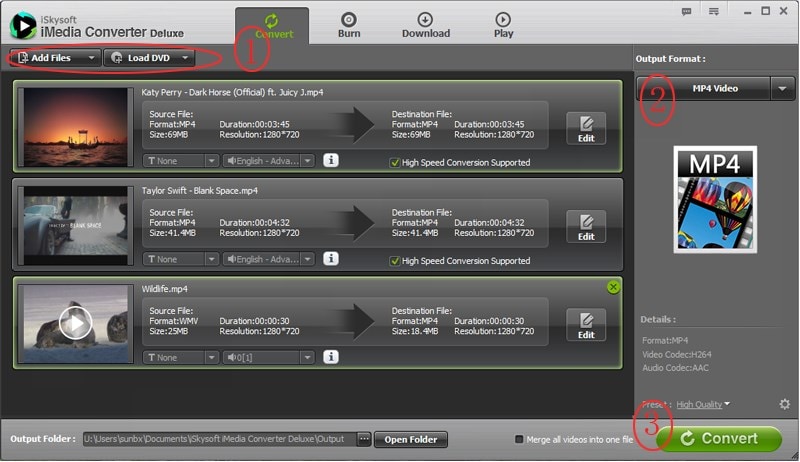
It is one of the easiest things to convert Windows Movie Maker Files to MTS using iSkysoft Video Converter Ultimate. Take advantage of the intuitive interface that the program comes with and get the best results out of the process. You must have the basics of how the program works to ensure you don’t endure a lot of challenges. Whether you are a new or experienced video editor, the following straightforward steps will be helpful:
Step 1. Add files to the converter- have your Windows Movie Maker files saved to WMV format before you start everything else. When through with converting, the files should then be added to the convertor. You can choose to drag and then drop the files or click on “Add Files” button to allow you browse through the computer for the files.
Step 2. Select output format- this step is very important because of compatibility issues. MTS will be the right output format to select from the many options that you will have for consideration. The format is highly compatible and will play on even portable devices.
Step 3. Begin conversion- click on the “Convert” button to finalize all the steps for converting your Windows Movie Maker files to MTS.


