There have been many complaints about people unable to capture videos using Windows Movie Maker. It’s understandable especially if they are doing it for the first time. You will need to have all the basics for using the program before making any attempt. That will guarantee you of a peaceful time editing your video. If you start doing screen capture without grasping such basics, you will be courting disaster so don’t try it. This article will show you how to create a snapshot in Windows Live Movie Maker and also provide an alternative to Windows Movie Maker to make record desktop video.
- Part 1. How to Do Screen Capture with Windows Movie Maker
- Part 2. Best Way to Do Screen Capture in Filmora Video Editor
Part 1. How to Do Screen Capture with Windows Movie Maker
Screen capture is very important in the modern world because of the ability to share videos online. Most of the videos that are popular in online sites these days have been made possible through screen capture. But, it is not all about screen capture but capturing that with the right software program. There are very many options in the market and Windows Movie Maker will be a suitable one. Windows Movie Maker has a distinct feature for screen recording that you will enjoy using. It allows you to select the precise part of a video to record and cushion the other video from damage. Following is a simply tutorial of how to create a snapshot in Windows Live Movie Maker.

Step 1: Open the program and go straight to the contents pane. From there, click on the video clip to edit and haul the playback indicator from below the monitor.
Step 2: There are “Previous Frame” and “Next Frame” buttons that you can use to navigate and know the frames to capture. Once you have located the precise one, click on “Tools” and then “Take Picture”. Preview the frame before proceeding to be sure it’s the right one.
Step 3: For the screen you have captured, give it the right name and then click on “Save” to store all changes made. It will now be ready for sharing on any site.
Part 2. Best Way to Do Screen Capture in Filmora Video Editor
Filmora Video Editor for Windows is the best alternative to Windows Movie Maker in the market and provides the best methods, tools and techniques to perform the video editing easily. Filmora Video Editor enables you to easily make movies , edit audio, apply effects and share your new movie on YouTube, Facebook, Vimeo, DVD, TV, iPhone, iPad, iPod, and more!

Best Video Editing Tool to Make Screen Capture
- Supports almost all the popular video formats, audio files and images. No incompatibility issues;
- Hand-picked filters, overlays, motion graphics, titles, intro/credit. More effects are added regularly;
- Special effects, like green-screen, split-screen, face-off, etc. are available as well;
- Export video in multiple formats or directly optimize videos for YouTube, Facebook, Vimeo, etc;
Step 1. Run the program
Launch Filmora Video Editor and enter the “Full Feature Mode”.

Step 2. Ready to record screen
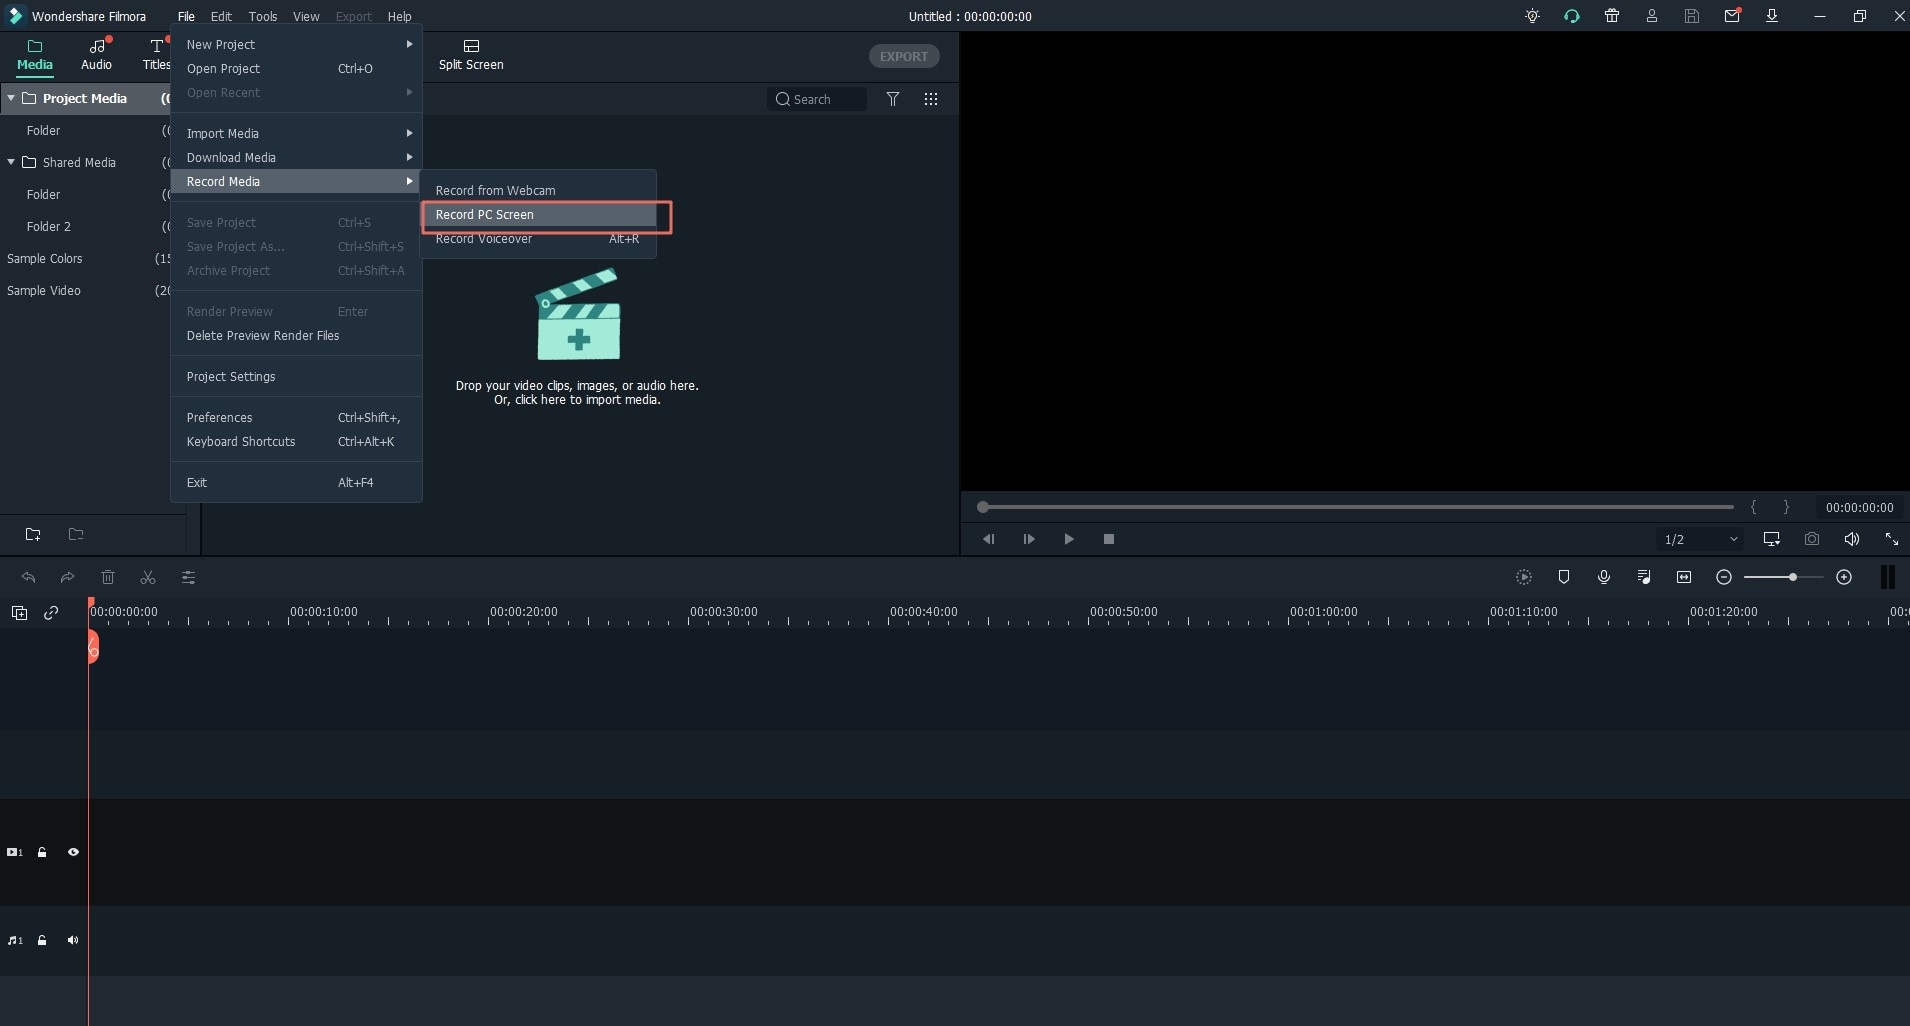
Navigate to the “RECORD” button and click the “Record PC Screen”.

Step 3. Make settings
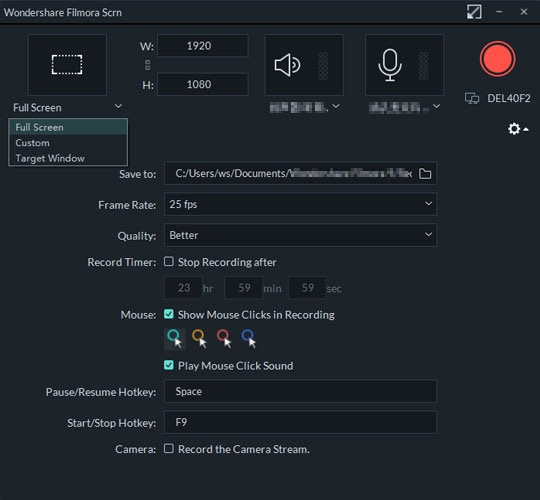
You can record PC screen in 3 recording screens, including Full Screen, Custom and Target Window. If you want to record your PC from microphone device or audio system on computer, you can turn the icons on. And you can also click on the “Settings” to do any necessary adjustments.

Step 4. Capture screen
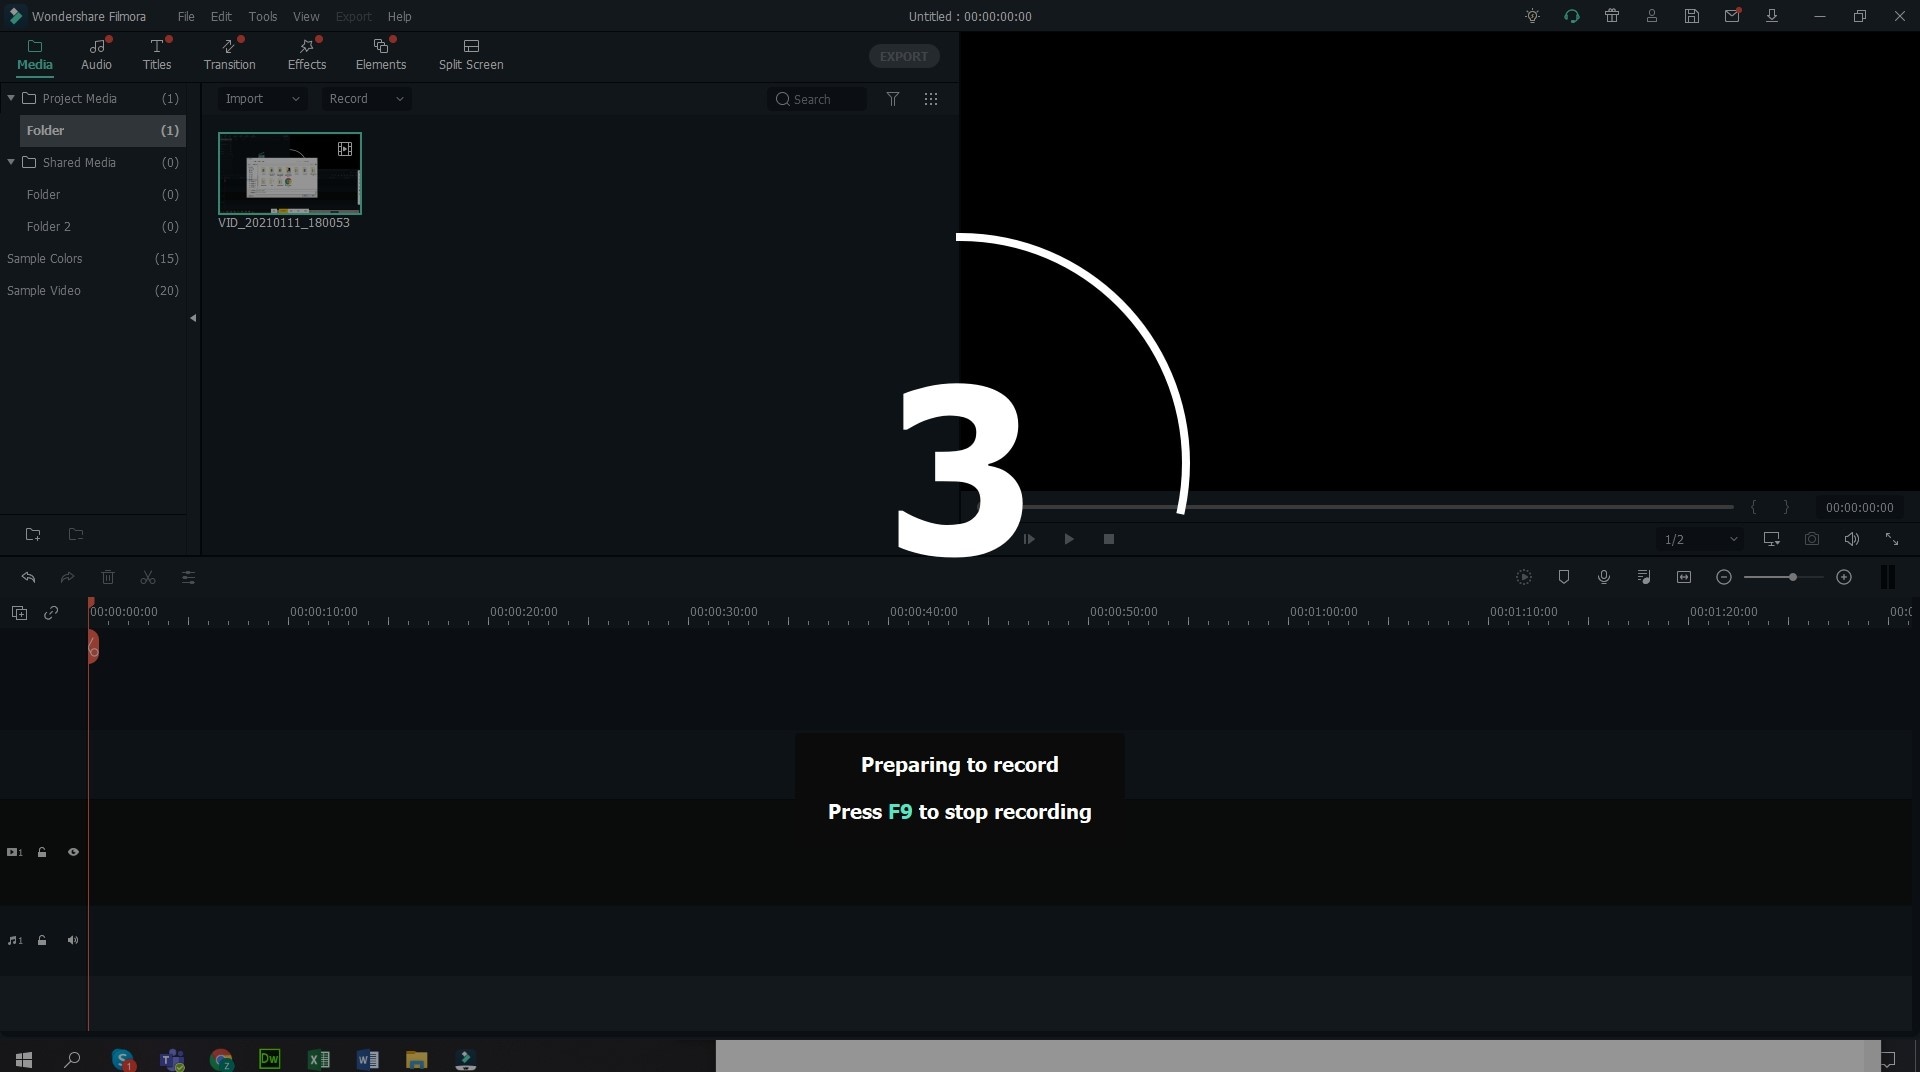
When everything is OK, you can click on the “REC” button. Filmora Video Editor will start recording after counting down from 5, 4, 3, 2, 1. You can press F9 or customize the Start/Stop Hotkey in settings to top recording anytime.


