New to be a YouTuber and wondering how to edit YouTube videos? Editing YouTube video could be a very easy thing once you have a professional video editor for YouTube. You may have used or heared about the YouTube Video Editor which has been retired in September 2017 or other video editor software like iMovie and Windows Movie Maker. Now you may ask, which is your suitable video editor software? How to make tweaks and add effects to your videos to make them attractive? Even some users may wonder the possibility of editing YouTube video after published. In this article, you can find all answers.
- Part 1. Effortless Method for How to Edit YouTube Videos
- Part 2. Can You Edit A YouTube Video After Uploading
Part 1. How to Edit YouTube Videos Using the Professional YouTube Video Editor
Filmora Video Editor for Windows (or Filmora Video Editor for Mac) is a perfect video editor which will let you edit YouTube video in real time and the best part is that you don't have to learn much about this software. It has an amazing user friendly interface which can easily be used by every YouTuber. :

Recommendation: Filmora Video Editor
- Best video editing software for beginner and semi-professional, that comes with powerful editing skills like trimming, splitting, rotating, editing, etc.
- Advanced video effects like green screen, PIP, audio mixer, etc. can also be found and applied to your video within few clicks.
- 500+ free special video effects to customize and create an awesome movie by yourself.
- 1000+ standalone effects downloading resources to make videos in all kinds of styles.
- Export videos to Chromebooks compatible format with 1 simple click.
[Tutorial] Step-by-step Guide to Edit YouTube Videos
Now, this part will show you how to easily create a stunning and attractive YouTube video, in this way you can appeal to more fans on your YouTube account.
Tips: If you're also looking for beginner-friendly video editing softwares, try Filmora for free. It enables you to edit amazing youtube videos and win abundant audience for you!
Step 1. Import Videos and Photos
Once you have got the latest version of Filmora Video Editor, Run it on your computer. On the main screen of software, choose "FULL FETURE MODE" and click on the "Import Media Files Here" button to load a video. You can also drag and drop the Audio and Video files that you want to edit.

Step 2. Start Editing YouTube Videos
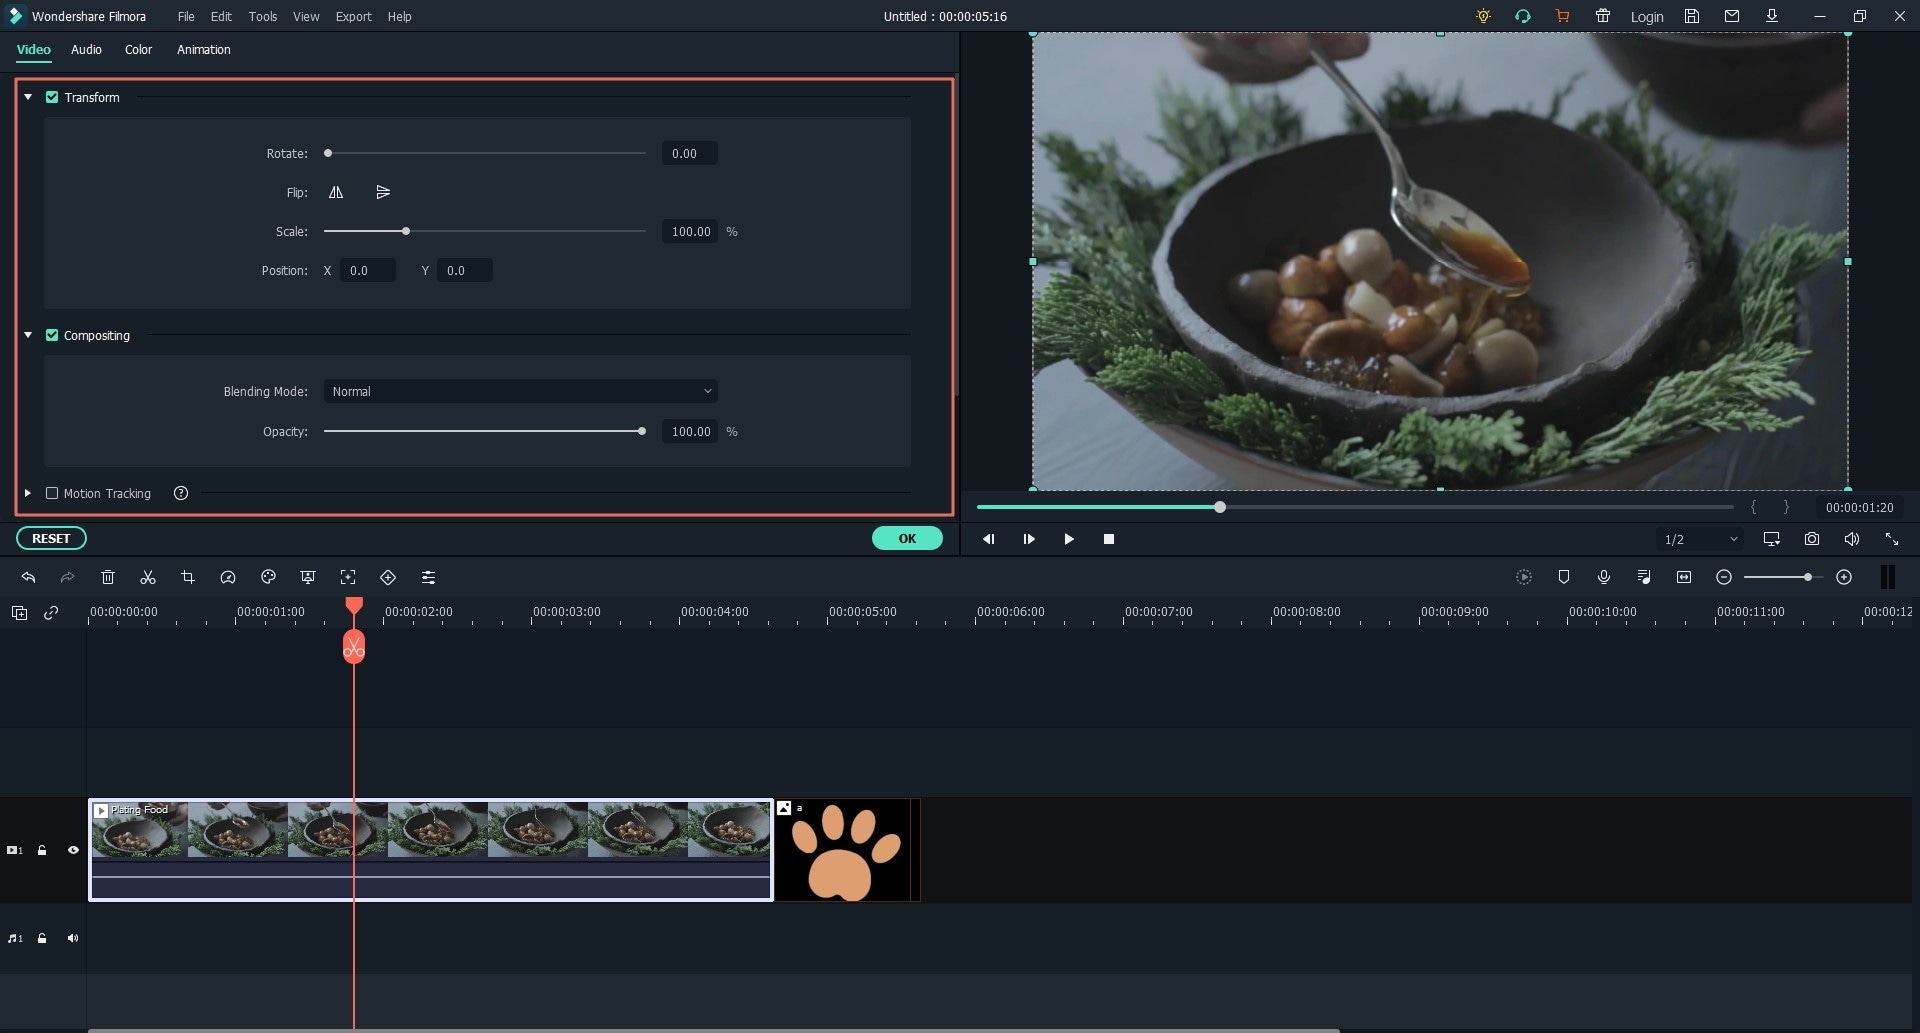
The next step is to move the video to the timeline for editing purpose. Simply drag and drop it to the editing area. Here you can perform basic video editing functions such as:
- Change the speed of the video;
- Rotation of the video;
- Adjust the Brightness of the video.
Click on the "Edit" icon and it will reveal all the options to perform these basic editing functions.
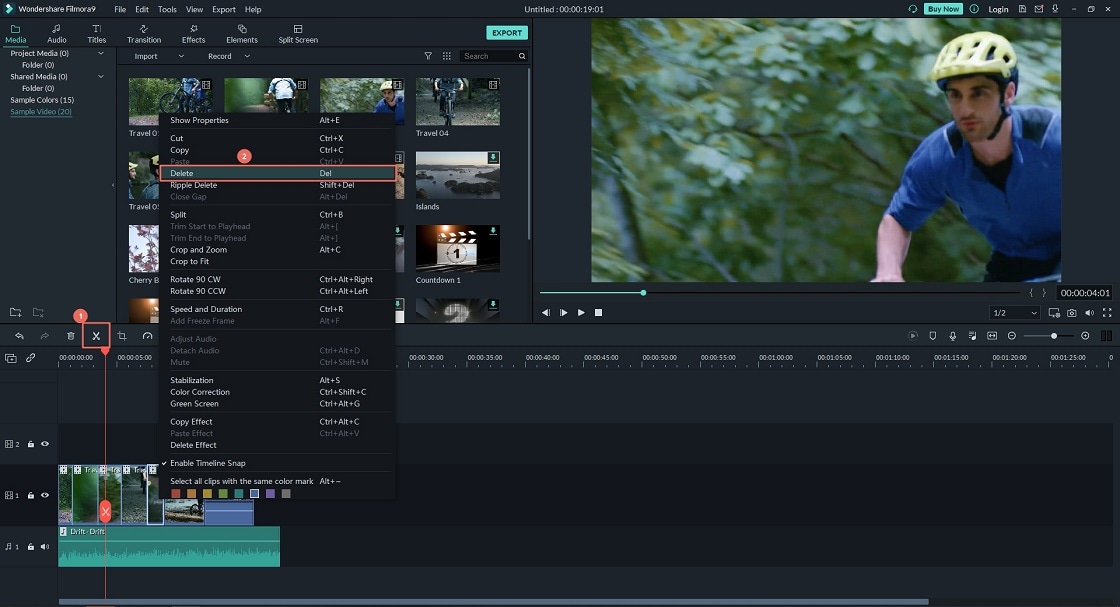
Move the cursor to a specific position to split down the video into two or more different clips as shown in the screenshot below. Then you can delete the unwanted video clips by directly selecting and clicking "Delete" keyboard button.
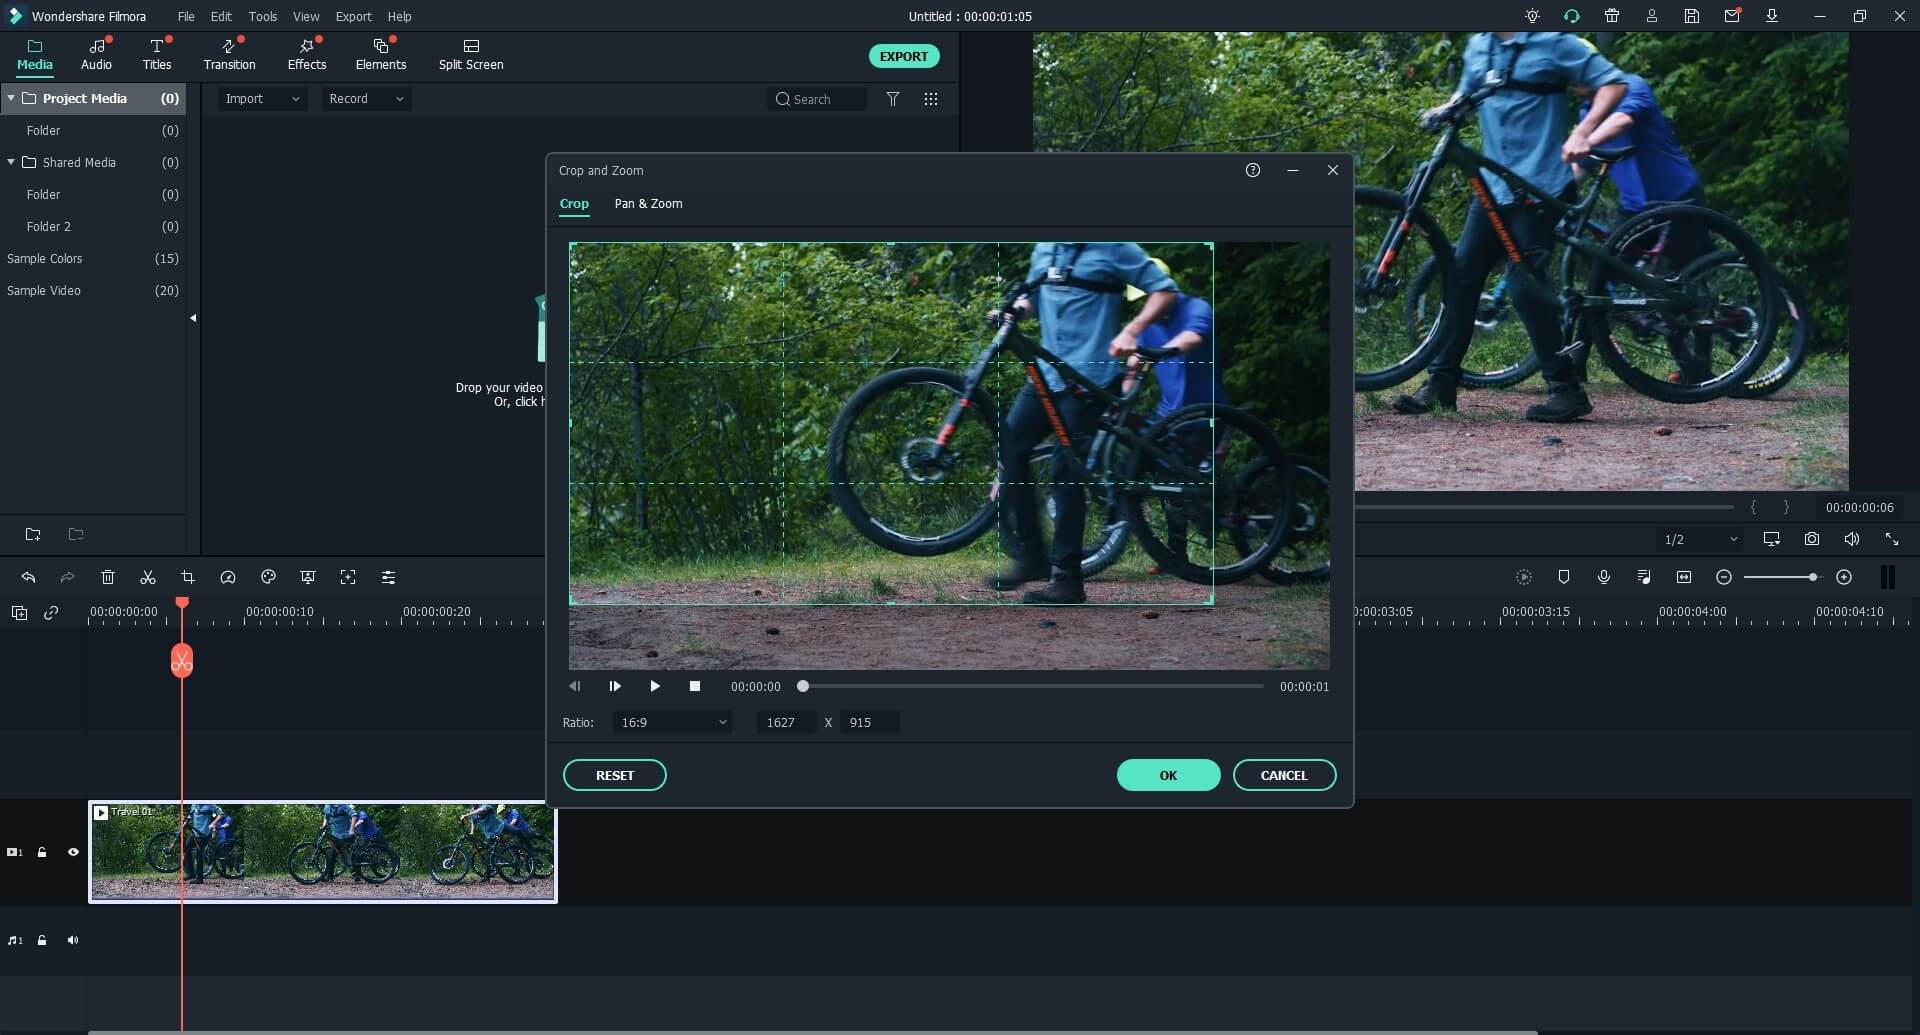
Next, if you need to remove errant objects in the video image, you can choose to crop the video. The distinguished feature from YouTube Video Editor is that you can crop the video using Filmora Video Editor. Right click on a video and select "Crop and Zoom". You can either select already present options or can adjust the frame of the video manually.
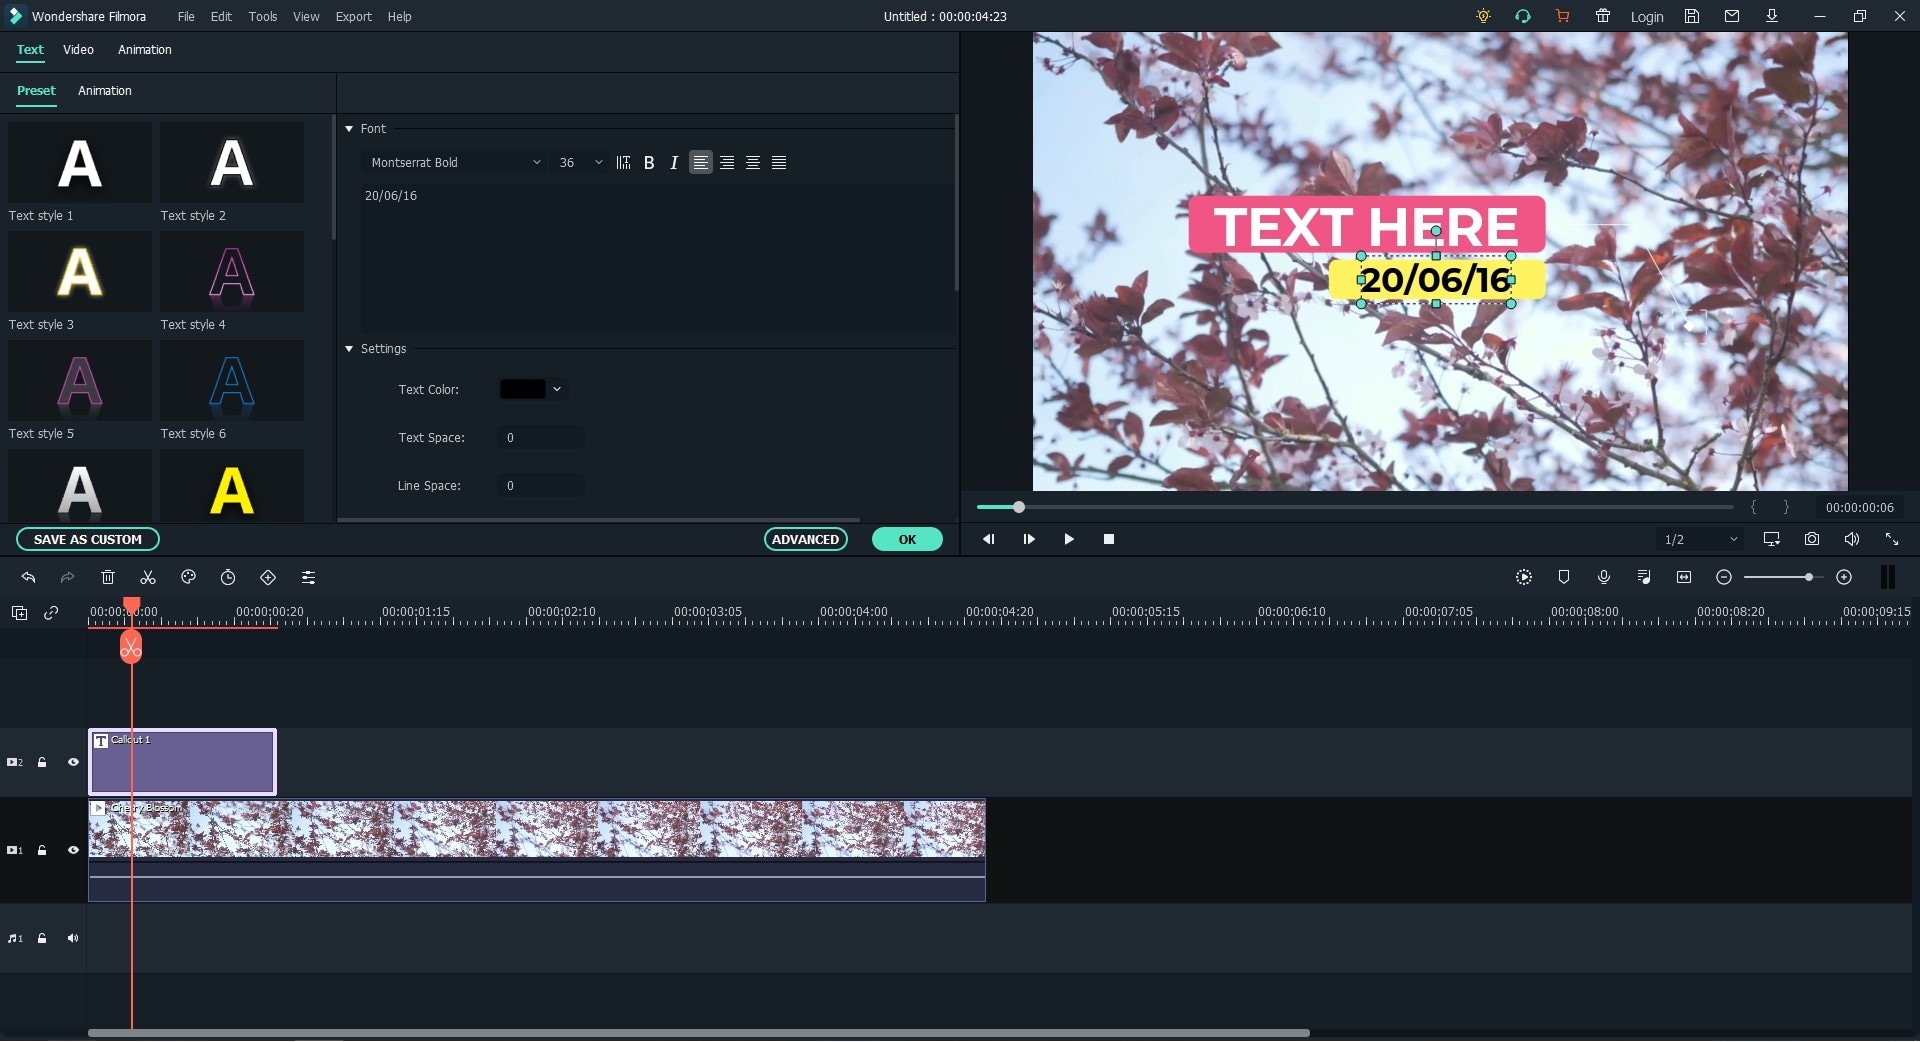
To make video more stylish, Filmora Video Editor provides "Add Text" features, there are plenty of preset text styles. Click on "TEXT/CREADIT" icon upon the timeline, on the left panel, select a style and apply on YouTube video. The preset text can also be edited in every possible way, double click on the text and here it will open all the options to edit the text.
If you have added more than two video clips or divided one clip into two. You can always join them using many beautiful transitions already present in the Filmora Video Editor for YouTube. From the left panel, click on the "Transitions" icon, now, drag a transition to join two videos.
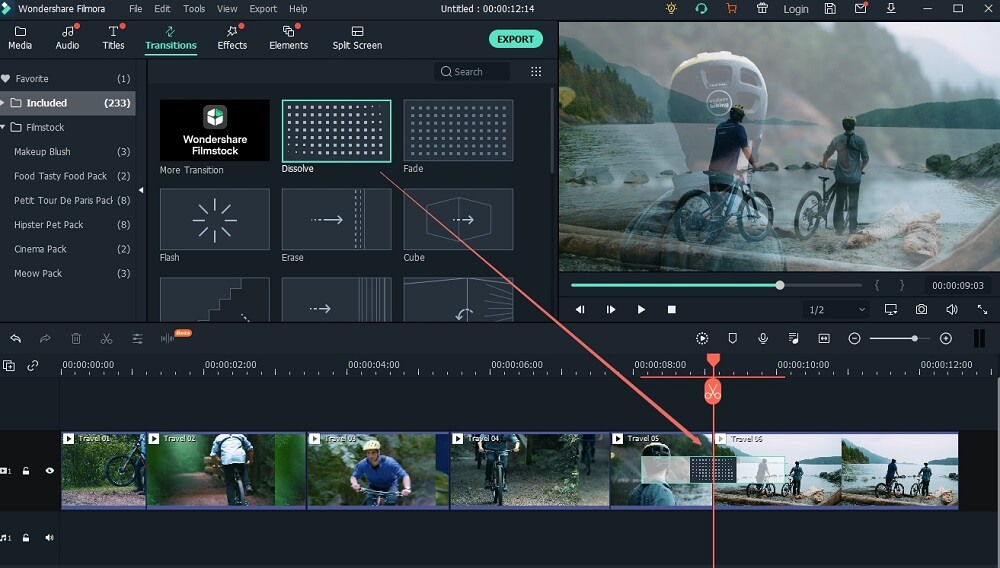
Also, you are recommended to use filters to optimize YouTube video color. Right beside the "Transitions" icon, you will see the option for "Filters", select a filter and move it to the editing area to apply on a video.

In addition, there are some power tools available to apply, Face-off, mosaic and tilt shift on a video clip. Click on the "Power Tool" icon, you can get them.
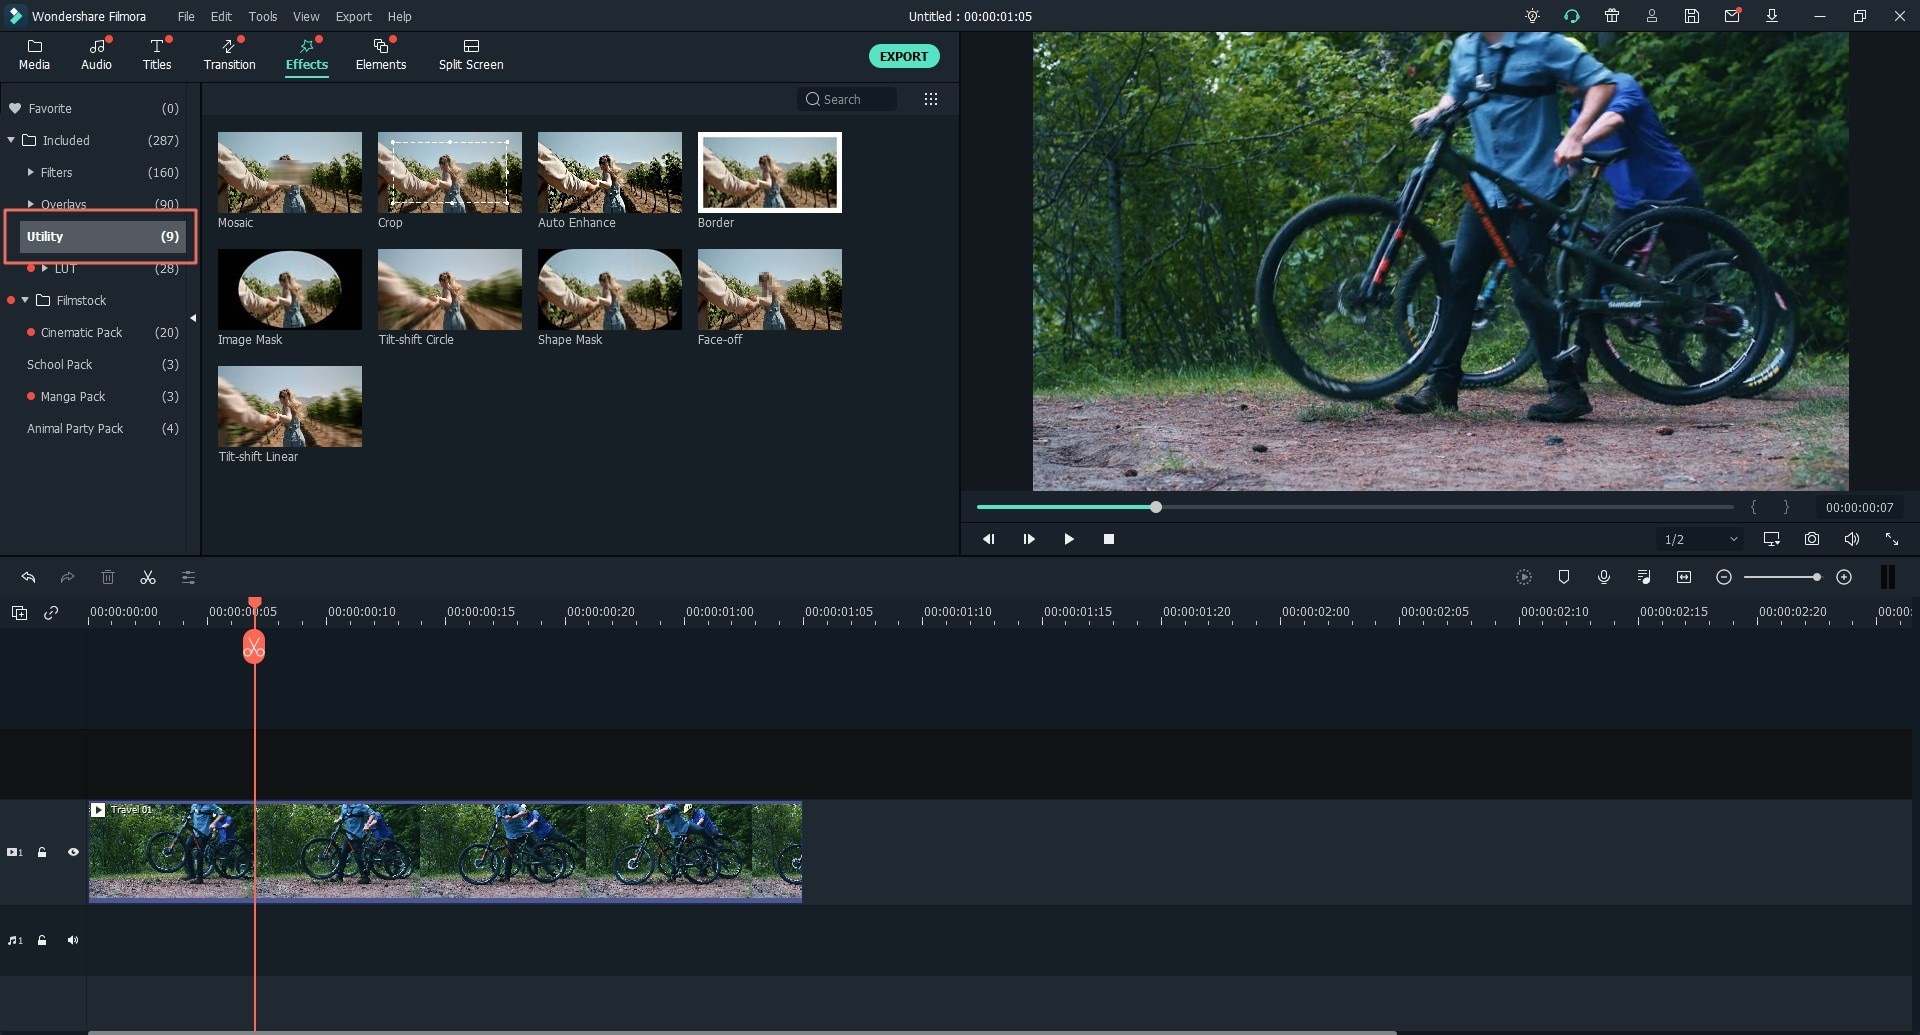
Step 3. Export the Edited YouTube Video
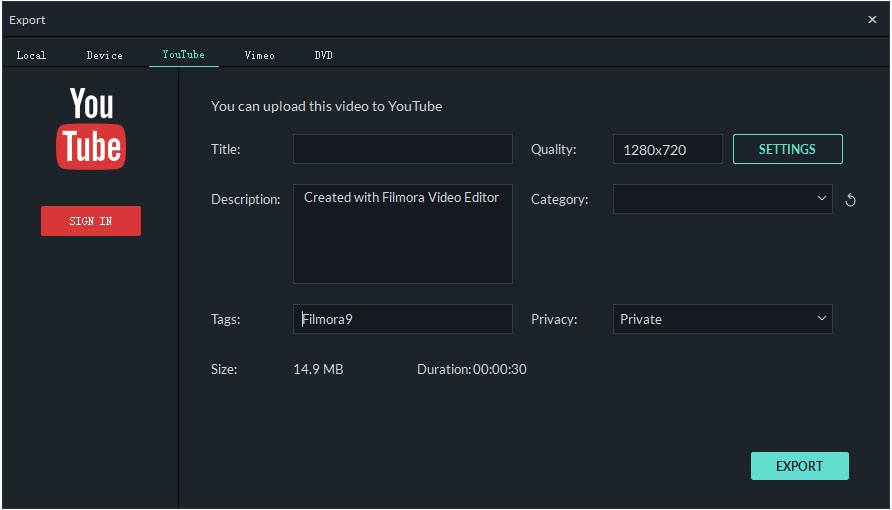
Once the editing process is completed, click on the "Export" button to export the final video to your computer. The best part here is that you can upload the videos directly to the YouTube, select the YouTube from the left panel. Add your sign in details, Title, Description and everything related to the video and click on "Upload" button to upload the video to YouTube.
Part 2. Is It Possible to Edit Uploaded YouTube Videos
Some YouTubers asked us, is it possible edit a published YouTube video? The answer is "YES".
Since Google has retired YouTube Video Editor, many users fall into helplessness. They intend to find some other free video editing software for youtube as the alternatives, but the other video editors for YouTube all do not support to edit uploaded YouTube videos. So, how to edit the existing YouTube videos without losing video ID, URL and viewing volume?
Good news, although YouTube Video Editor doesn't provide professional level video editing but still it performs every basic function efficiently. You can use it to trim down the videos, edit the background music of the video or apply custom blurring. .
How to Edit YouTube Videos Using the "New" YouTube Video Editor
Step 1: Go to the main screen of YouTube and Sign in with your credentials. Go to "My Channel" and choose "Creator Studio". You will find all your uploaded video in this list, find the one you want to modify and click the "Edit" button below the video title.
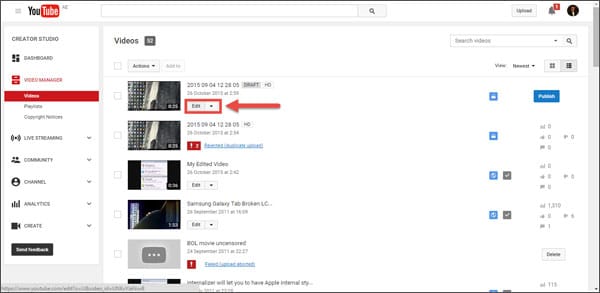
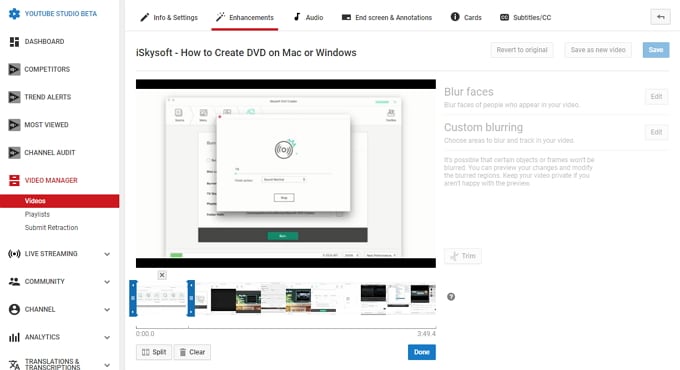
Step 2: From the next window, you can find edit tools provided by YouTube official. You just have the choice to improve your uploads with "Enhancements". In this tab, you can choose to trim your video, or choose areas to blur and track in your video.
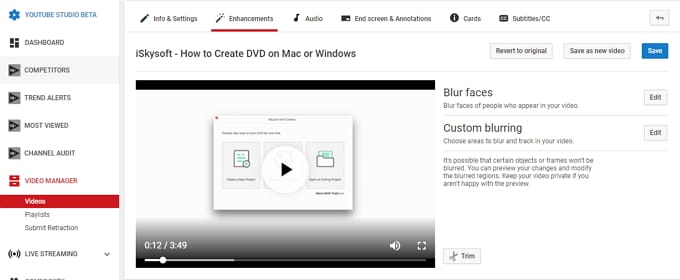
The trim process is easy to complete, you just need to click on "Trim" button, drag cursors to split the video into parts and choose to delete some parts of the video.
If you are editing YouTube directly on Android or iPhone devices, you are also allowed to add filters to the video.
Once you are done with the editing process, click on "Save" at top right corner. It will surely take some time to complete the process. But once the process is completed, video will be automatically shown in the video list.
Final Thought
As we can see, the "New" YouTube Video Editor can't provides many functions, this tool only provides the most basic editing functions, even it can not add basic transitions or combine video clips. Apart from these issues, some YouTubers also have encountered YouTube Video Editor not working problems, it's really annoying.
According to these reasons, we also recommend you to completely edit YouTube videos before you upload them to YouTube. In this way, you can not only reduce the workload, but also you don't need to worry about the bad consequences of updating the video. Filmora Video Editor is really a practical video editor for YouTube which allows you to preview the edited videos before you export them. Why not download it and create your own stylish YouTube video now!


