Looking for a fast and simple way to slow down your video? Here you are, check this step-by-step guide and try filmora for free.
Sometimes, all you need is a slow-motion effect to show the sensitivity, feel, and nature of a scene. It makes the video look natural and cinematic and amps up the overall aesthetics of the shot. Here's a complete guide on how to slow down videos using Filmora easily.
Part 1. How to Slow Down a Video on Windows
Slowing down the video on Windows is a lot simpler than you think. Filmora gets the job done for you. It is an all-in-one video editing software with all the essential editing features of a good video editor. In addition, Filmora has tons of high-end features like Speed Ramping, Motion Tracking, Audio Ducking and Audio Denoise, plus a built-in Audio Equalizer and Mixer. Filmora also has a vast library of stock media, filmstock, transitions, graphical effects, audio effects, stickers, GIFs, and filters.
Here's the Step by Step Guide on How to Slow Down Video.
For Win 7 or later (64-bit)
For macOS 10.12 or later
Step 1Import Video
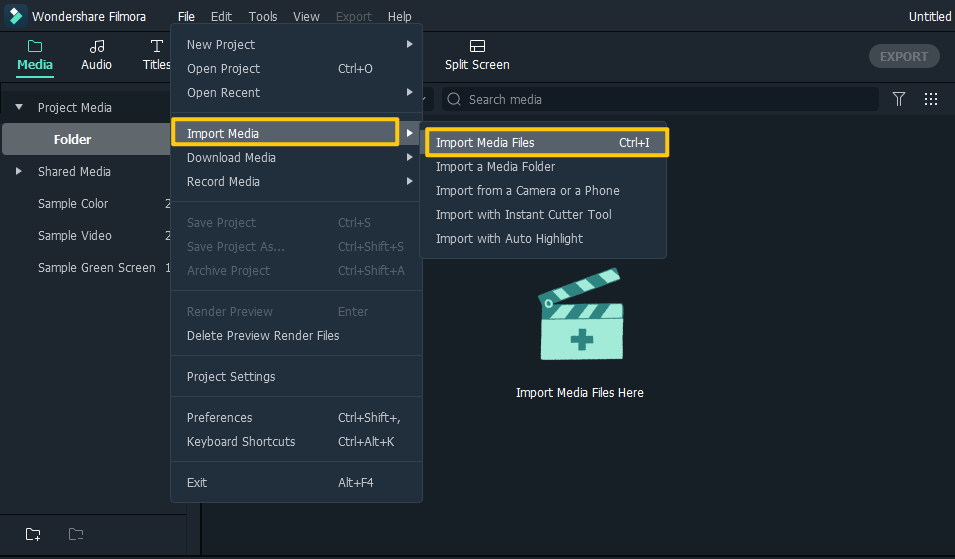
Import the video in Filmora by going to "File - Import Media - Import Media Files." Alternatively, you can do it by pressing Ctrl+I or dragging and dropping the file on the project media. Filmora supports all the video formats like MP4, MKV, AVI, MOV, TS, 3GP, etc.
Step 2Slow Down Video
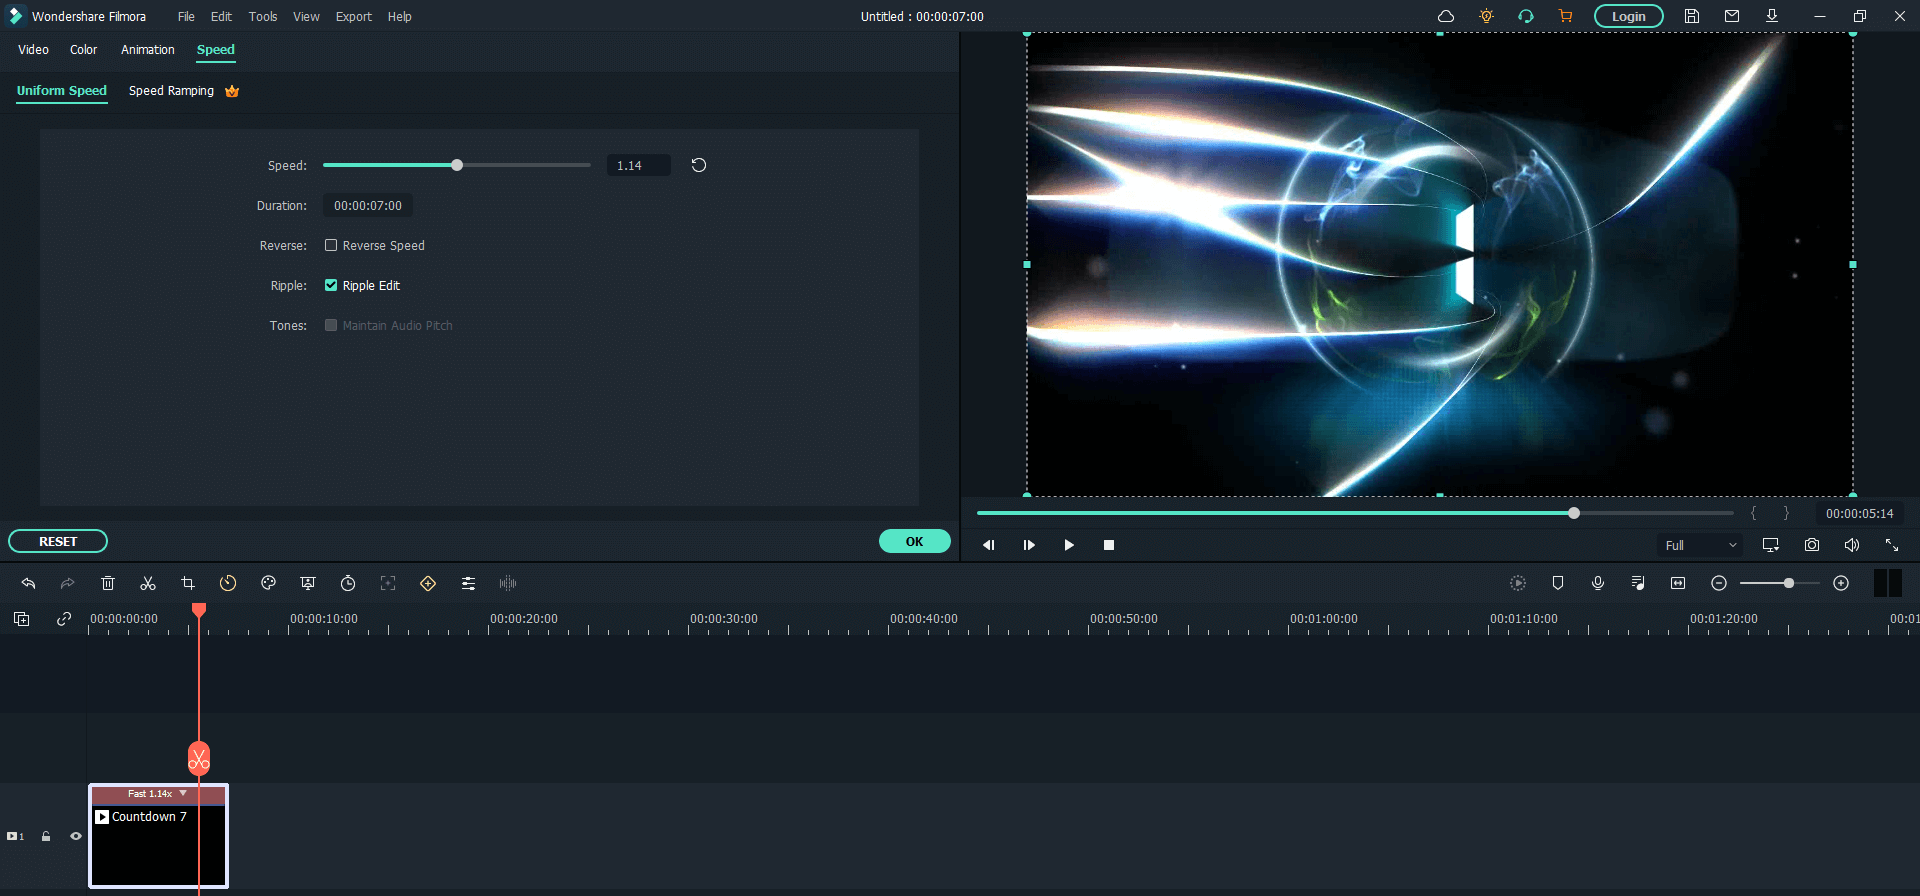
Drag and drop the video clip on the project timeline. To slow down the video, right-click on the clip in the timeline and choose "Speed." After that, select "Uniform Speed." Set the video to the desired speed by adjusting speed or duration. The video duration will increase as the video is slowed down.
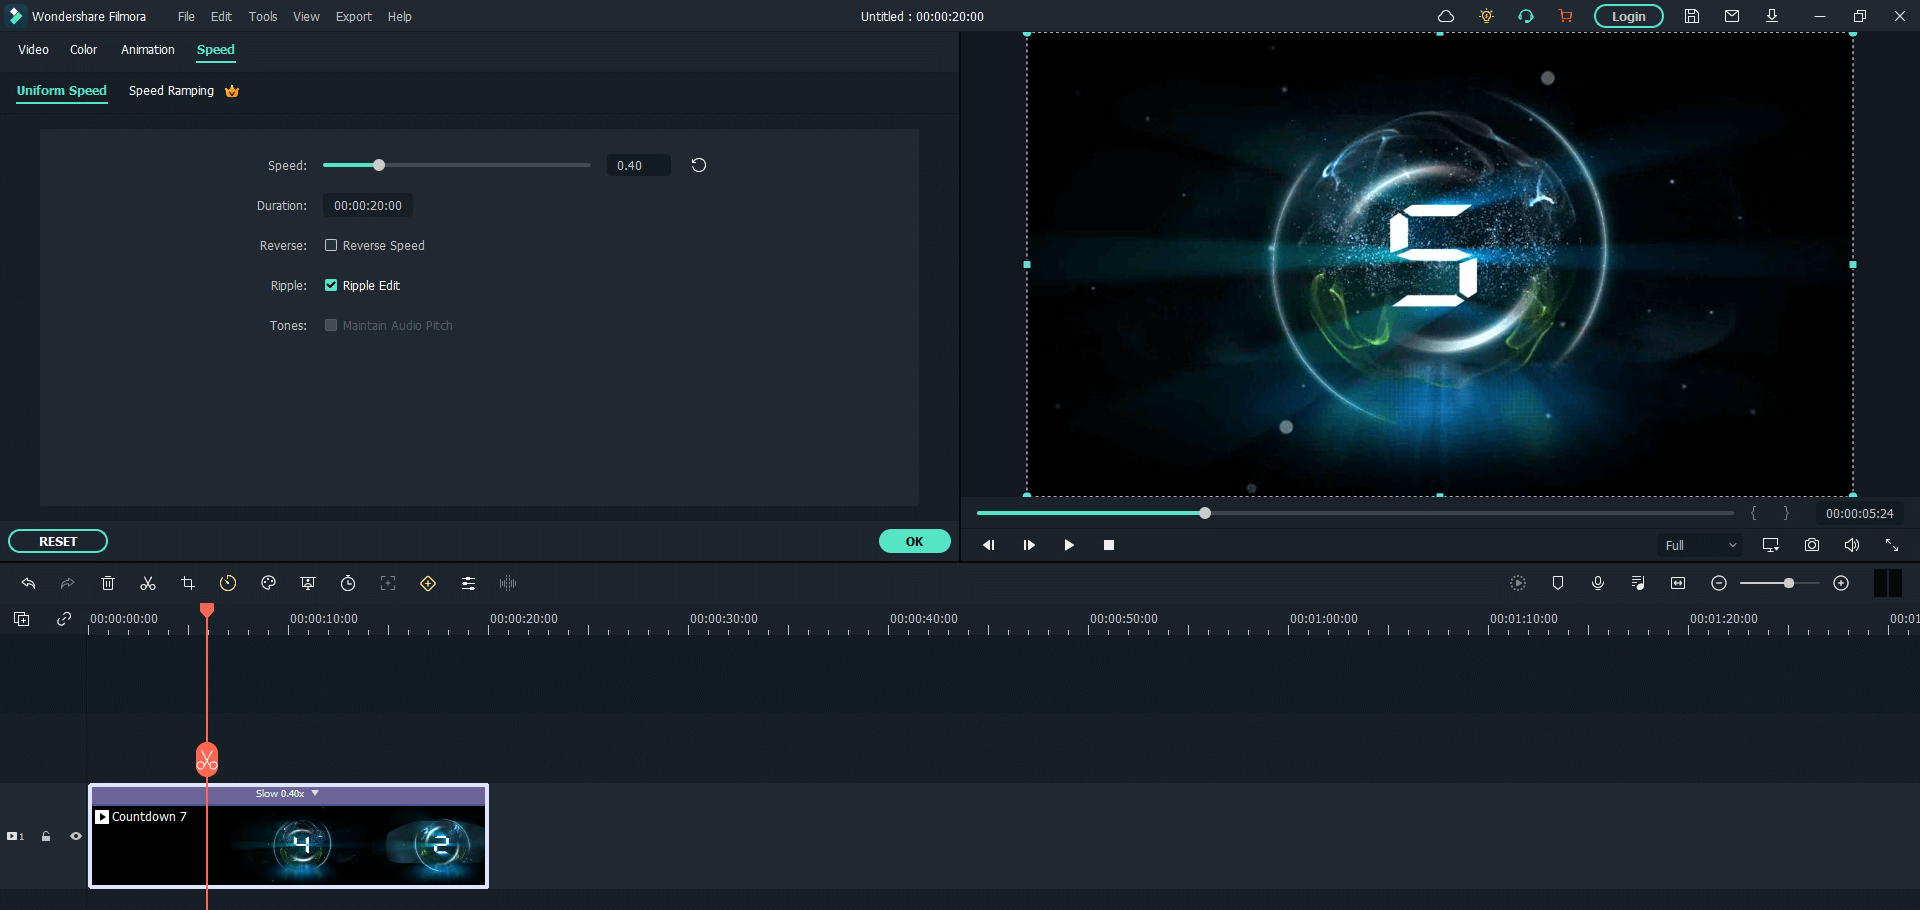
Note: You can also speed up a video in the same way. The only difference is that you'll have to decrease the duration or increase the speed from the slider.
Step 3Export Video
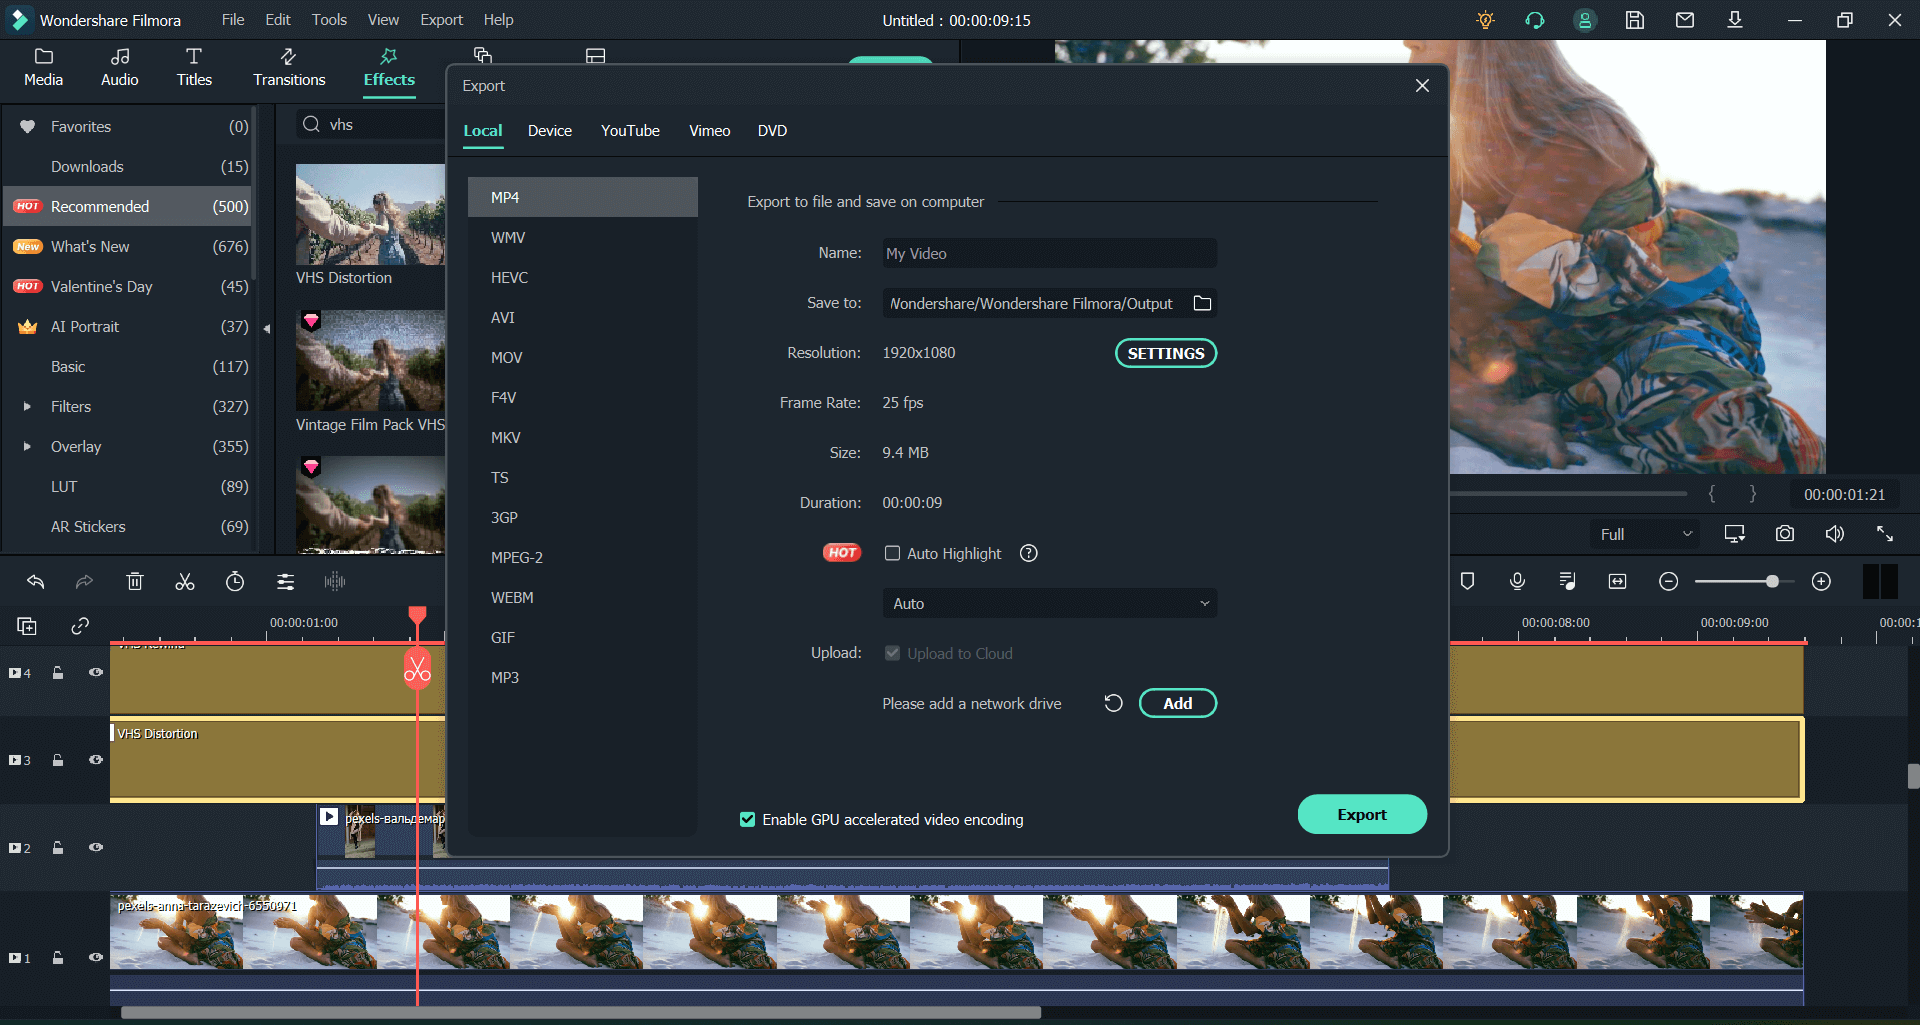
Once you are satisfied with the results, export the video. The processing might take time depending on your video duration.
For Win 7 or later (64-bit)
For macOS 10.12 or later
Part 2. How to Slow Down a Video on Mac
Slowing down video on Mac is elementary and straightforward using Filmora. Here is a quick step-by-step guide to help you get the job done.
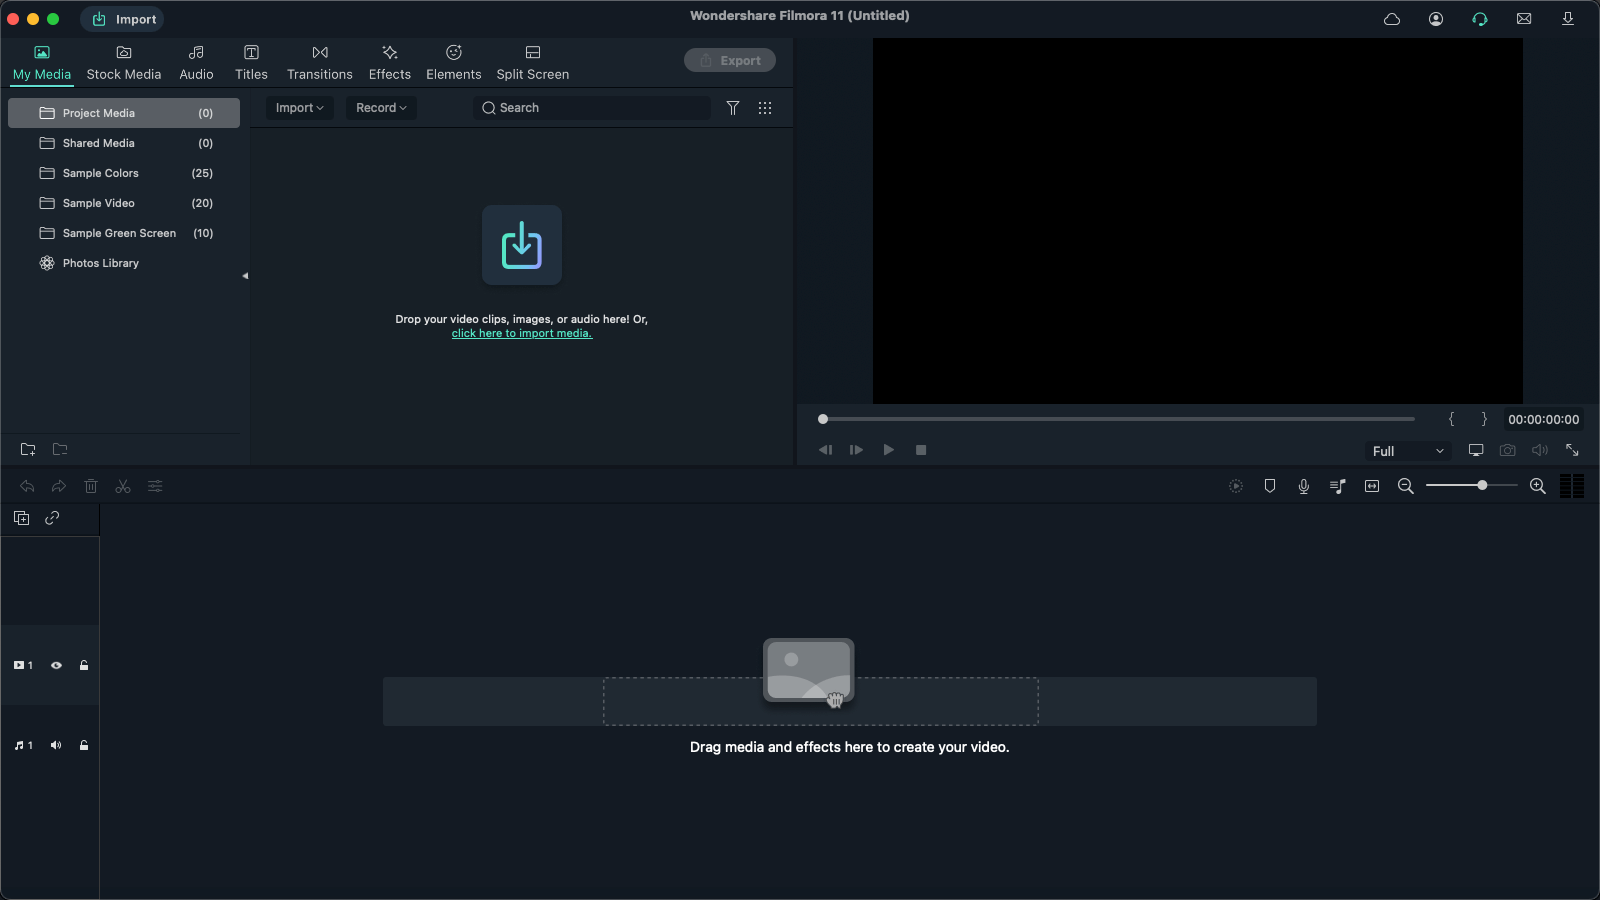
Step 1Import Video
Import the video into Filmora by pressing "Import" on the top. Alternatively, you can drag and drop your file on the project media to get started. Filmora supports all the video formats such as MP4, MPEG, MKV, AVI, MOV, 3GP, TS, etc.
Step 2Slow Down Video
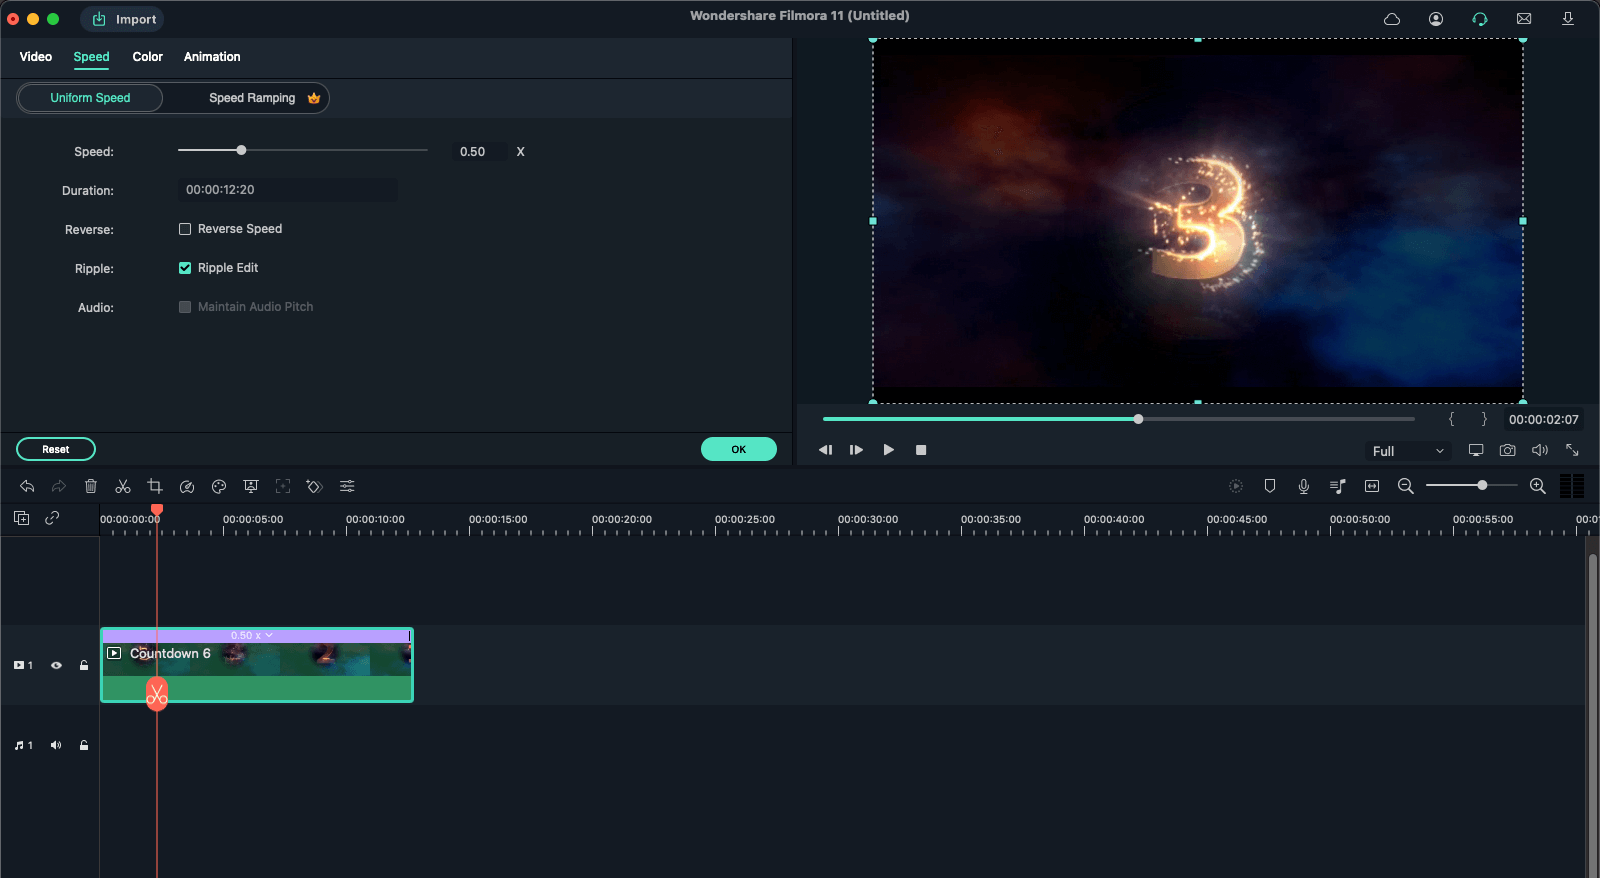
Once the video is in the project, drag it in on the project timeline. Next, right-click on it, click "Speed," and select "Uniform Speed." Here, the speed panel will appear. Set the video to the desired speed by adjusting speed or duration. Note that decreasing the speed will increase the duration and file size. You can also mute the video if you want to.
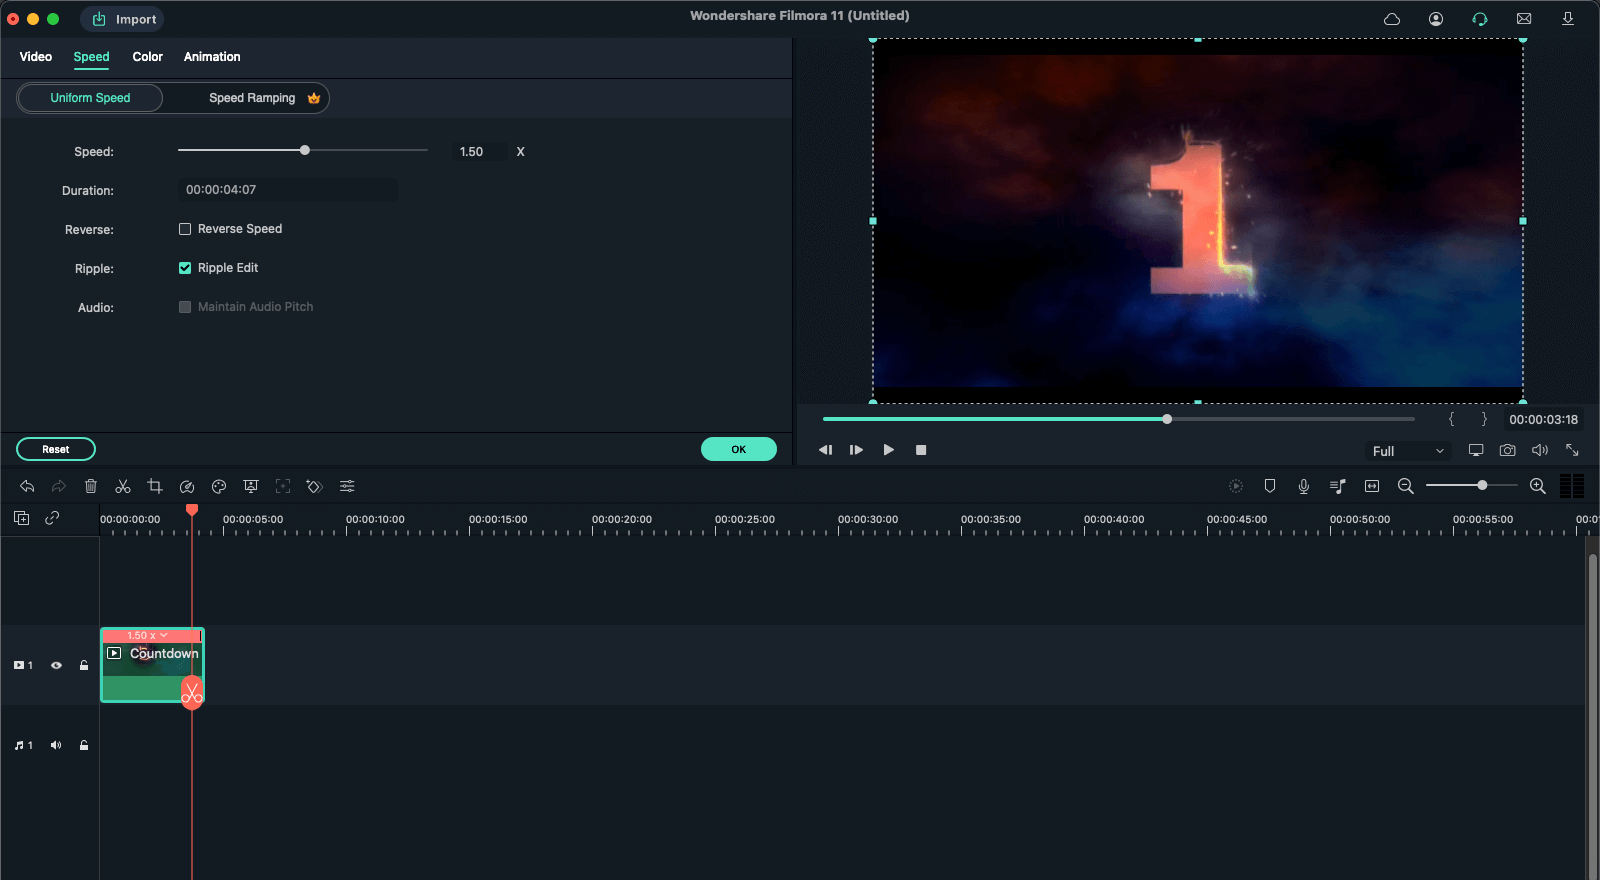
Note: Speeding up the video is almost identical. To speed up the video, go to the speed panel, and increase the slider's speed. Alternatively, you can increase the duration of the clip in the timeline.
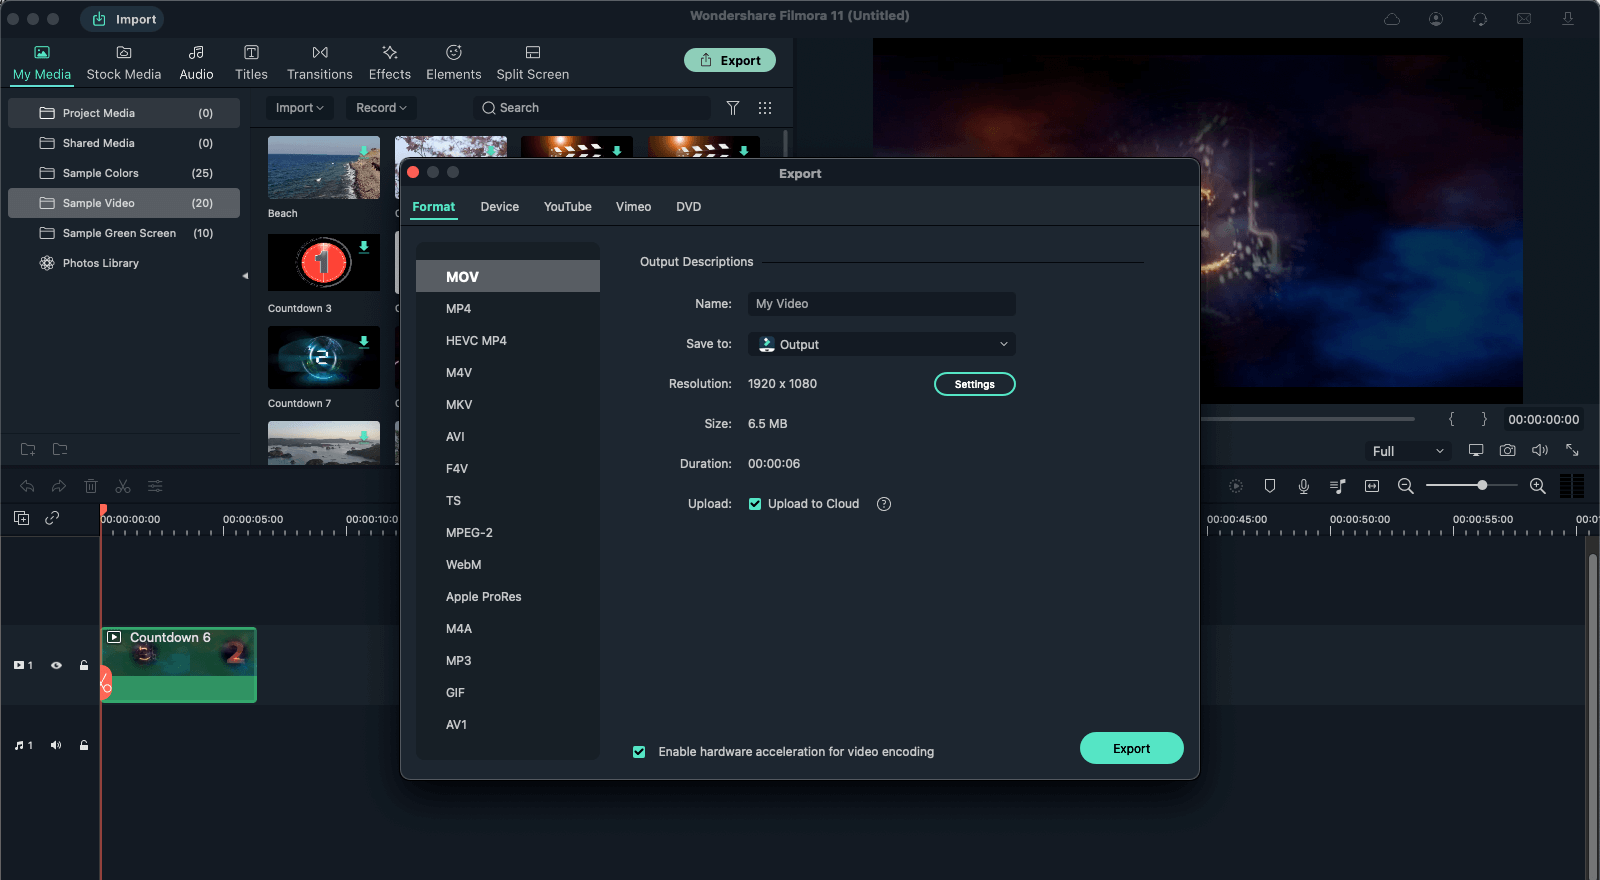
Step 3Export Video
Once you are satisfied with your results, save your project and export the clip. Video processing may take time, depending on your video duration and your device.

Wondershare Filmora - Best Video Editor for Mac/Windows
5,481,435 people have downloaded it.
Best video editing software for beginner and semi-professional, that comes with powerful editing skills like trimming, splitting, rotating, editing, etc.
500+ free special video effects to customize and create an awesome movie by yourself.
1000+ standalone effects downloading resources to make videos in all kinds of styles.
Record voice in real-time: you can have you voices recorded in realtime and instantly add them to the video files.
The software supports almost all available videos, images, and video formats. Besides, it also supports GIF files and 4K resolution videos.
