Looking for a fast and easy way to trim your videos? We will walk you through a step-by-step process to trim a video on Windows.
The birthday cake is about to get cut. You start recording so that you don't miss any precious moments. But now you need to trim the video on your computer and share the precious moments.The default software has limited functionalities. They stop us from taking a video from good to great. What if you want to also edit out some background noise or slow down the part where the birthday cake is cut?
That is where Filmora comes in! Here's a step-by-step guide to trim a video on windows.
Part 1. How to trim a video on Windows using Filmora
Filmora is an all-in-one video editor that not only gives you basic editing capabilities like trimming, cutting and merging of videos but also advanced features like speed ramping, motion tracking, audio ducking and audio denoise. It works great on Windows 11/10/8.1/8/7/Vista/XP. Filmora also gives abundant stock media resources to jazz up your video.
For Win 7 or later (64-bit)
For macOS 10.12 or later
Here's a step-by-step guide to trim a video in Windows using Filmora.
Step 1Import the video
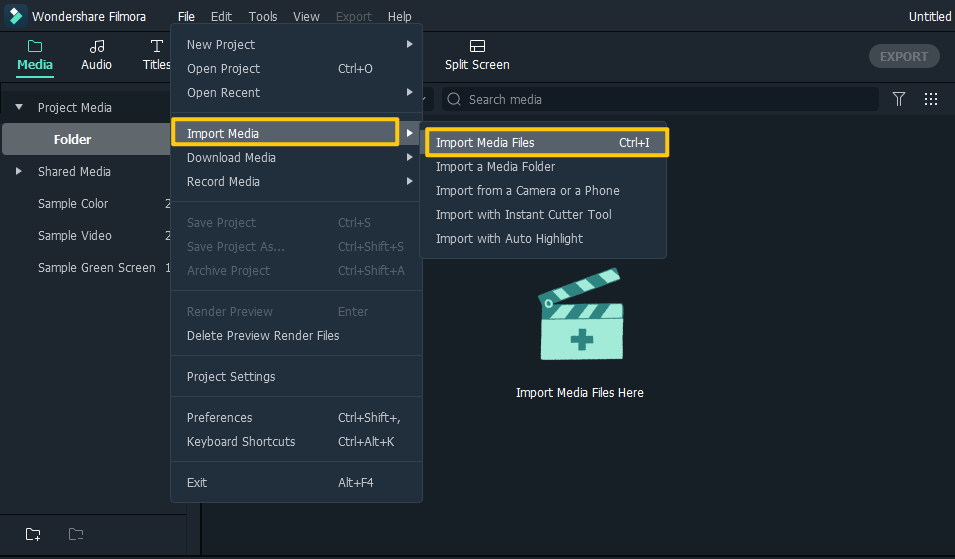
Open Flimora and import the media file into it. Press Ctrl + I or choose File -Import Media -Import Media Files.

Filmora supports almost all the commonly-used video formats, including AVI, MP4, MOV, MPG, VOB, WMV and more.
Step 2Trim video
To trim the video, there are two ways of doing it.
Option#1: Drag the video to trim
Click the edge of the clip until the trim icon shows up, then drag it forward or backwards to the ending points of the unwanted part to trim it out.

Option #2: Trim to playhead
A playhead is the red line you see in the image, that moves across the video as the video is played in Filmora. Here's how you trim:
- Play the video and pause at that point and right-click on the clip.
- Choose "Trim Start to Playhead" to trim out the clip from start till the playhead.
- Choose "Trim End to Playhead" to trim out the clip from the playhead to the end.

Step 3Export video
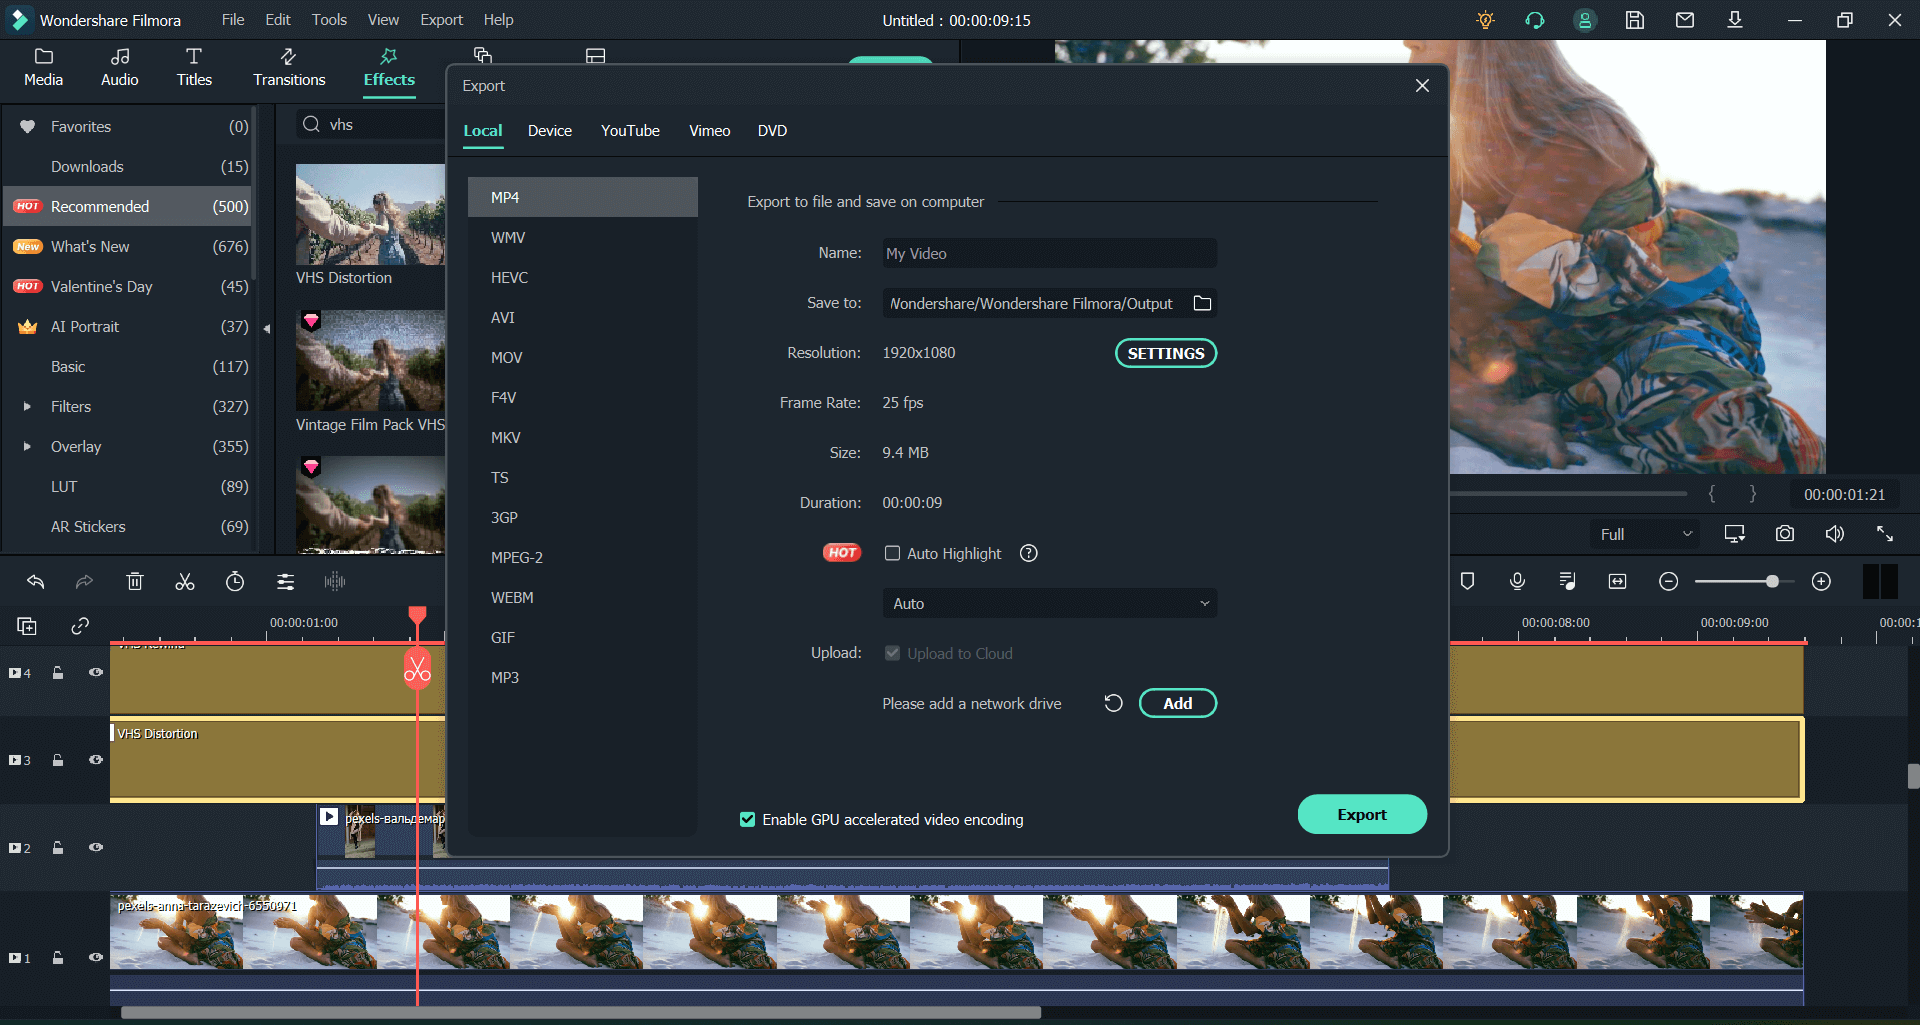
Once you have trimmed and edited the video as per your needs, click on Export and choose the format you want to export in and the location where you want to export the file.

That's it! It's quite easy to use Filmora to trim a video, isnt't it? Want to learn more about Filmora? Check the video below!
For Win 7 or later (64-bit)
For macOS 10.12 or later
Part 2. Frequently Asked Questions
1. How to trim mp4 videos on windows?
Step 1. Import the MP4 video into a Filmora project. (File -Import Media -Import Media Files)
Step 2. Drag the edge of the clips to the desired start and endpoints
Step 3. Export the mp4 (Click Export. Choose a location to export to.)
2. How to trim video with Windows media player?
Step 1. Install a plugin SolveigMM WMP Trimmer
Step 2. Import the video using the folder icon in WMP Trimmer.
Step 3. Click on Edit File to start trimming your video.
Step 4. Choose the points to trim.
Step 5. Click Trim to cut the video.

Wondershare Filmora - Best Video Editor for Mac/Windows
5,481,435 people have downloaded it.
Best video editing software for beginner and semi-professional, that comes with powerful editing skills like trimming, splitting, rotating, editing, etc.
Advanced video editing features including speed ramping, motion tracking, color match, keyframing, masking, etc
Advanced audio editing features including audio ducking, audio denoise, auto beat sync, auto synchronization, etc
500+ free special video effects to customize and create an awesome movie by yourself.
Numerous free stock media from Giphy, Unsplash and Pixabay
Top-notch industry-leading Boris FX and Newblue FX plug-ins and live graphics solutions to simplify complex editing tasks
The software supports almost all available videos, images, and video formats. Besides, it also supports GIF files and 4K resolution videos.
