
Filmora Video Editor for Mac
Key Framing (Customize Animation) on Filmora
A Keyframe in animation and film production are graphics or shots that define the starting and ending points of any smooth transition.
For example, if you have two keyframes that specify different positions, the keyframe image, clip, or element will move between those positions between the keyframe timestamps.
How to operate Keyframes?
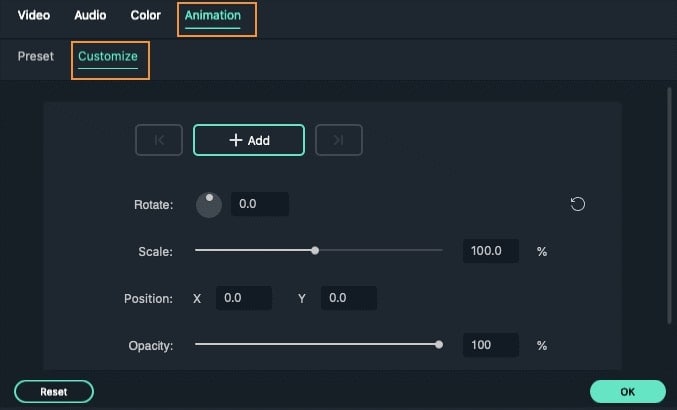
Double-click the clip, image, or element in the timeline, and then click to enter the "Animation" tab. You will see options for Preset animation and Custom animation.
Preset animation: select the desired animation and drag and drop it into the timeline.
How to use keyframes for custom animations?
You can use keyframes to animate the following parameters: Scale (size), Rotation, Position, Opacity.
Or use Keyframes to animate the following media types: video, photo, element. It works as follows:
Step 1: In the Animation tab, select Customize

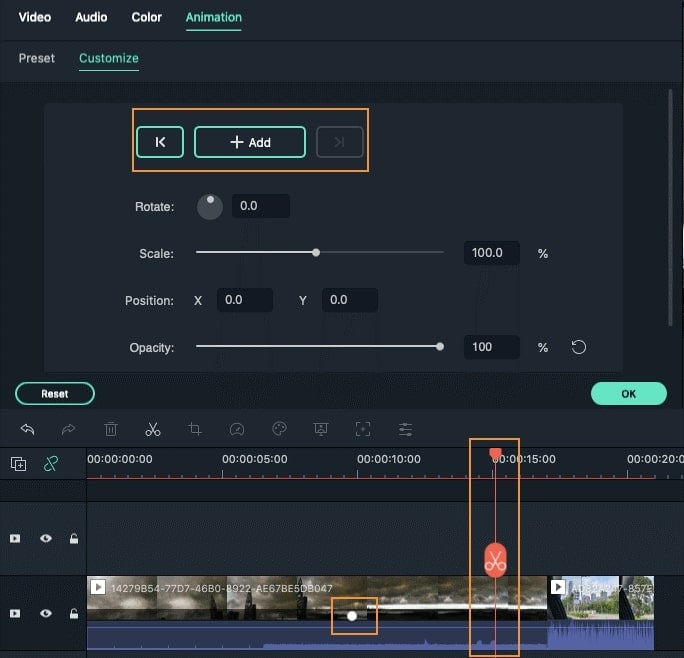
Step 2: Move the playhead to the position where you want to add a keyframe and then click Add. All animations need at least two keyframes because they will change between them, as they will vary between them. The first keyframe marks the start of the change.

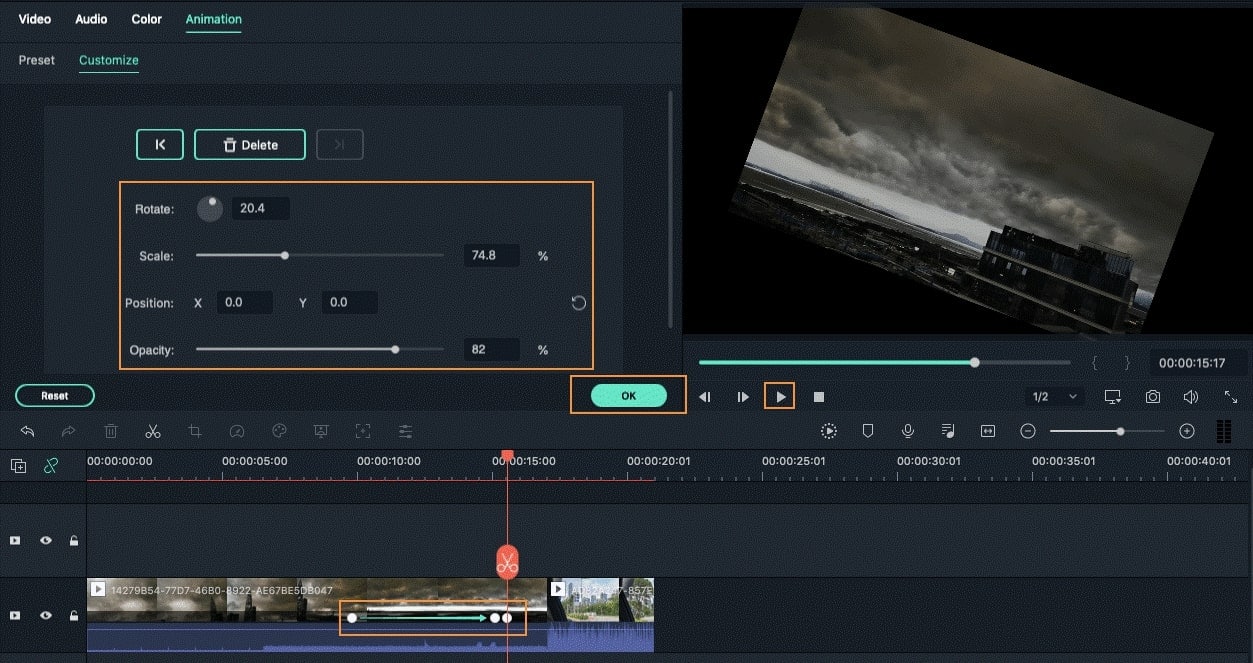
Step 3: Move the playhead and add a second keyframe. Change at least one of the values (position, rotation, scale, or opacity) in this keyframe by dragging and adjusting the media size in the keyframe menu or the video preview.

Popular Products


