
Filmora Video Editor for Mac
Edit Images
Filmora for Mac allows you to import images and combine images to video to make your own movie. You can add, manage and edit images easily. You can also enhance your image by editing and applying filters, transitions, overlays, PIP, and more other effects.
1 Add Images to a Video Track
Drag and drop: The easiest way to add an image to videos track is to drag and drop the selected image in the media library to the video track directly.
Using the Toolbar: To add an image to a video track, you can also place the playhead at the location where you want to insert an image, right-click on the image in the media library and select "Insert" from the drop-down list. If you want to add image to the end of the video, you can select "Append"option to add the image to the end.
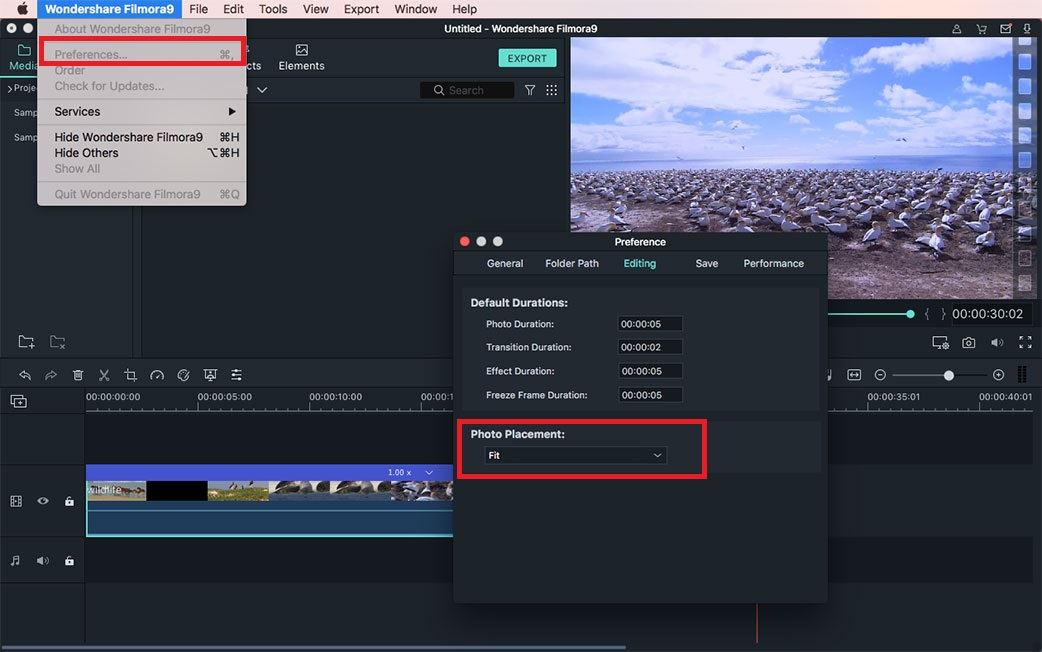
Remove the black bars: To remove the black bars around the image, you can go to the "Wondershare Filmora 9" menu, choose the "Preferences" option. On the "Preference" window, click on the "Editing" button, and then you can apply the "Fit", "Crop to Fit" or "Pan & Zoom" effect to all of your images.
2 Add Images as Overlays
If you want to add and image as overlays, you can directly drag and drop the selected image to the video track which located above the track on which a specific video clip is positioned. Make sure that the image is located directly above the video so that it can overlay on the video clip.
Tips: By default, video track 1 is the bottom layer of your video, but by dragging and dropping an image above the video track 1, video track 2 will be automatically created.
3 Edit Images
Change Image Duration: To change the duration of an image in timeline, move the cursor to the beginning or end of the image, when the pointer appears, either move forward or backward.
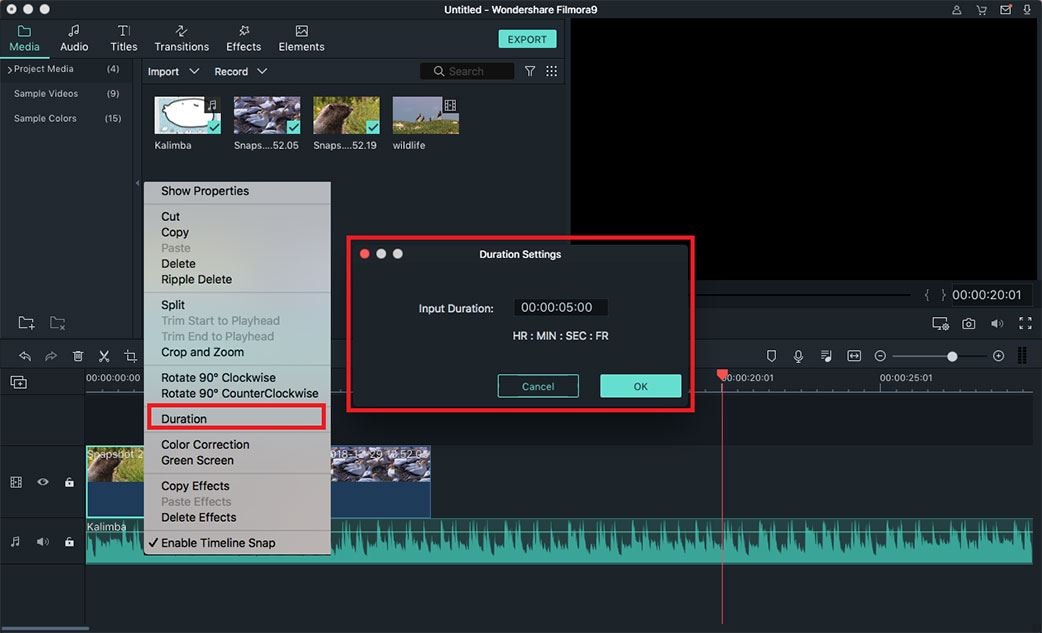
You can also right-click on the image and select the "Duration" option to change image duration on the "Duration Setting" window.
Changing Image Position: You can preview the image which you've placed in the timeline on the preview window. If you want to change the position of the image, you can drag and drop the image to the location in the timeline you wanted.
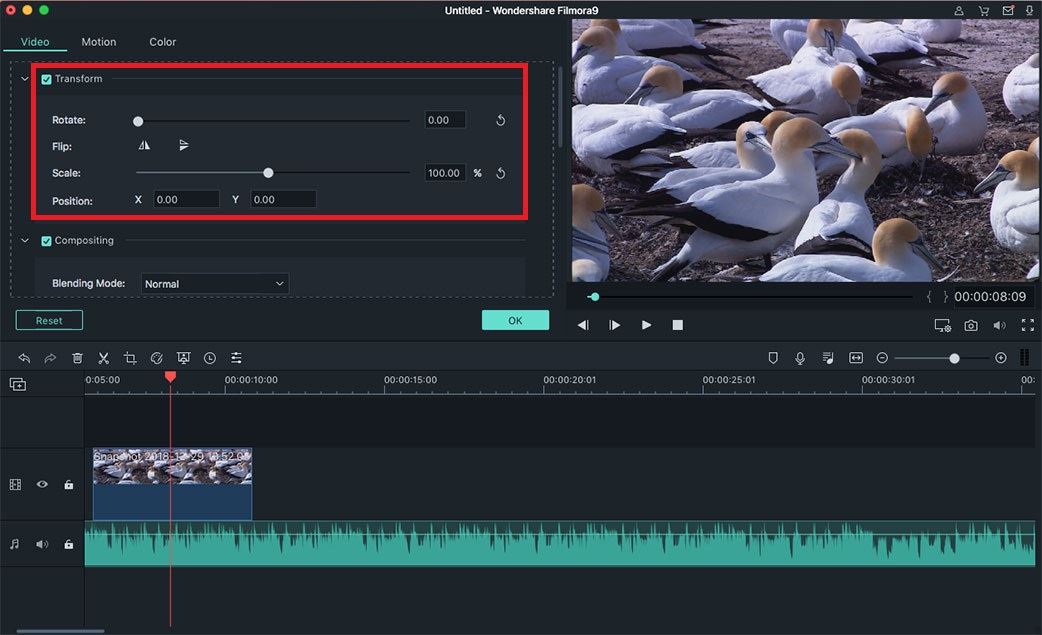
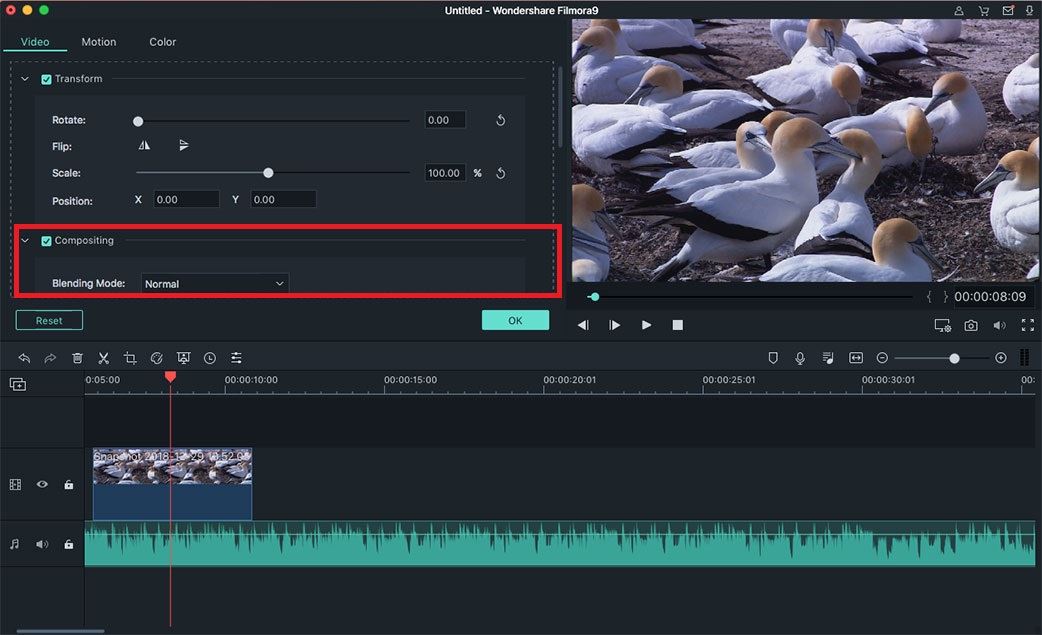
Rotate or Flip an Image: Double-click on the image in the timeline to open the image editing menu. Under the "Transform" tab, you will find the "Rotate" and "Flip" option. You can drag the "Rotate slider" to rotate the image and flip horizontally or vertically. (Make sure the Box next to Transform option is checked first.)
Create Composite Images and Videos: To create composite images, you can open the "Composition" menu and select a "Blending Mode" you like. You can also move the "Opacity Slider" under the "Blending Mode" option to change the transparency of the image.
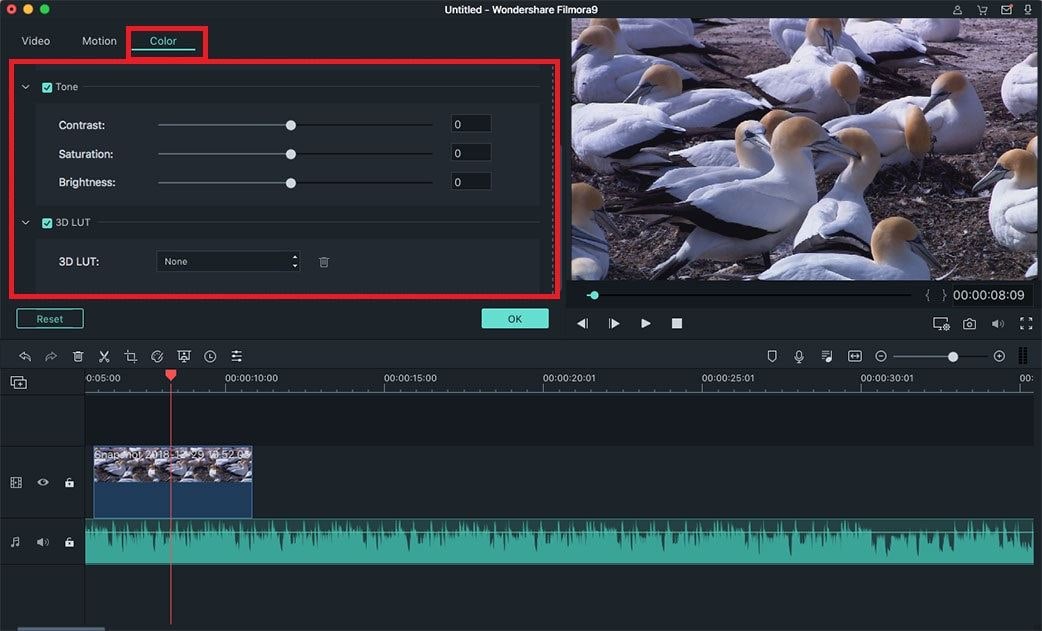
Adjust Image Color: Switch to the "Color" tab under the image editing menu. On the color setting window, you can adjust the image temperature, tint, contrast, and apply 3D LUT effects.
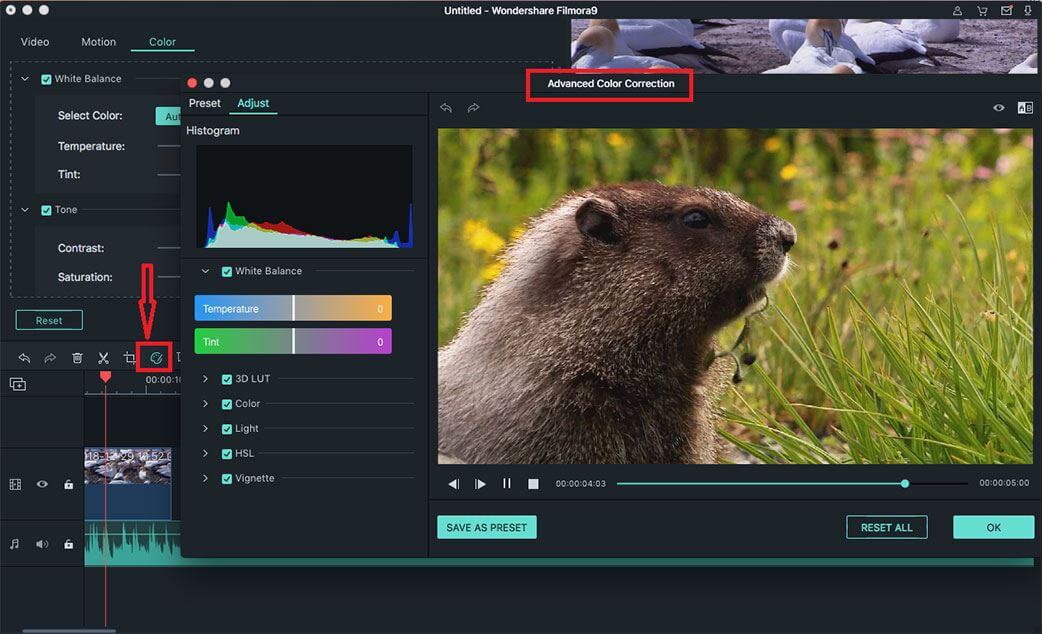
By clicking on the "Color Correction" button on the toolbar, you can open the "Advanced Color Correction" to edit the color of image further more.
4 Apply Motion Effect
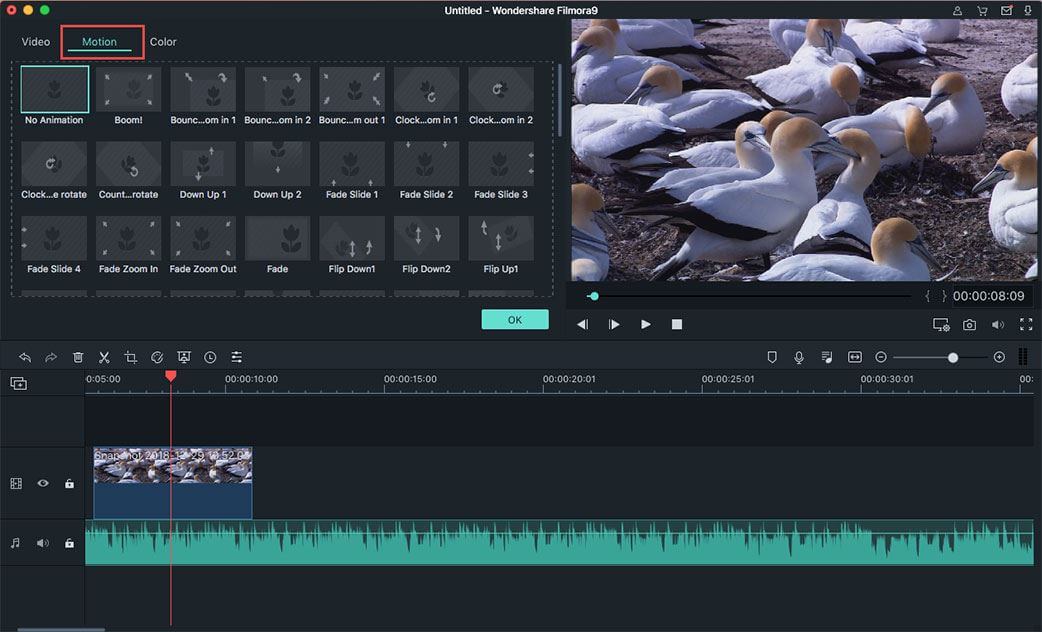
You can apply motion effect on your image to make it animated. To do so, drag the image to the timeline, and double-click on the image in the timeline. In the pop-up window, switch to the "Motion" tab and select your desired motion effect. And then click "OK" to apply the effect.
Popular Products


