
Filmora Video Editor for Mac
Filters and Overlays
- Add Filters and Overlays
- Delete Filters and Overlays
- Find Filters/Overlays
- Customize Filters/Overlays
- Favorite Filters/Overlays
1 Add Filters and Overlays
Looking for a way to add filters or overlays to your video? Below is an easy guide for you:
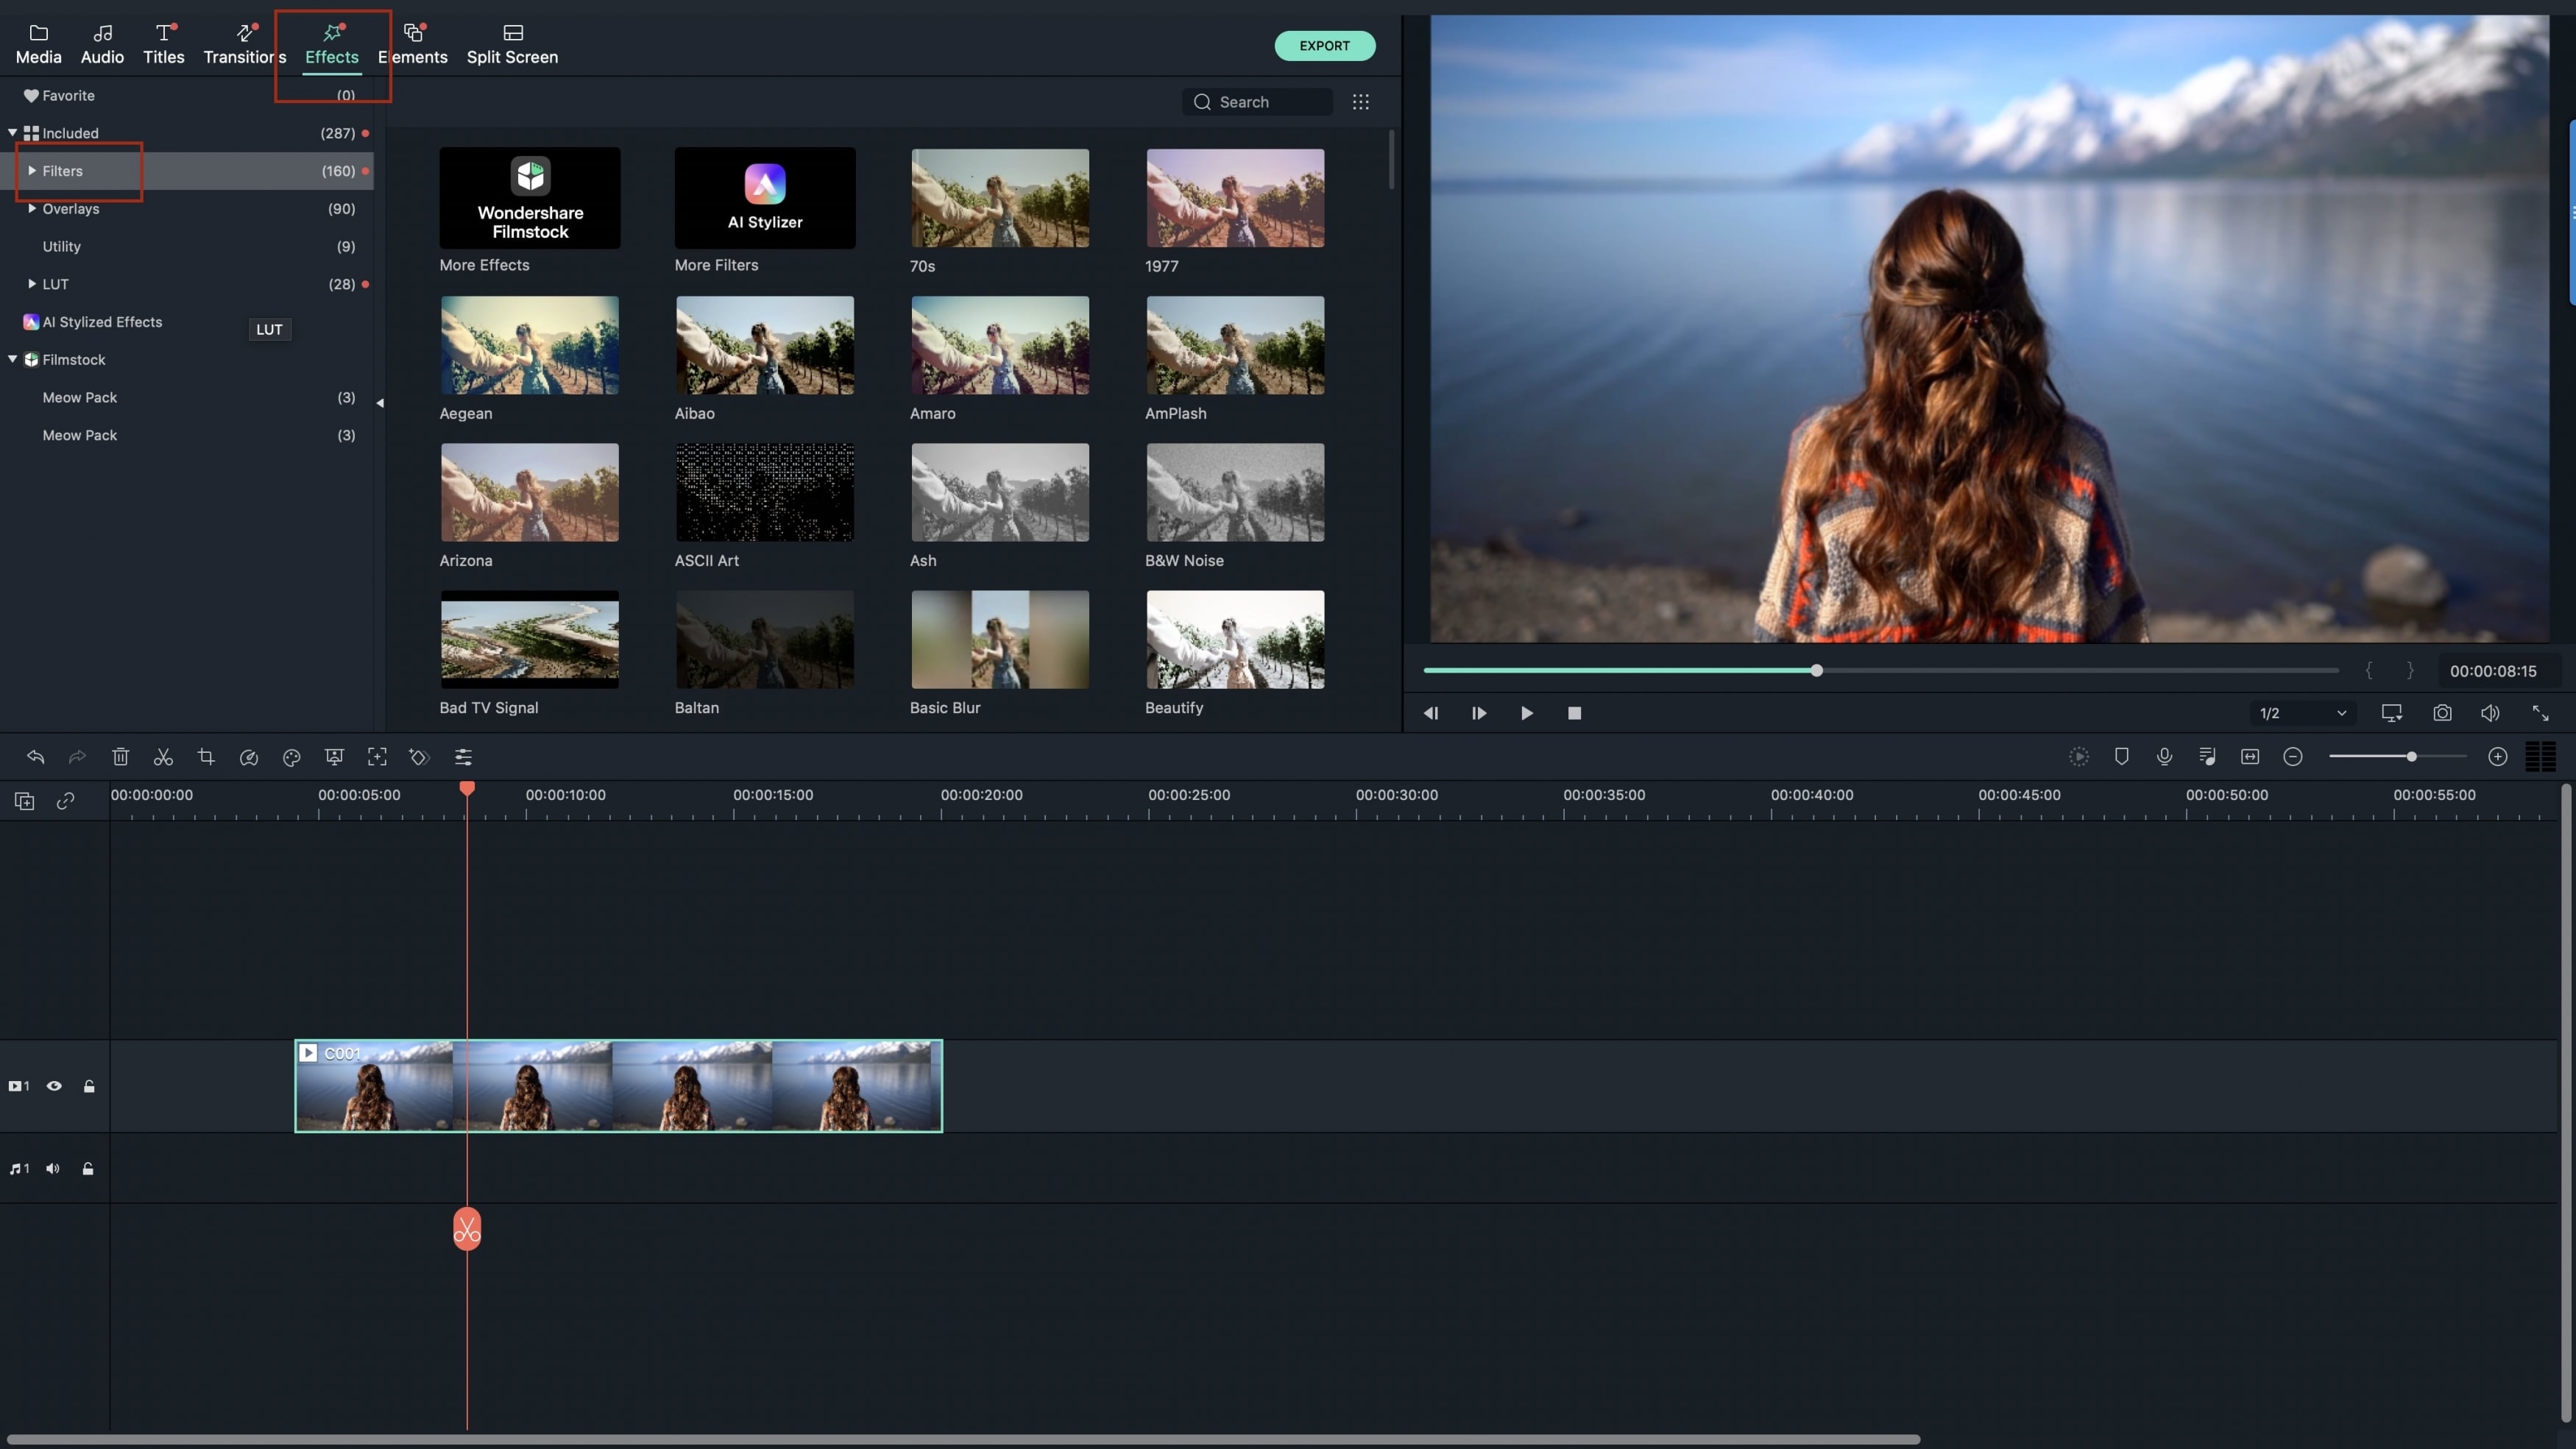
Step 1. Click on the "Effects" button on the "Media Library" and then you can select the filters or overlays you like.
Step 2. Hover the cursor onto the thumbnail, you can see the "Plus" icon in the middle of each filter and overlay effect. Click on it, the effect can be applied and you can find it in the timeline.
Step 3. Drag and drop the effect onto the video clip in the timeline, the effect will be used on the whole clip.
2 Delete Filters and Overlays
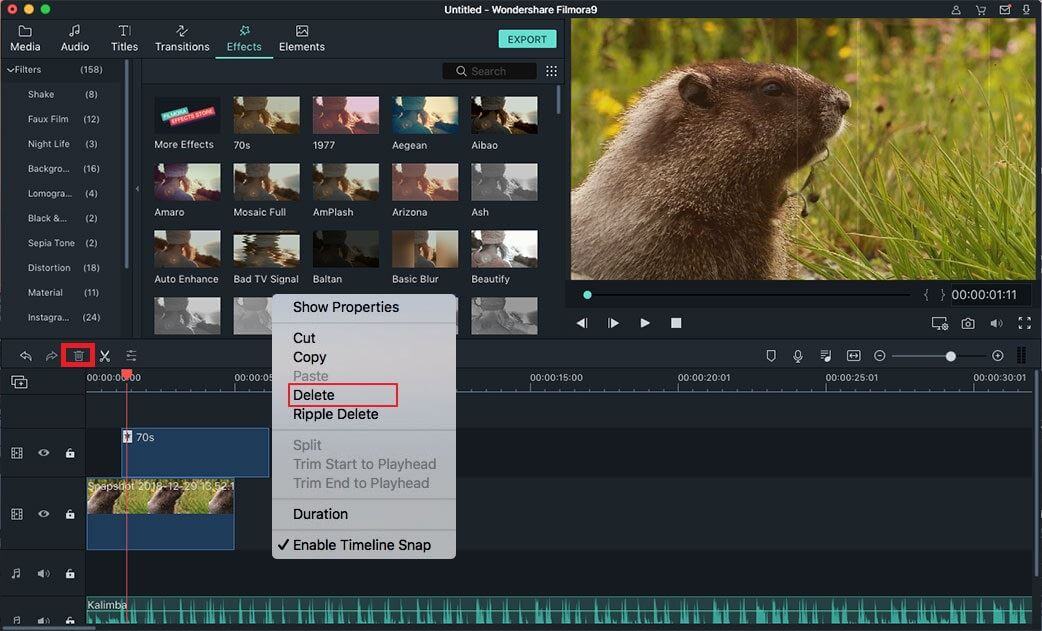
For deleting a filter or an overlay effect, right- click on the filter or overlay in timeline and select "Delete". You can also click on the "Delete" button on the toolbar to remove filters or overlays from your project.
3 Find Filters/Overlays
Filmora provides you with multiple filters/overlays themed categories, you can find the filters or overlays from the left side of the media library by category. Or, you can also search the filter you want at filter library.
4 Customize Filters/Overlays
You can easily customize the filter/overlay effects with Filmora:
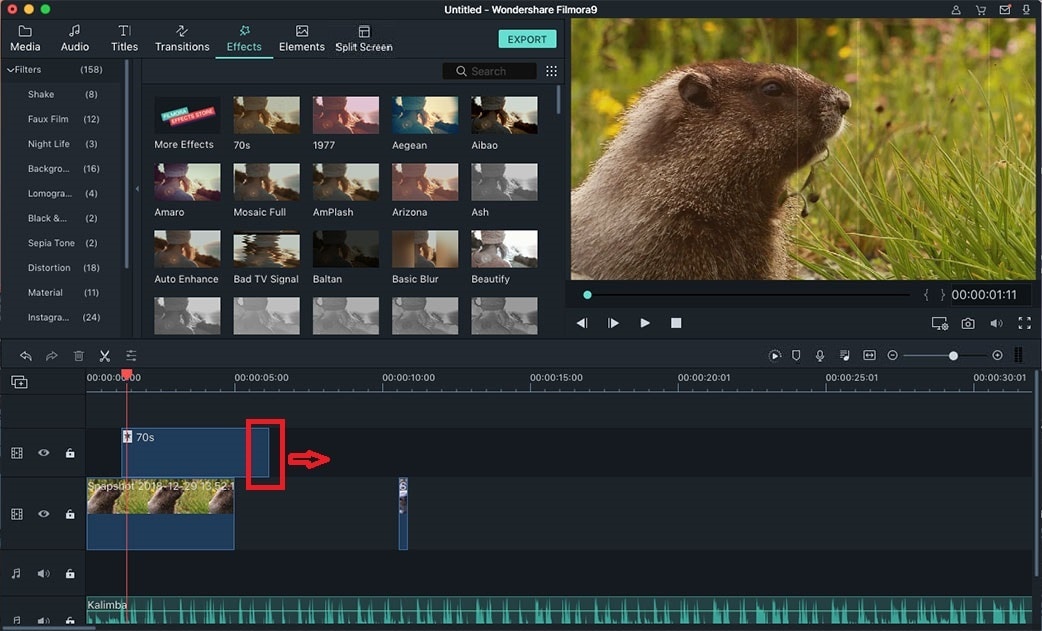
Change the Duration: You can change the duration by dragging the edge of the icon.
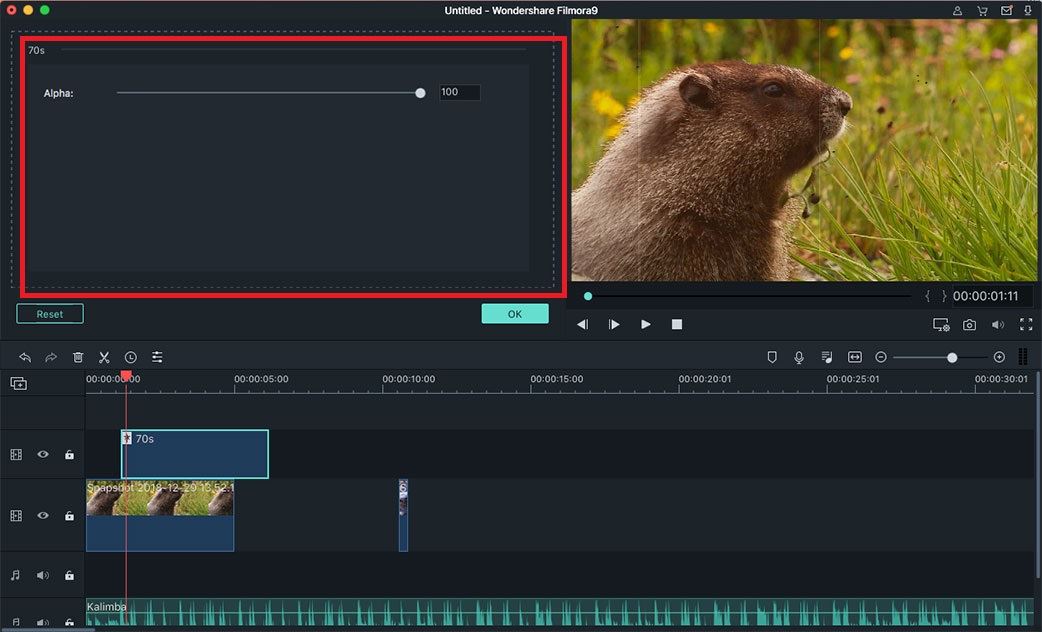
Change the Alpha Opacity: And you can also change the alpha opacity to make the value from 0 to 100. It helps you to make the filter more transparent with a lower value. To do so, you can double-click on the overlay in the timeline to open the editing panel.
5 Favorite Filters/Overlays
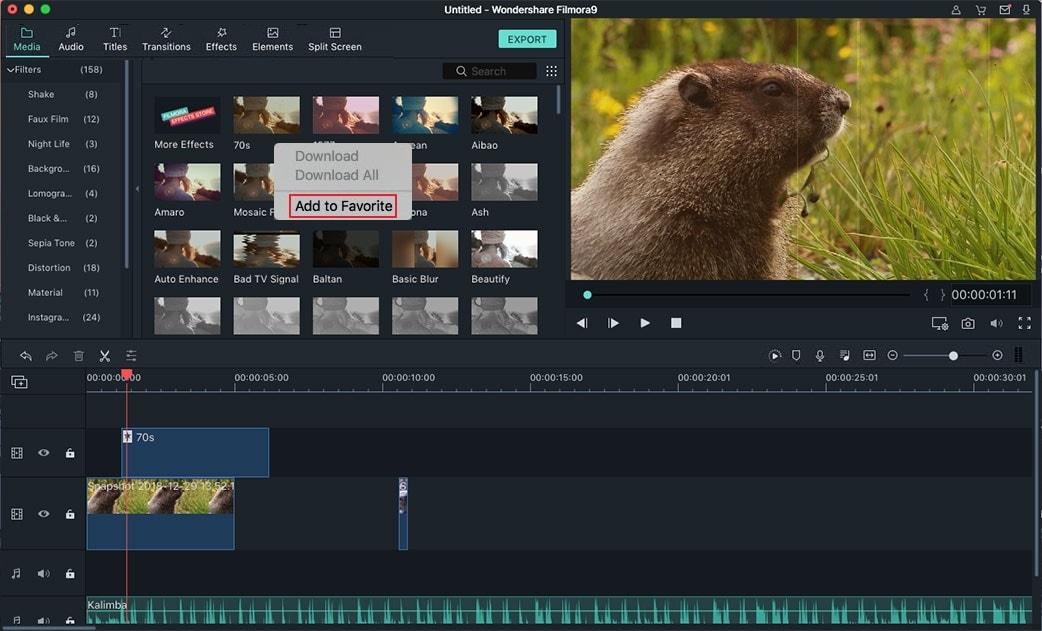
You can add the filter or overlay to your favorite library. Just right click on the filter/overlay effect and select the "Add to Favorites" option to save it.
Popular Products


