
Filmora Video Editor
Advanced Color Tuning
Color tuning means color correction, which help you to adjust the color and create high quality video or image. You can choose from options of Presets and Adjust. The Presets option comes with many templates so you can directly apply them to your video. On the other hand, you can manually adjust the color in the Adjust option.
- Access Advanced Color Tuning
- Advanced Color Correction - Adjust
- Preview Your Changes or Settings
- Save as Preset
1 Access Advanced Color Tuning
After drag the video to the timeline, click on the "Color Palette" icon to open the "Advanced Color Tuning" window.
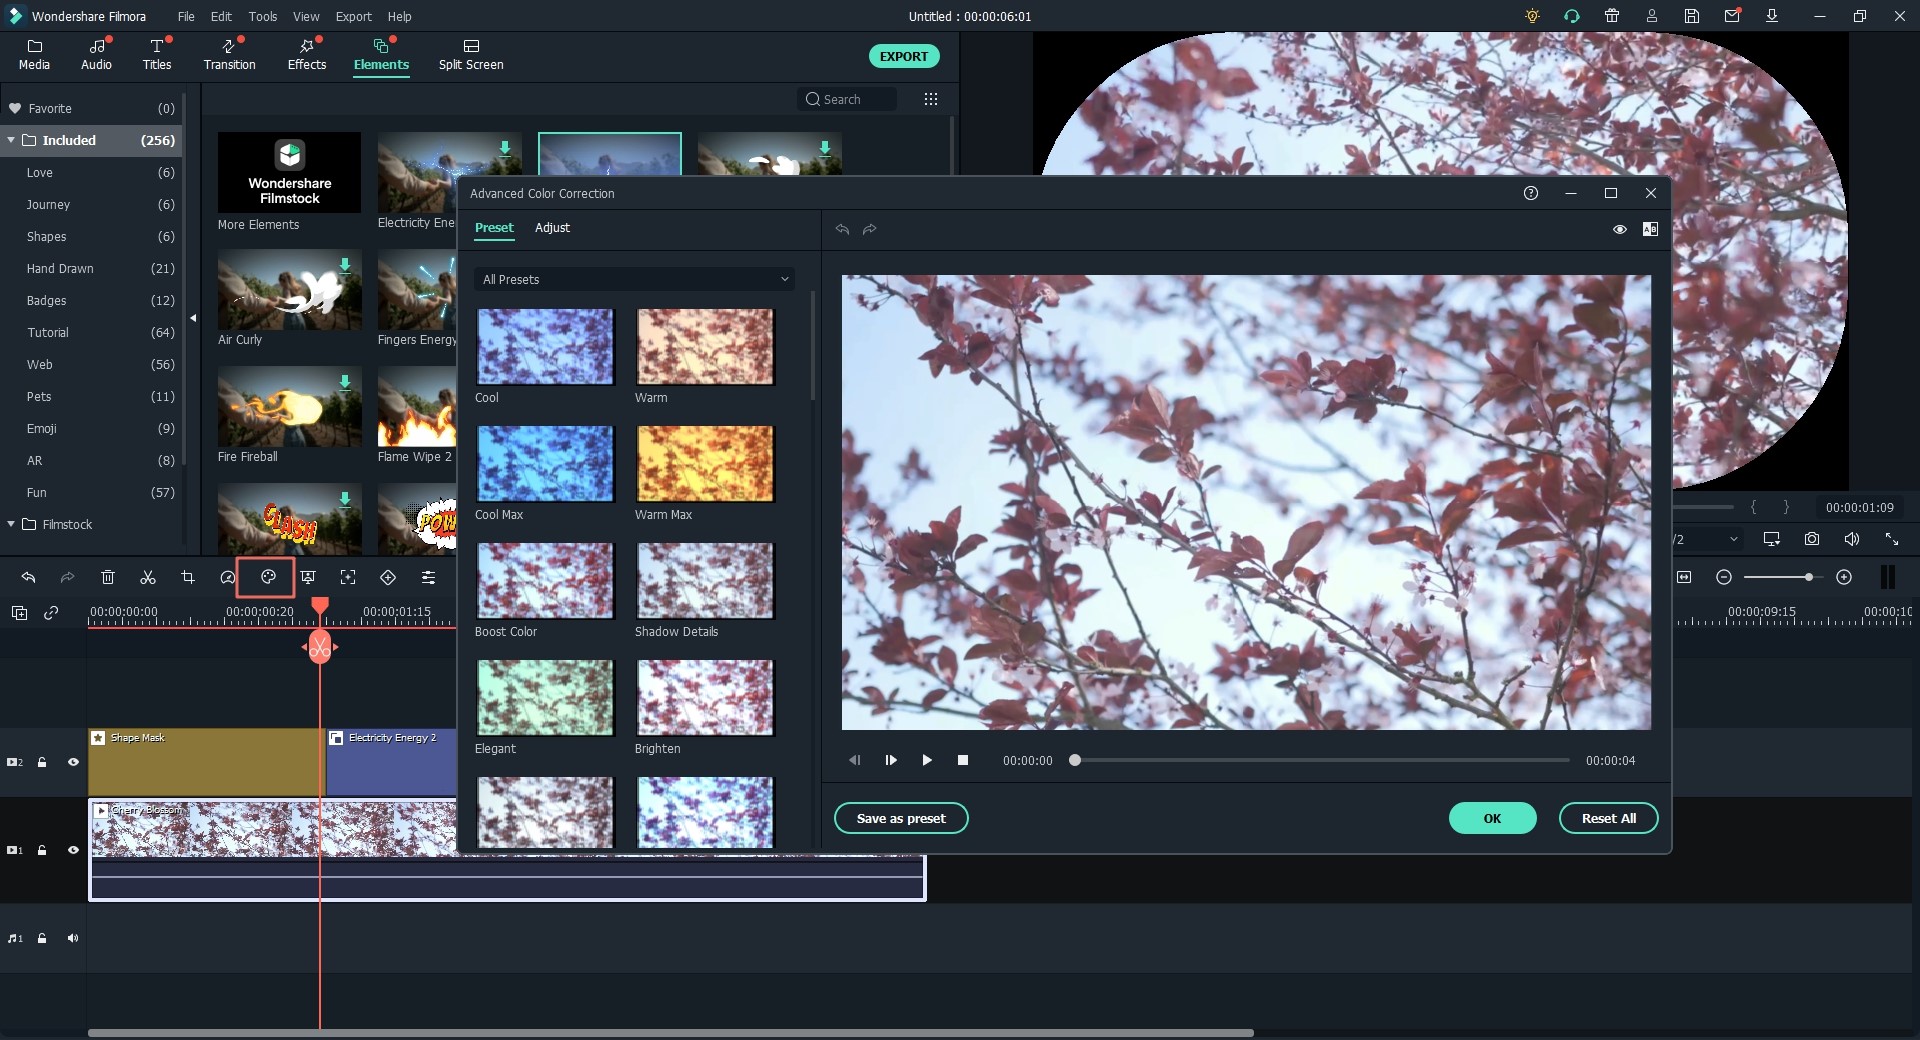
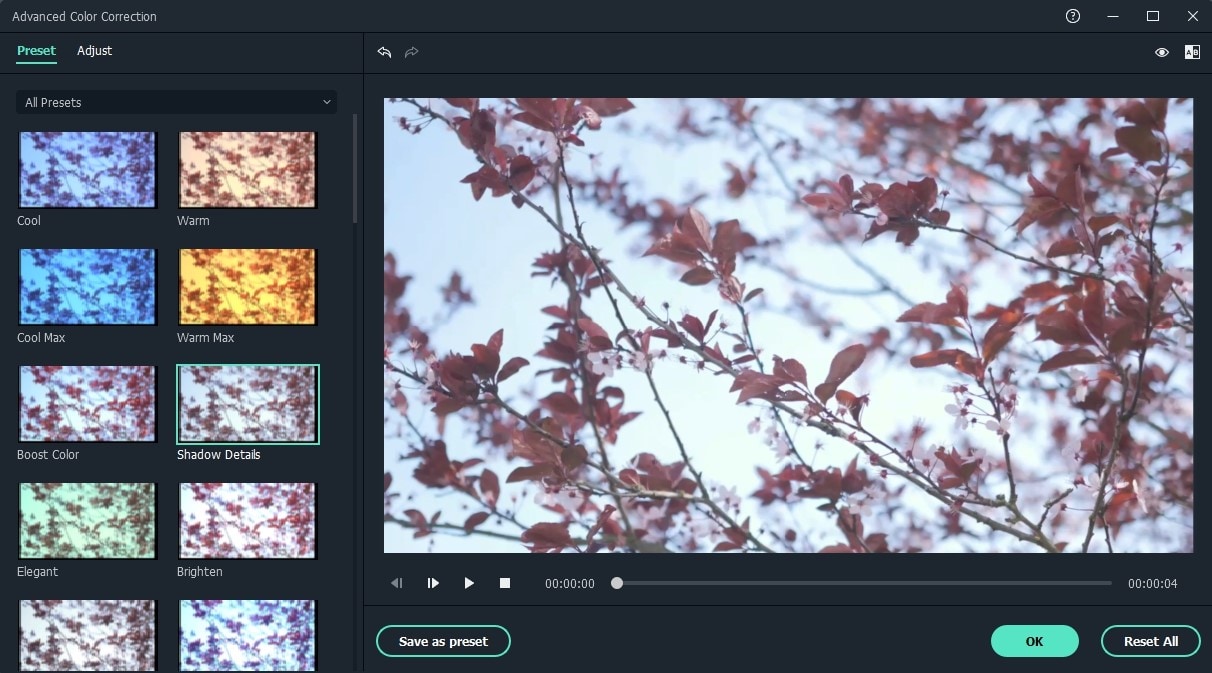
You can have many free templates in the "Preset" tab including 3D LUT, Vignette, Common, Film, Custom, and Favorites. Simply double-click on the template you want and apply it to your video directly.
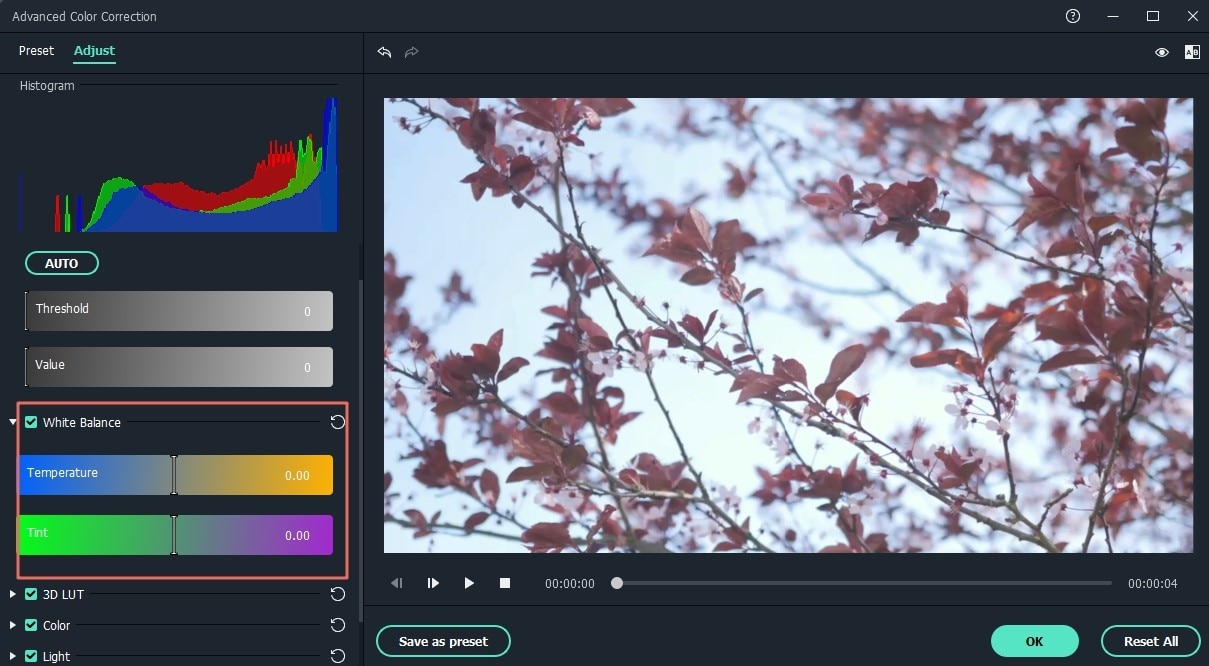
2 Adjust Color Manually
White Balance: It helps you to adjust the color temperature for special atmosphere. You can set warm color by shifting light towards yellow, while set colder color by shifting light towards blue.
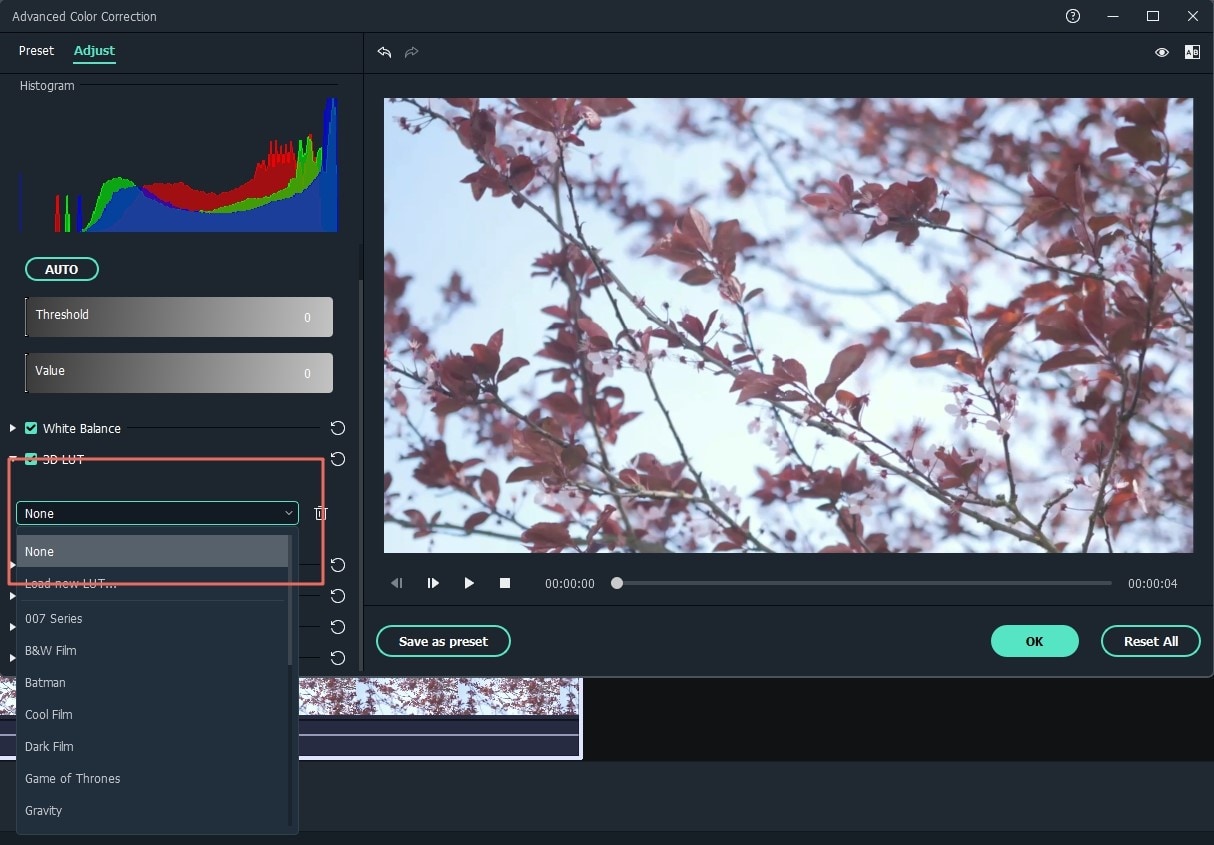
3D LUT: Like a color grading preset, it is commonly used as part of the Digital Intermediate process in movie production chain. You can click on the "3D LUT", and select the 3D LUT options you want. And you can also download free 3D LUT out of Filmora Video Editor.
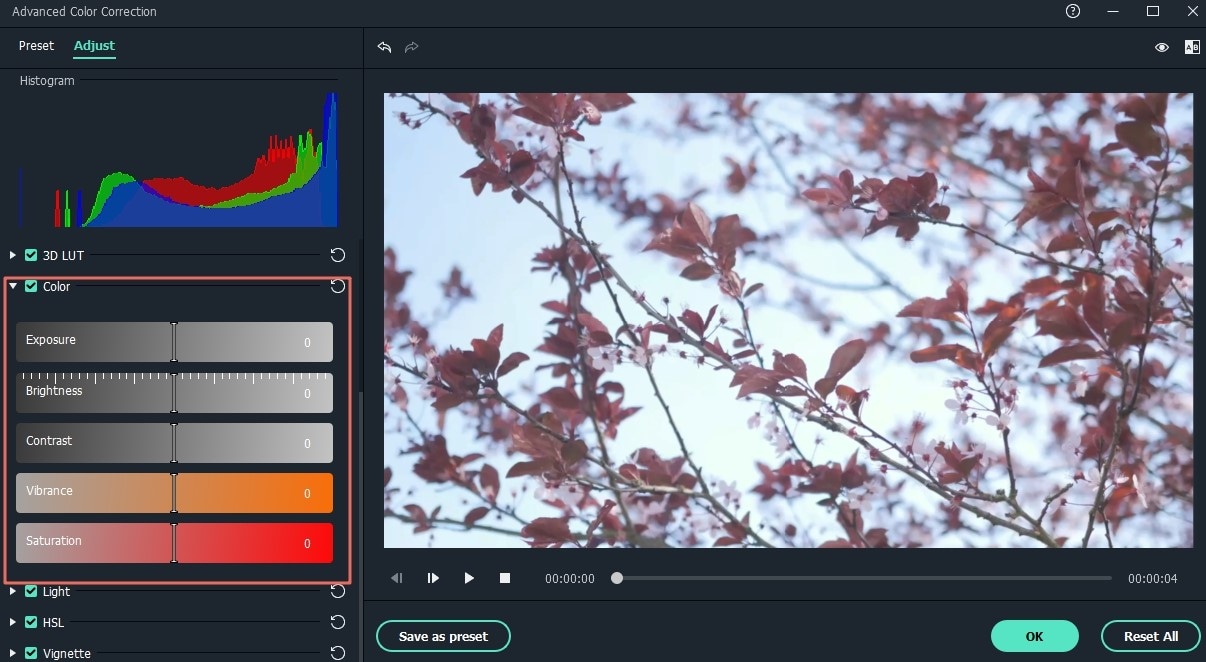
Color: In this section, you can adjust the Exposure, Brightness, Contrast, Saturation and Vibrance. You can directly drag the slider to the value you want to adjust the color.
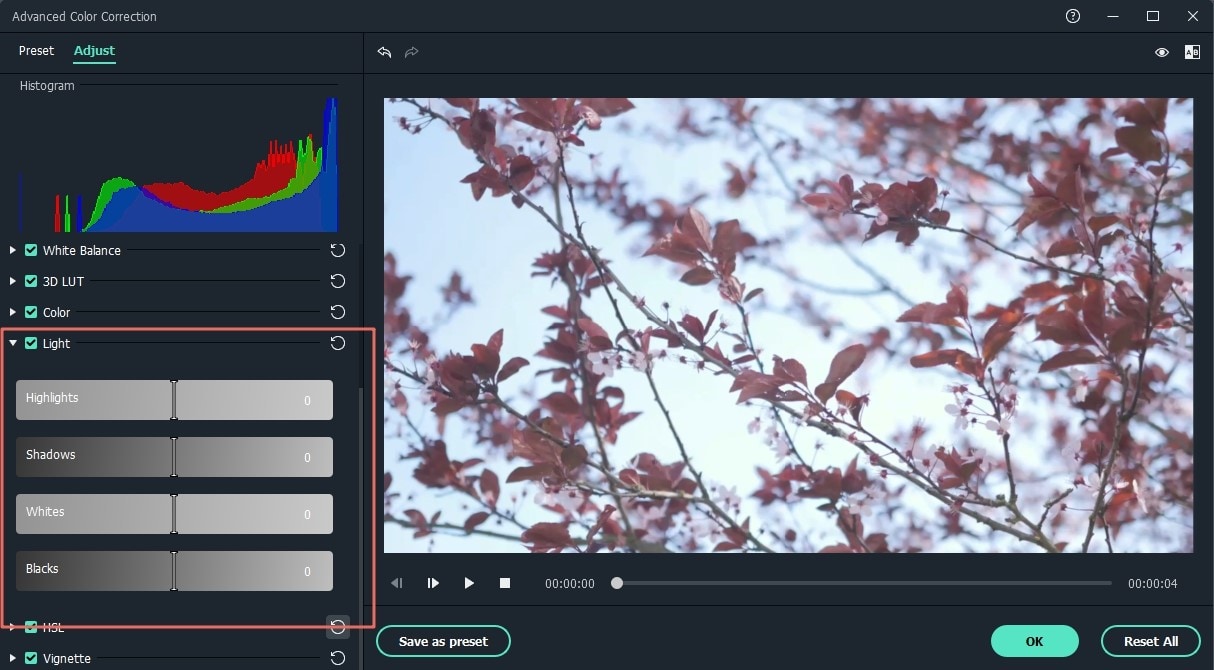
Light: Here you can adjust the light of the video by changing the Highlights, Shadows, Whites and Black. You can easily drag the slider left and right to do the adjustment.
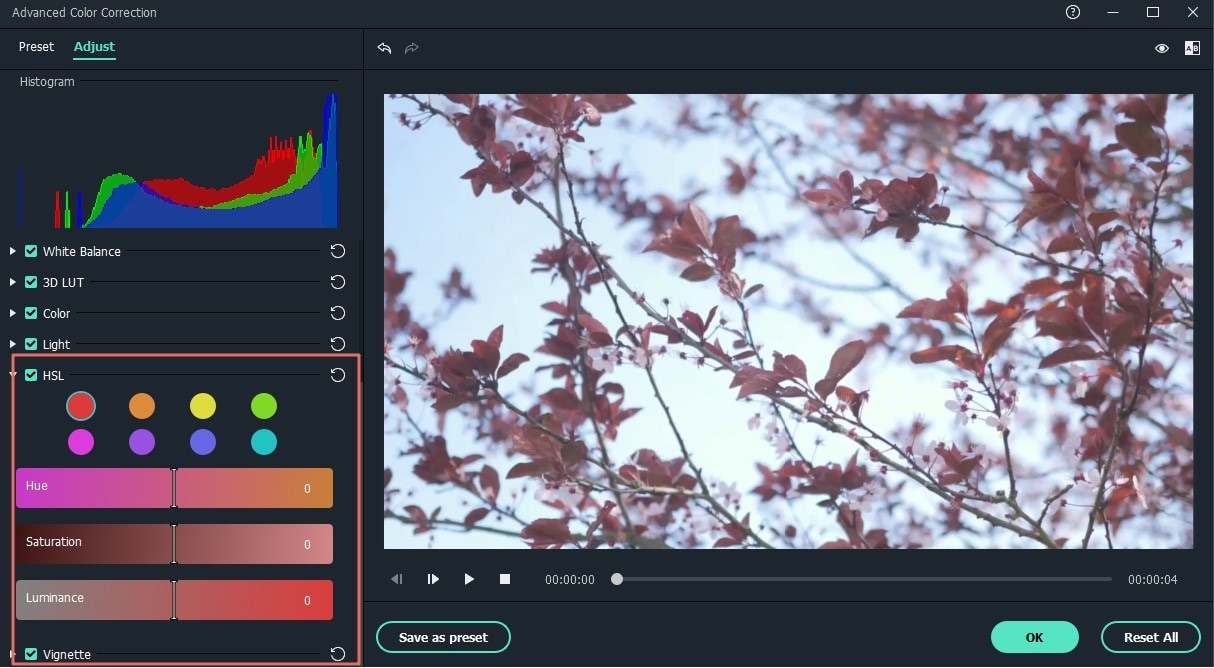
HSL: HSL means Hue, Saturation and Luminance, which is used to optimize the individual color range of your video. When click on the HSL, select a color from the panel, and drag the slider from left and right, and the corresponding color will be adjusted.
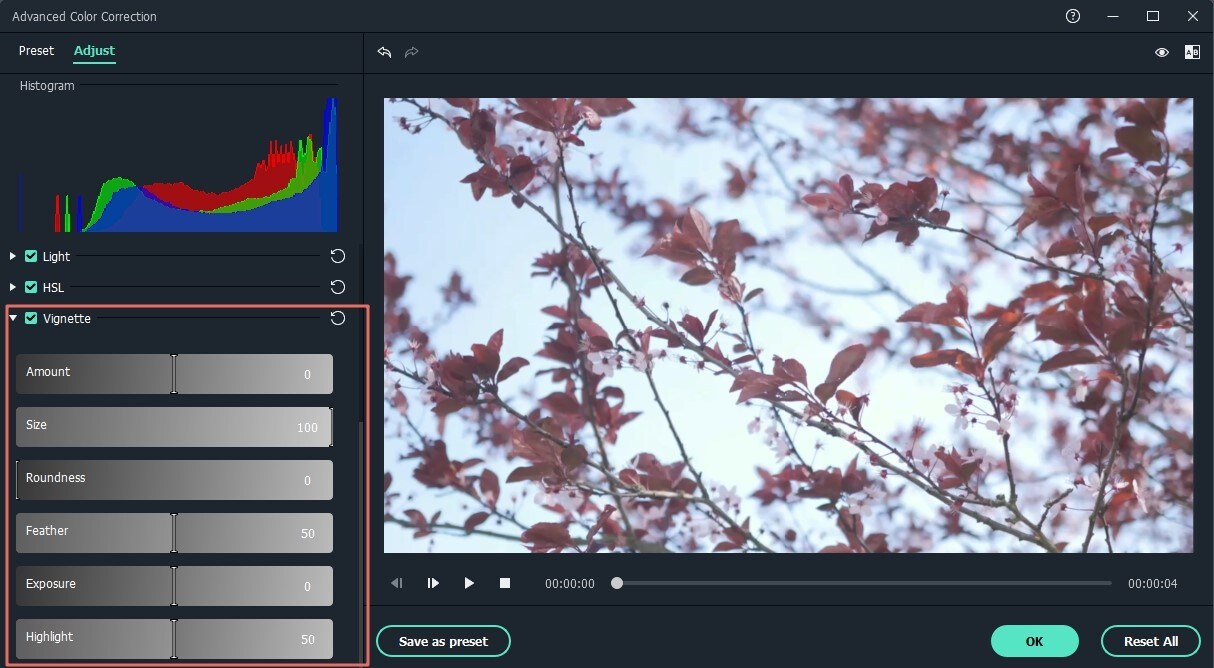
Vignette: Vignette section helps you to apply a personalized vignette effect for your video. Click on the "Vignette" option, and drag slider in amount, size, roundness, feature, exposure and highlights to do the adjustment.
3 Preview Your Changes
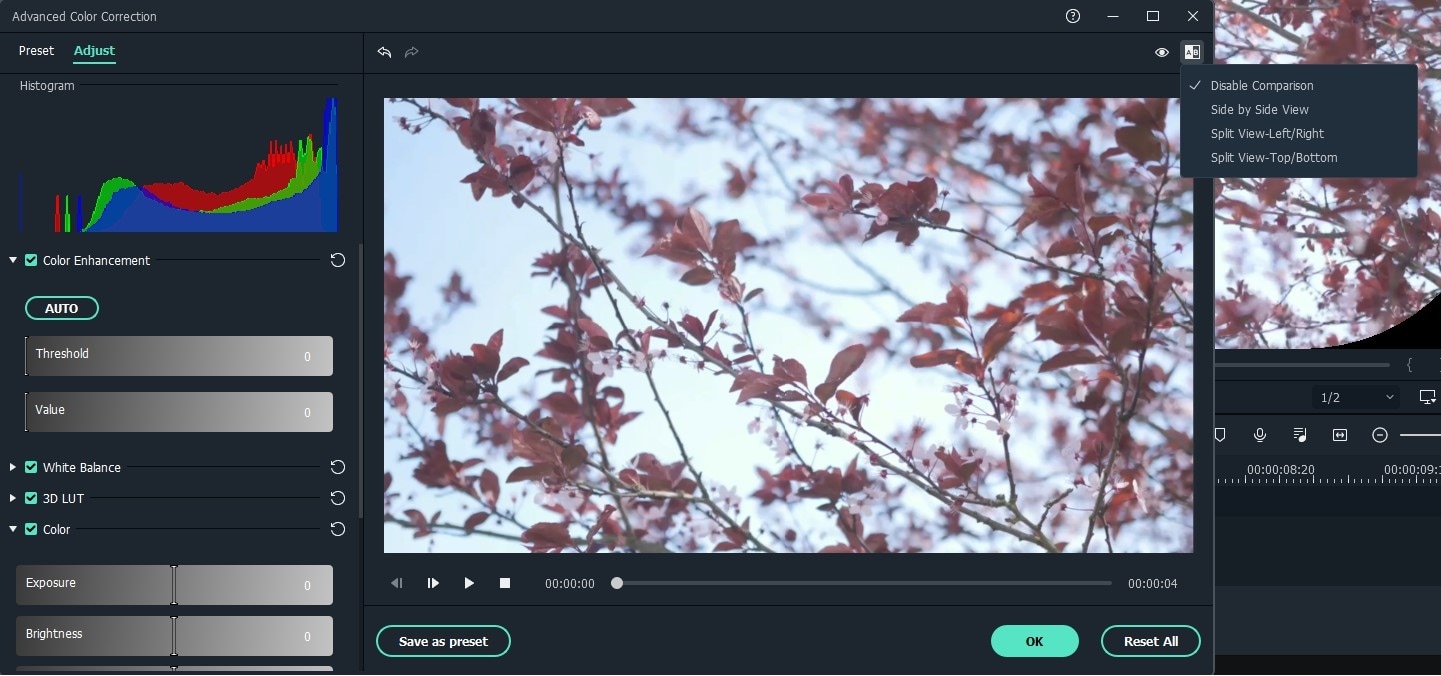
When you finish the adjustment, you can preview your video with the Compare Before/After mode. You can view the video in the mode of Side by Side View, Split View-Left/Right, Split View-Top/Bottom. Or you can click on the Show Original button or select Disable Comparison to view the original video.
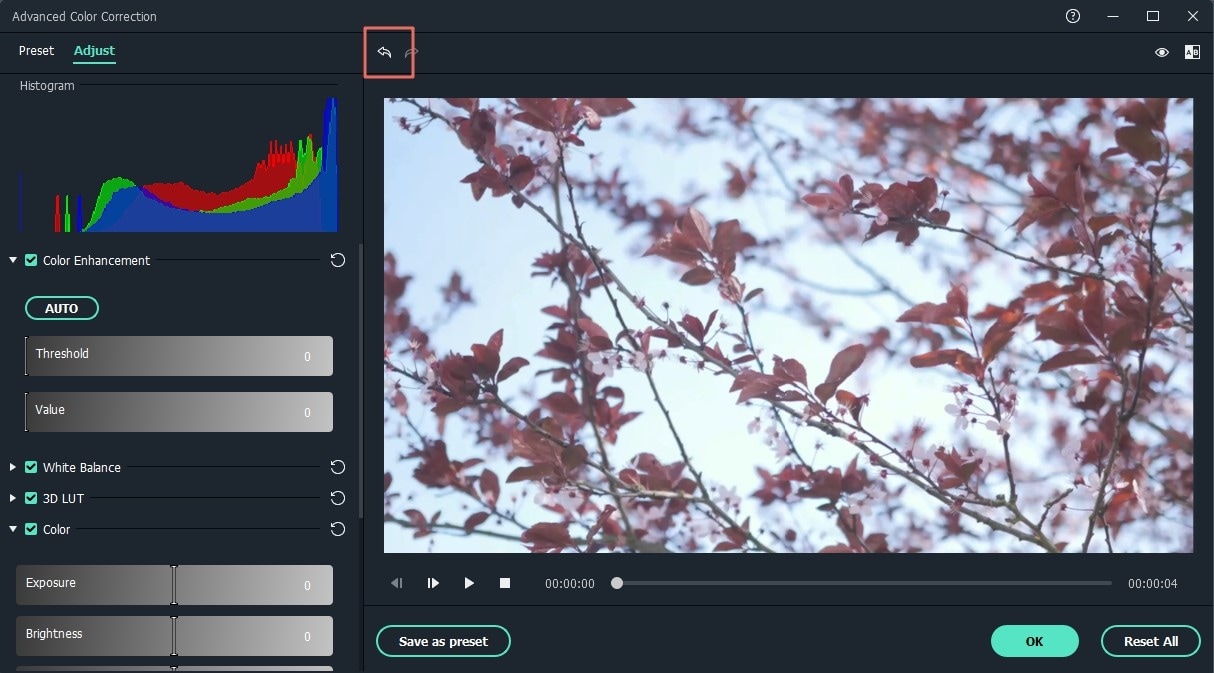
If you are not satisfied with the adjustment, you can click Undo/Redo button in the preview window and adjust again.
4 Save as Preset
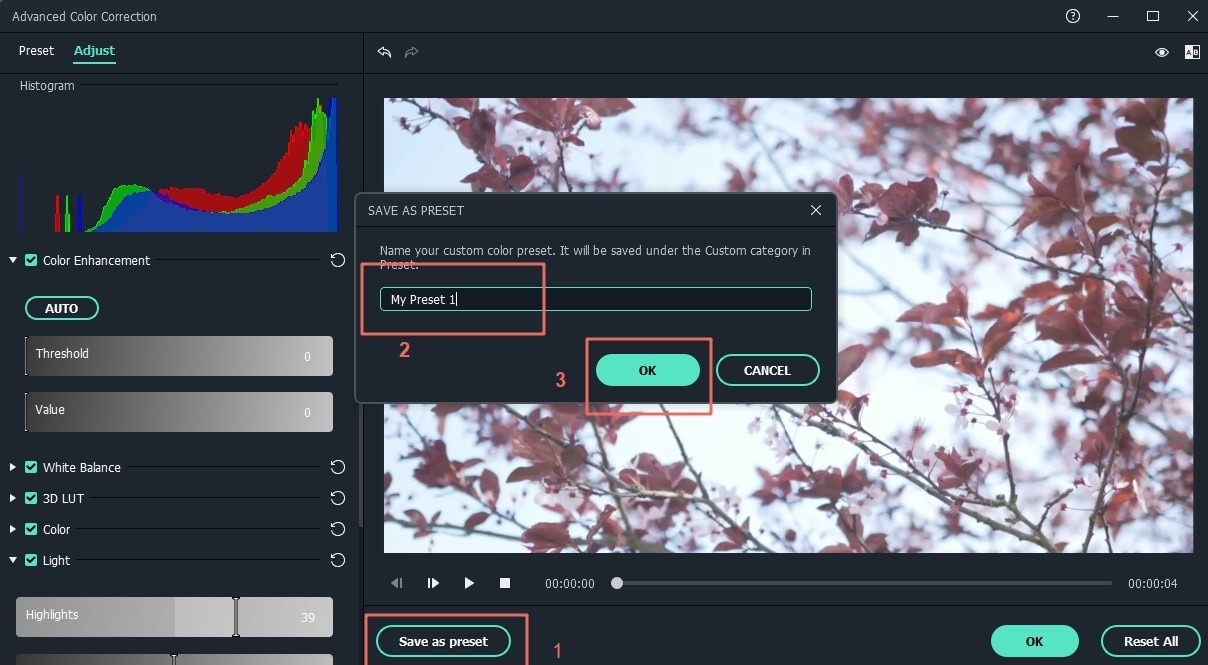
If you like the adjustment, you can save it as a preset. Simple click on the "Save as Preset" button to add it to the "Preset" tab.
Popular Products


