
Filmora User Guide
Silence Detection Add-on
Silence Detection is an exclusive (and paid) add-on for Filmora X users that’ll help them remove silent pauses within a video more easily. The add-on scans the entire video to detect all the silent pauses and automatically removes them to save time and make your editing process more convenient.
Note: It’s worth noting that the Silence Detection add-on can only be integrated into your Filmora Video Editor by paying the additional subscription charges. In any case, however, your purchase won’t include the license for Filmora X whatsoever.
How to use Silence Detection
Here’s the detailed step-by-step process to use Silence Detection in Filmora X to remove silent pauses. Keep in mind that the add-on will only work when your clip has audio as well. If a video clip is already muted, you won’t be able to use Silence Detection.
Step 1: Import your video and find the Silence Detection option
Start by importing the video to your project and initiating the Silence Detection add-on. To do this, you can follow three different methods.
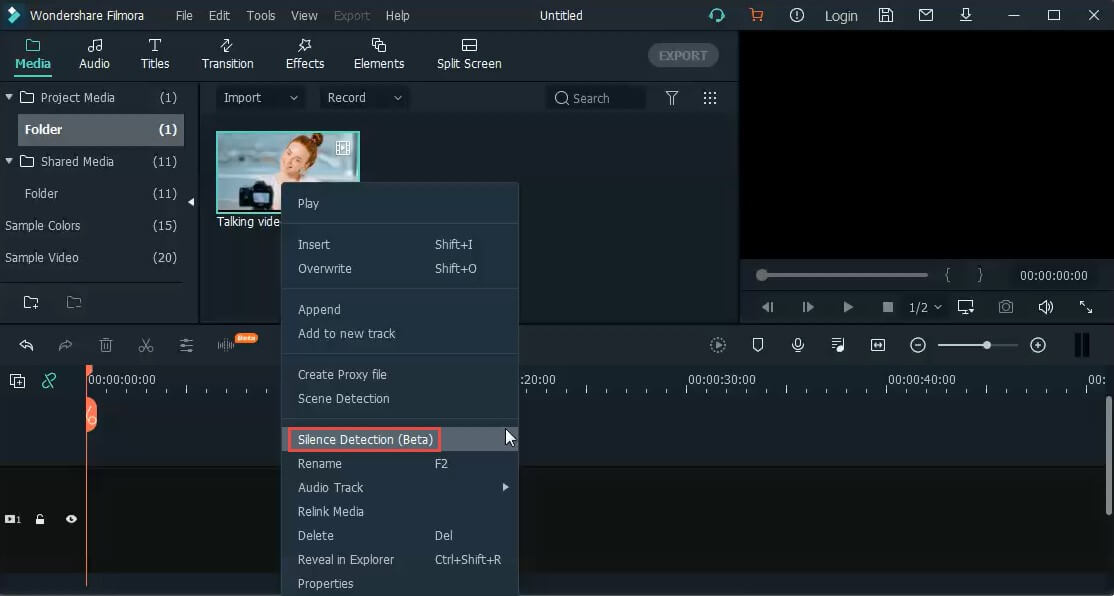
1. Right-click the video thumbnail inside Filmora X’s media library and tap Silence Detection.
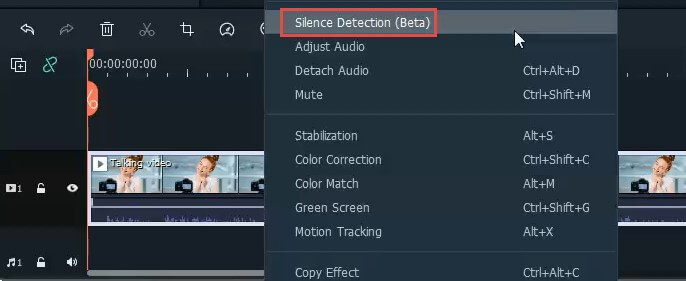
2. Load the clip to your project’s timeline. Right-click on the file and select Silence Detection.
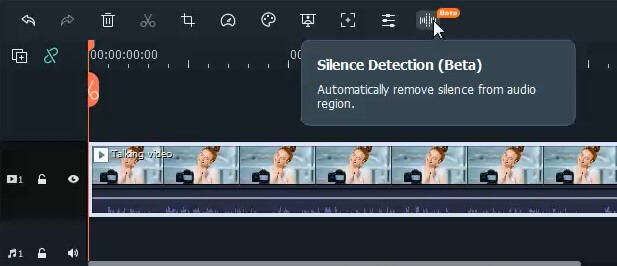
3. Alternatively, you can also initiate the add-on by tapping the small Silence Detection button in the toolbar.
Step 2: Adjust the audio parameters for the silence detection
You’ll be prompted to the Silence Detection window. Here you can adjust three different parameters to configure Silence Detection for the selected clip. These parameters include:
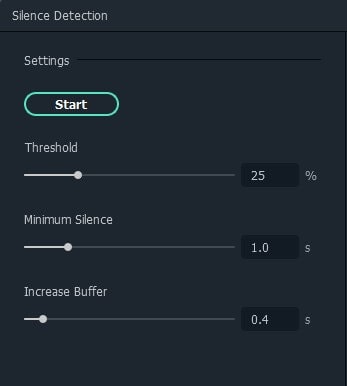
• Threshold: With Threshold, you can adjust the volume threshold for the clip. For instance, if you set the Threshold value to 25%, all the segments having a volume less than 25% will be considered silent.
• Minimum Silence: Use minimum silence to define the silence duration for segments with low sounds. For instance, if you specify the minimum silence value to 1 sec, all the segments that have low-sound over 1 second will be considered silent.
• Increase Buffer: Use Increase Buffer to increase the buffer time for the segments next to the silent or low-sounding parts to make them more audible.
Step 3: Auto analyze the audio and detect silences and low-sounding parts
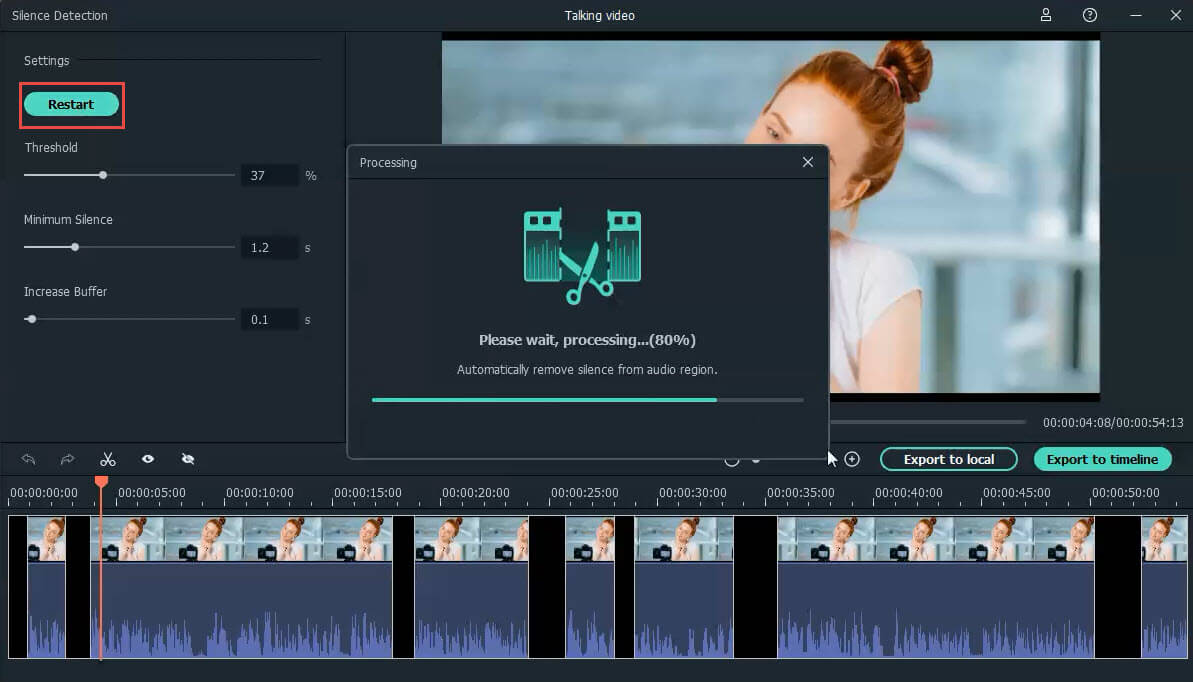
Once you've adjusted the three different parameters, click Start to initiate the automatic silence detection feature. Silence Detection will automatically separate the entire clip into two different segments on your timeline.
● The black segments will display the low-sounding or silent sequences that need to be deleted from the video.

• The highlighted parts, on the other hand, will be the segments that are audible and need to be saved from compiling your movie.

Step 4: Preview the video and check
Play the video to check if all the silent parts are being skipped or not. In case you are not happy with the results, you can readjust the three detection parameters and click Restart. This will reinitiate the Silence Detection sequence, and the add-on will remove the silent parts according to specified parameter configurations.
Step 5: Export to local or to the Filmora X timeline
After your clip is ready, you can either export it to your local PC or Filmora X’s timeline (if you want to continue with the editing process).
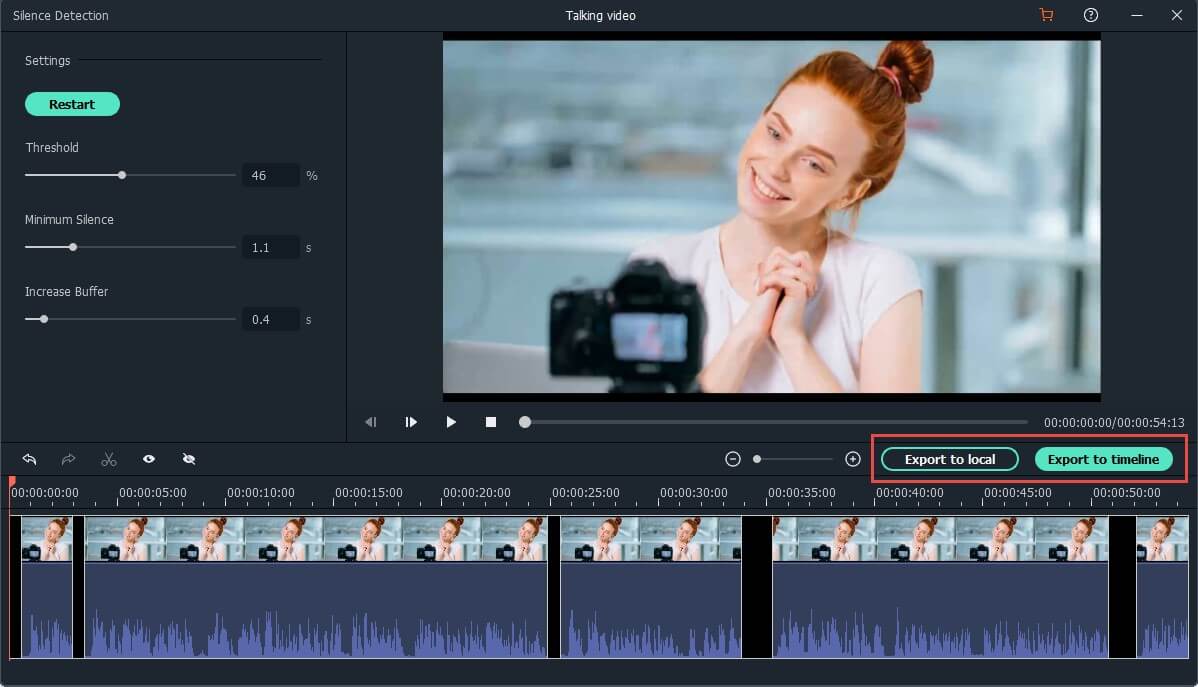
Export to Local
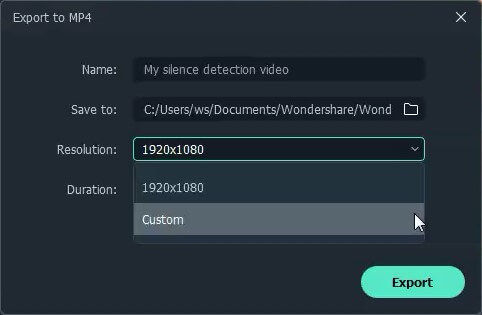
Tap Export to Local if you want to save a .mp4 file on your local storage. Specify the video’s name, choose its resolution, and click Export to complete the process.
Export to timeline
Alternatively, you can also tap Export to Timeline to load the clip to Filmora’s timeline and continue editing the video to make it more appealing.

Can I override Silence Detection segments?
With Silence Detection, you can also override the silence segments before exporting the clip to your timeline or local storage. You can extend or shorten the silent segments of the clip using Filmora X’s Trimming tool. Apart from this, you can also make these segments invisible by clicking the small “Eye” icon in the toolbar.
Popular Products


