
Filmora User Guide
AI Portrait Add-on
AI Portrait is one of the newly added features in the latest release of Filmora. With the AI Portrait option, you can remove the background of the video automatically using the green screen or chroma key functionality. AI Portrait feature also lets you add numerous types of background-related effects in your videos.
How to use AI Portrait
Since AI Portrait uses automatic tracking to remove the background of a video, it works best with a single character and a camera-facing video with very little movement. Having multiple moving objects will make it difficult to detect the background smoothly in each frame.
You can use the following steps to remove the background of your video using the AI Portrait Add-on in Filmora.
Step 1. Find the AI Portrait effect
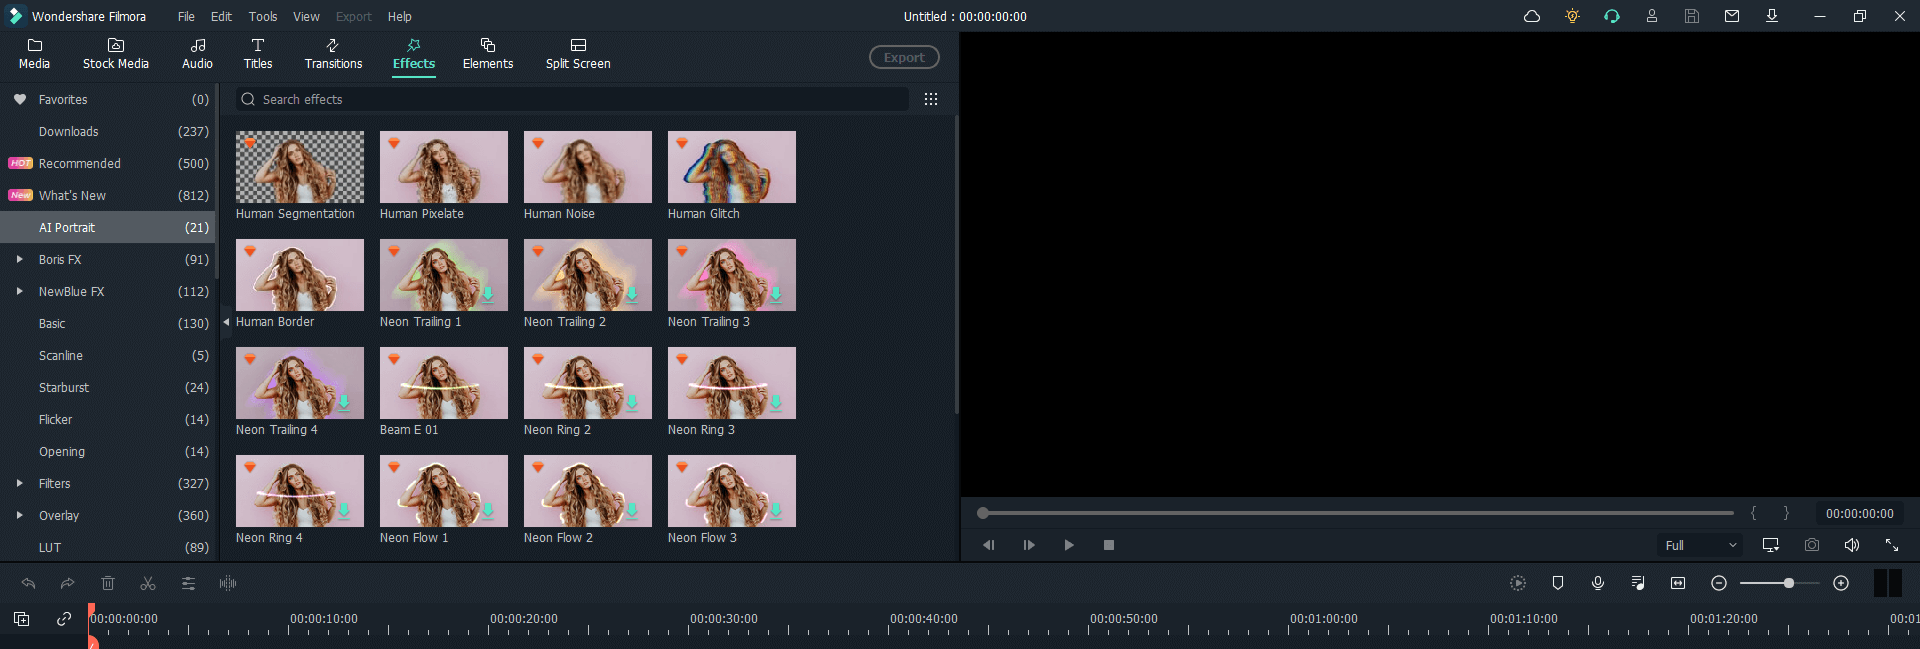
Drag and drop your video to timeline. Then, go to the Effects tab and check the AI Portrait effects.

Step 2. Apply AI Portrait effect to your video
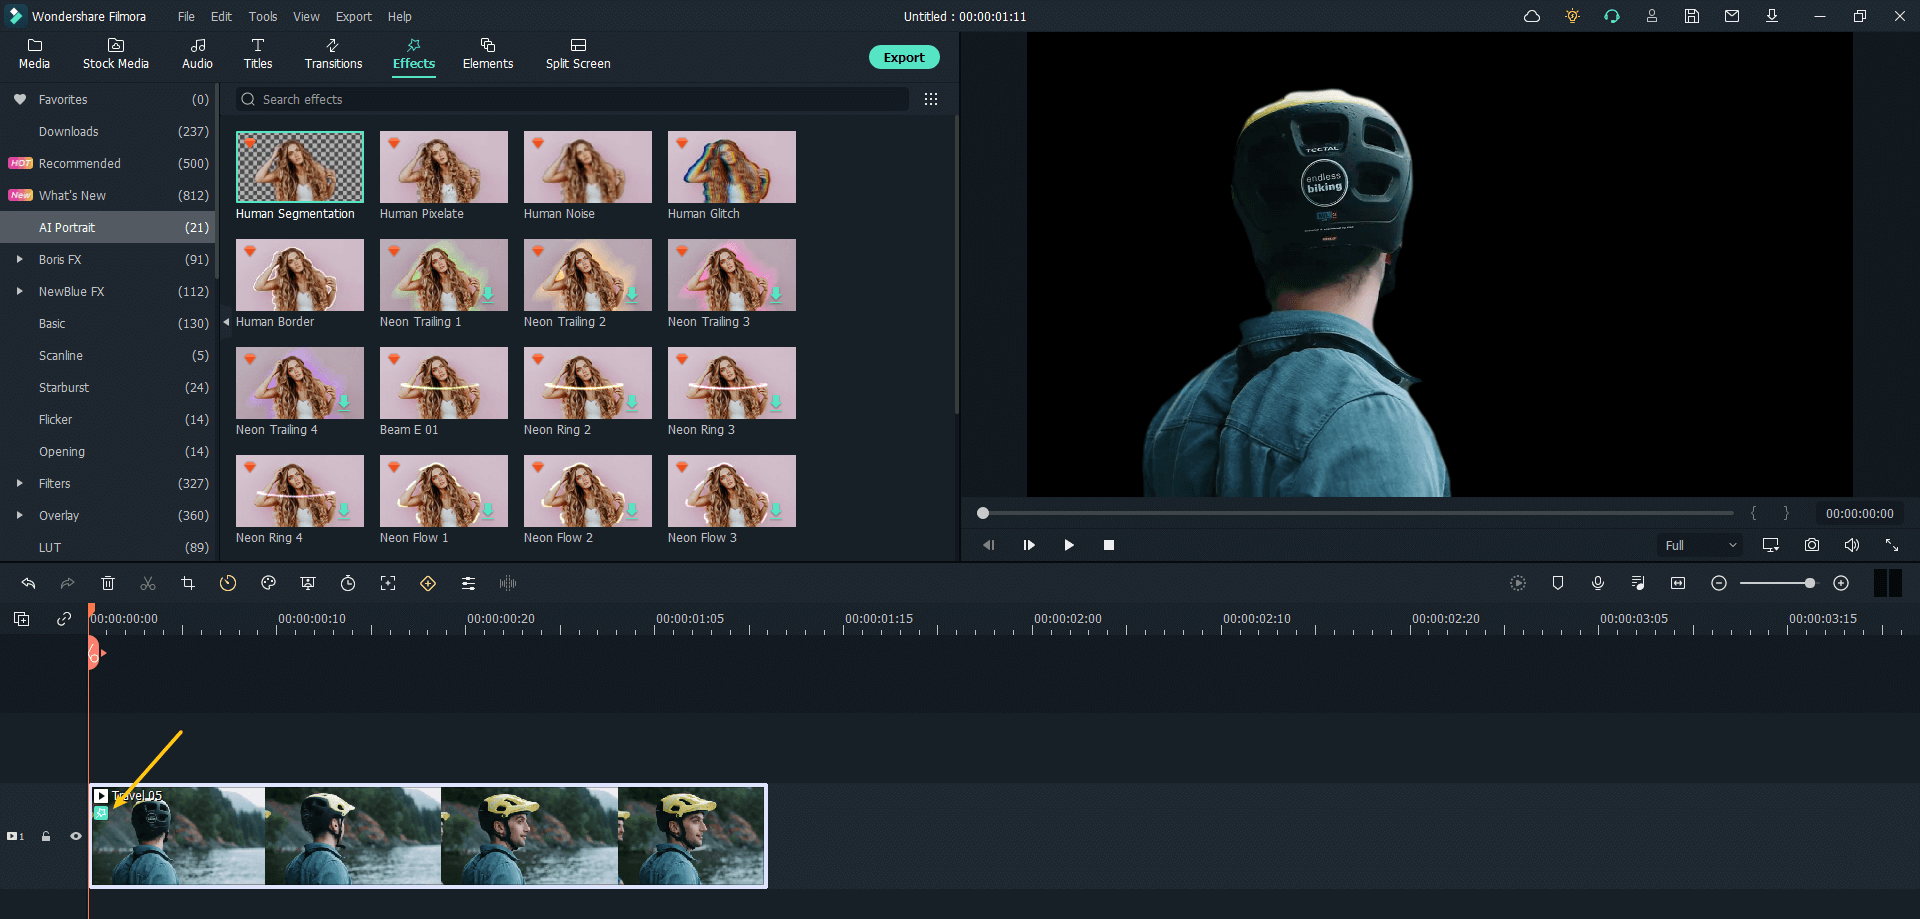
Once you have selected the AI Portrait type you want, you can double-click on it to review it in the preview panel. To apply it to your video, just drag and drop it to your video on the timeline until you see a green star icon on your video.

Tips: AI Portraits is one of the premium features of Filmora, you will need to purchase it first to use the effect and export the video. You can also use a free trial to see how it appears on your video.
Step 3. Adjust the details of the AI Portrait
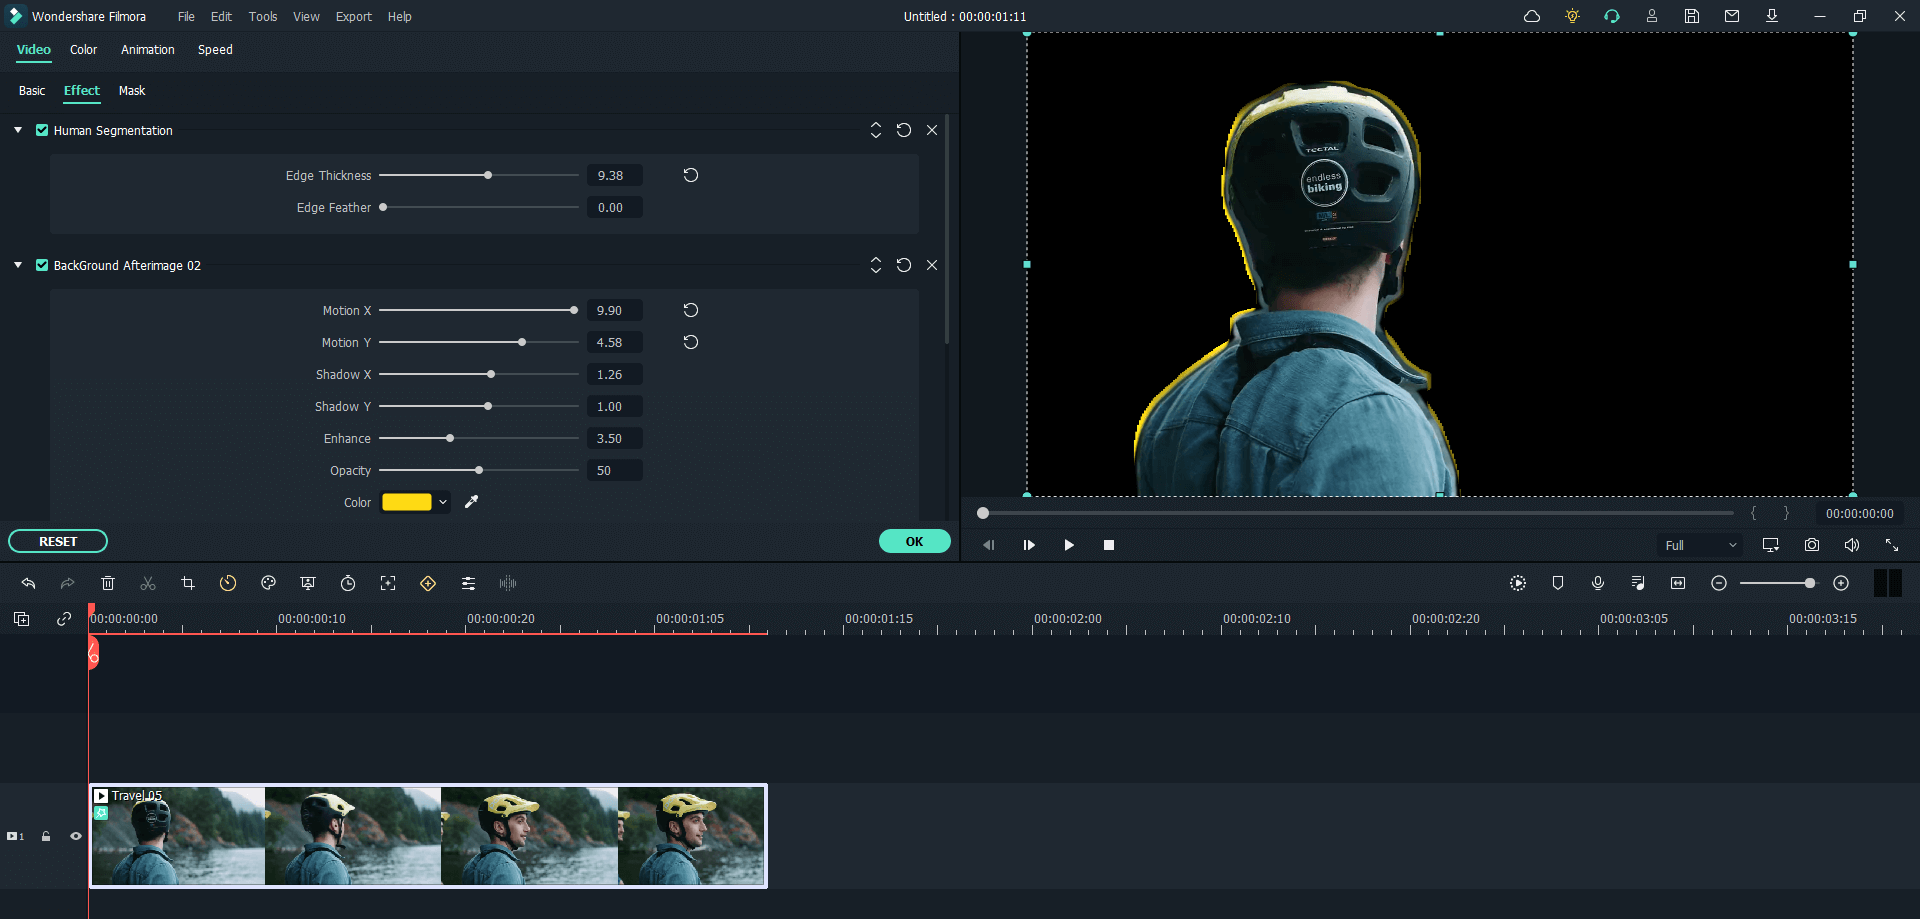
You can adjust the details of the AI Portrait that you are applying to your video. This means that different AI Portraits give you different types of adjustments to make. To do it, just double-click the video in your timeline and find the adjustment panel under the effect tab.

In this example, we used the BackGround Afterimage 02 effect and it gave us the option to adjust, Motion X, Motion Y, Shadow X, Shadow Y, Enhance, Opacity, Color.
Likewise, different AI Portrait options gives you different adjustments to make.
Popular Products


