
Filmora User Guide
Auto Reframe
Auto Reframing is an AI-based tool in FIlmora that helps the user to keep the focus on a specific object in the video. This tool will automatically adjust the frame of the video to ensure that the main object is in the video frame all the time - while keeping the aspect ratio.
Step 1. Enter auto-reframe mode
After adding a video media file to the media library, you can right-click on it and select Auto-reframe to proceed. Also, you can choose Auto Reframe mode from the start window to quickly enter auto reframe mode.
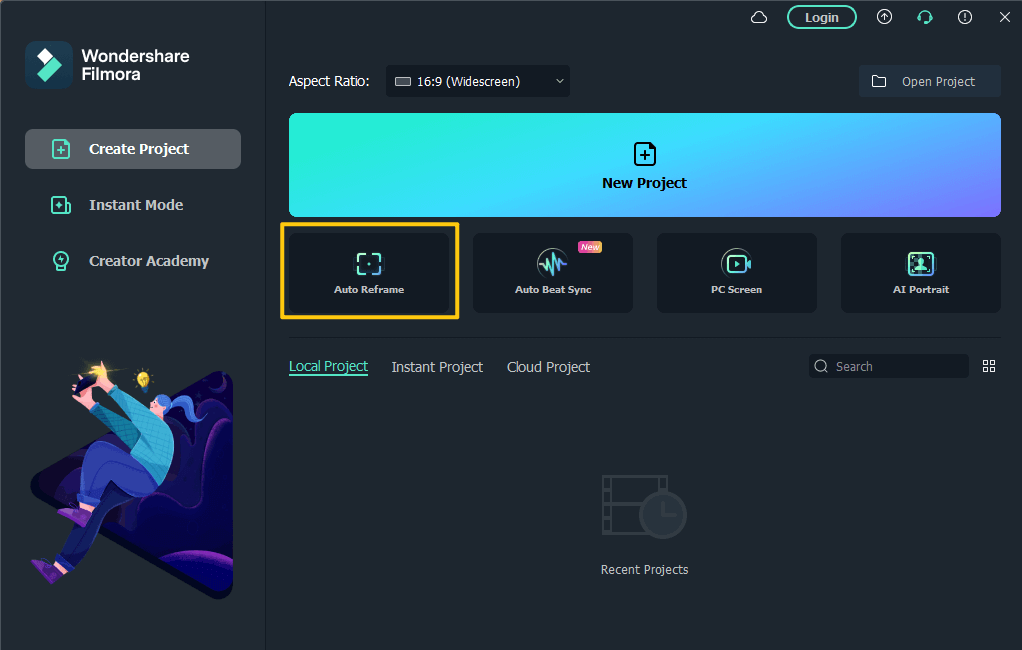
Step 2. Adjust the Auto-Reframing options
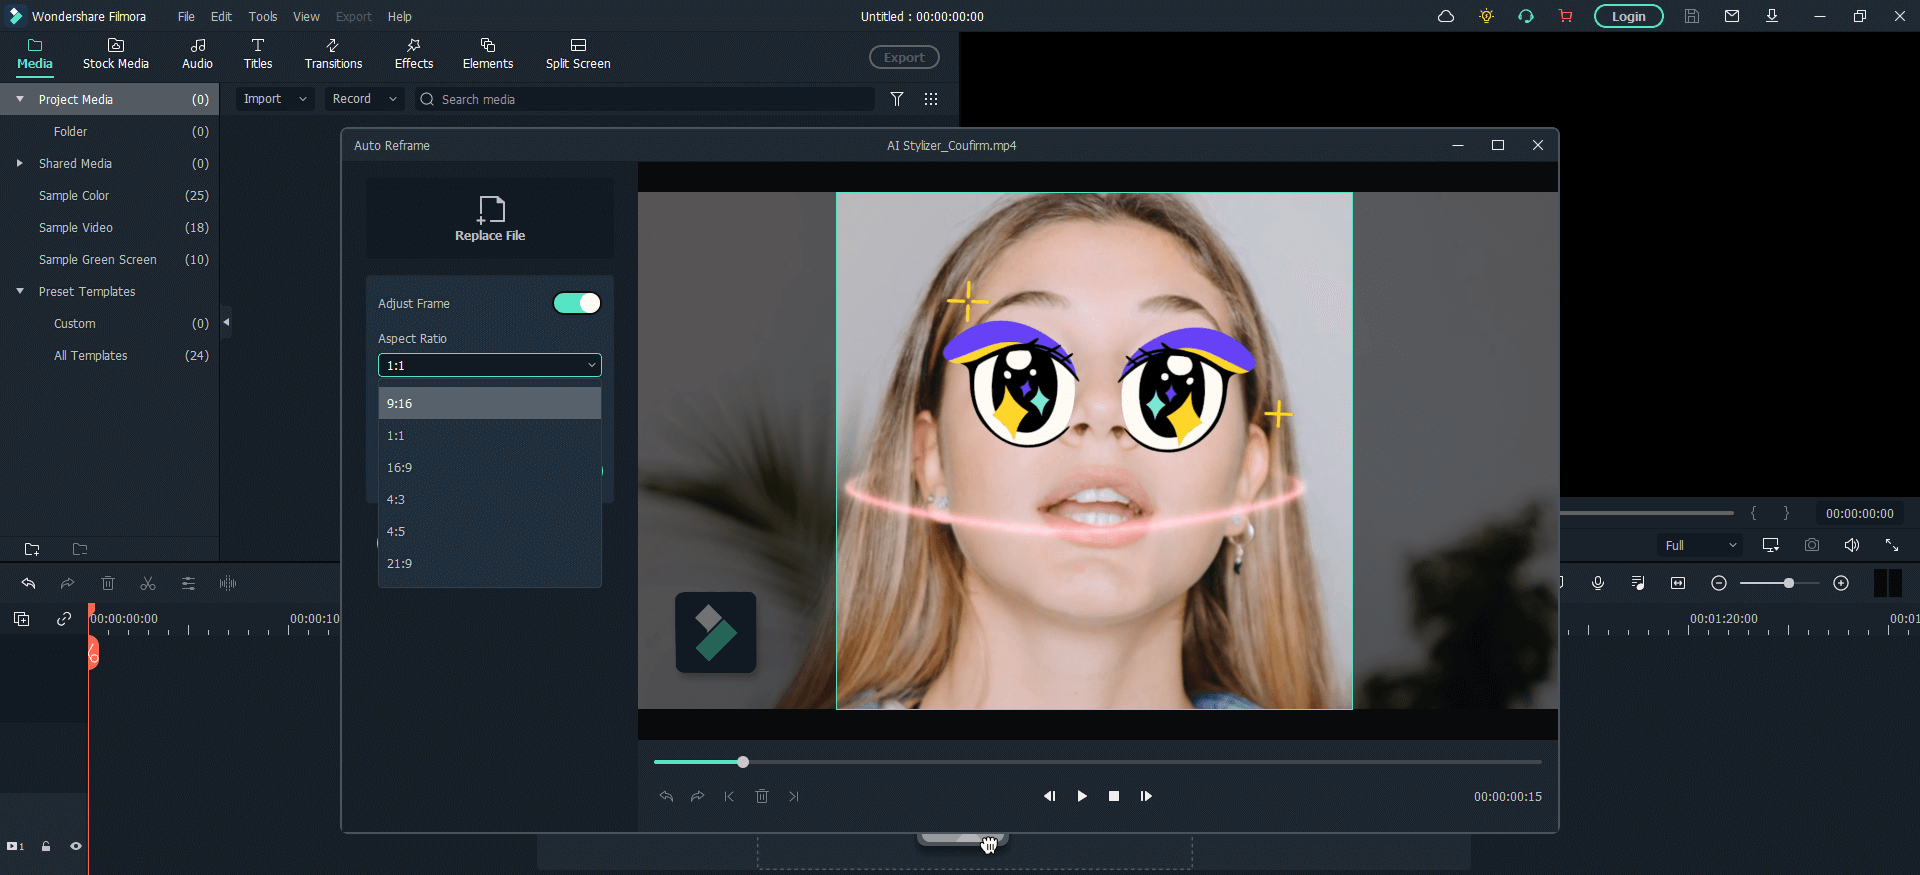
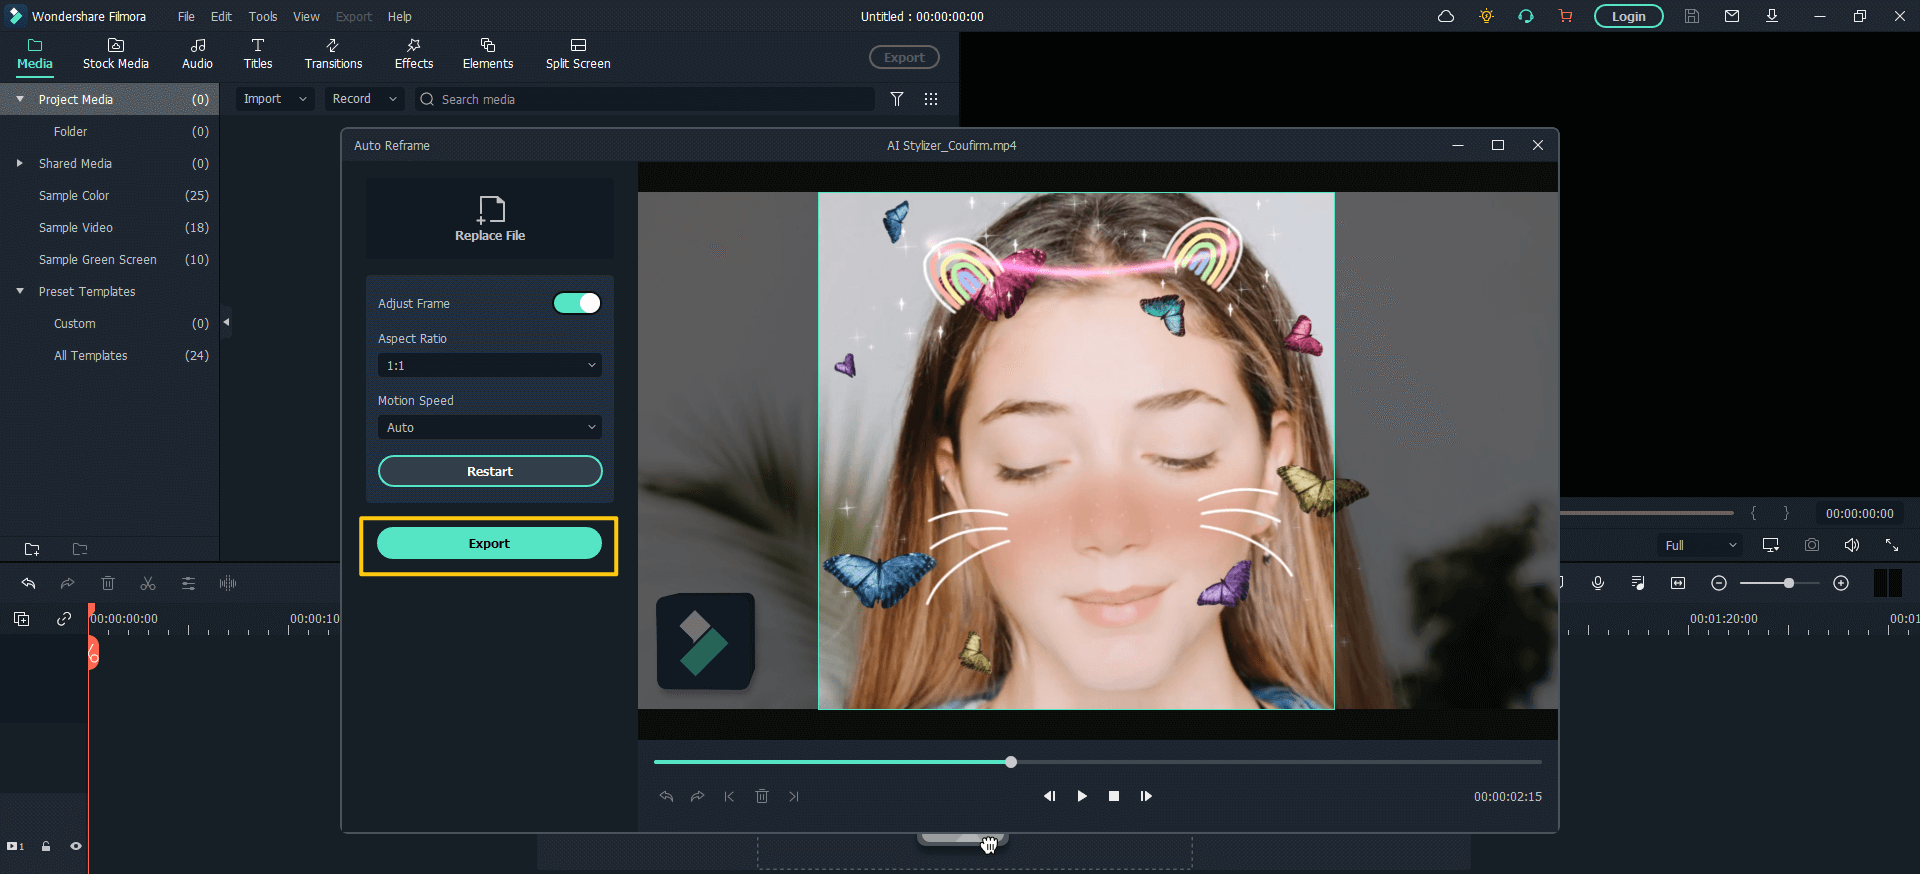
Once you click on the Auto-Reframing option in the above step, it will open a new working window with additional adjustments pertinent to Auto-Reframing. This will allow you to adjust the aspect ratio of the media file and select the motion speed.
You can use a number of aspect ratios that differ in terms of their usage on social media or devices. Also, you can adjust the speed between Auto, fast and slow options.
Step 3. Analyze and auto reframe the video
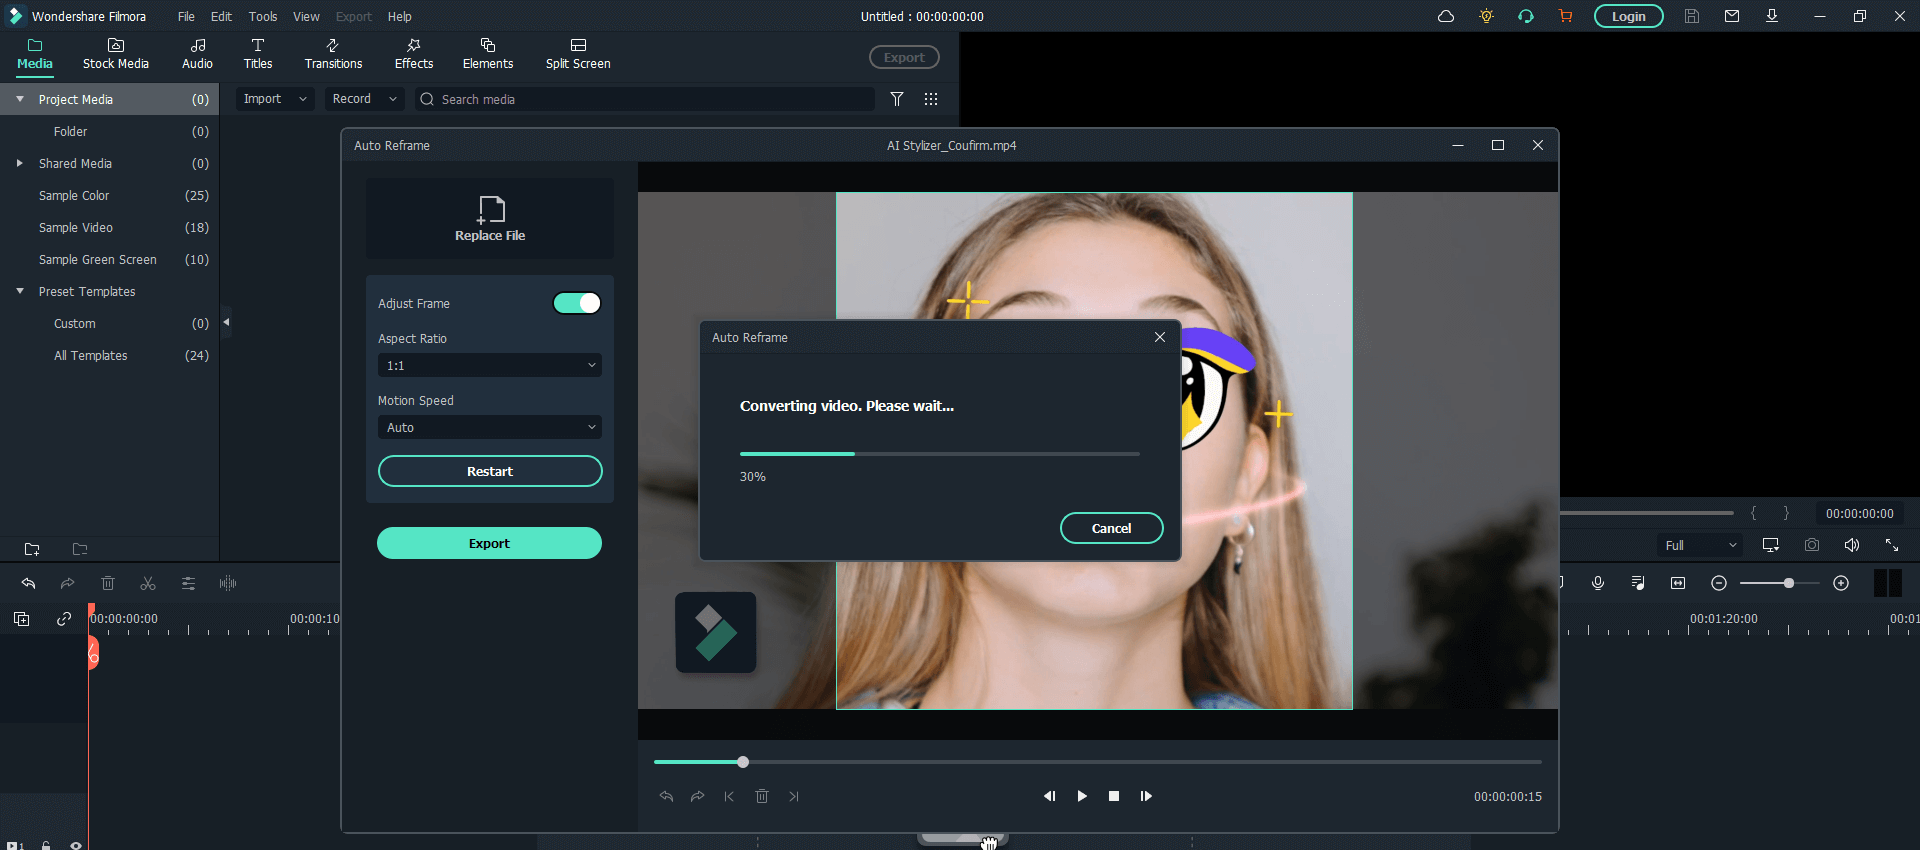
Once, you have selected your aspect ratio and motion speed, you can click on the Analyze button. Filmora will complete the analysis of your selection and convert the video to the aspect ratio and speed that you have selected. You can click on the play button to check the preview of the auto-reframing or you can still make further changes and click on the restart to let Filmora analyze with different settings.
Step 4. Export the video
As the last step, you can export the auto-reframed video then and there using the Export button just underneath the Analyze or Restart button in the same window. It will open a dialogue box in which you can select the file name and destination path - as shown in the image below.
Popular Products


