
Filmora Video Editor
Navigating Filmora Video Editor
1 Enter the Filmora Video Editor
After launching the Filmora Video Editor, there are 3 ways for you to start your editing process: the Project Library, Now Project and Open Project.
- Project Library: You can open the recent project file and continue to edit. These files are ordered by the dates they were last modified. (If there are lots of projects files, you can type the file name and locate it quickly)
- New Project: Click to open a new project and enter the editing interface.
- Open Project: Click here to open the saved project file (.wfp) and continue to edit. (Mac project file can be opened and edited in the Windows version in the new version)

2 Video Editing Interface
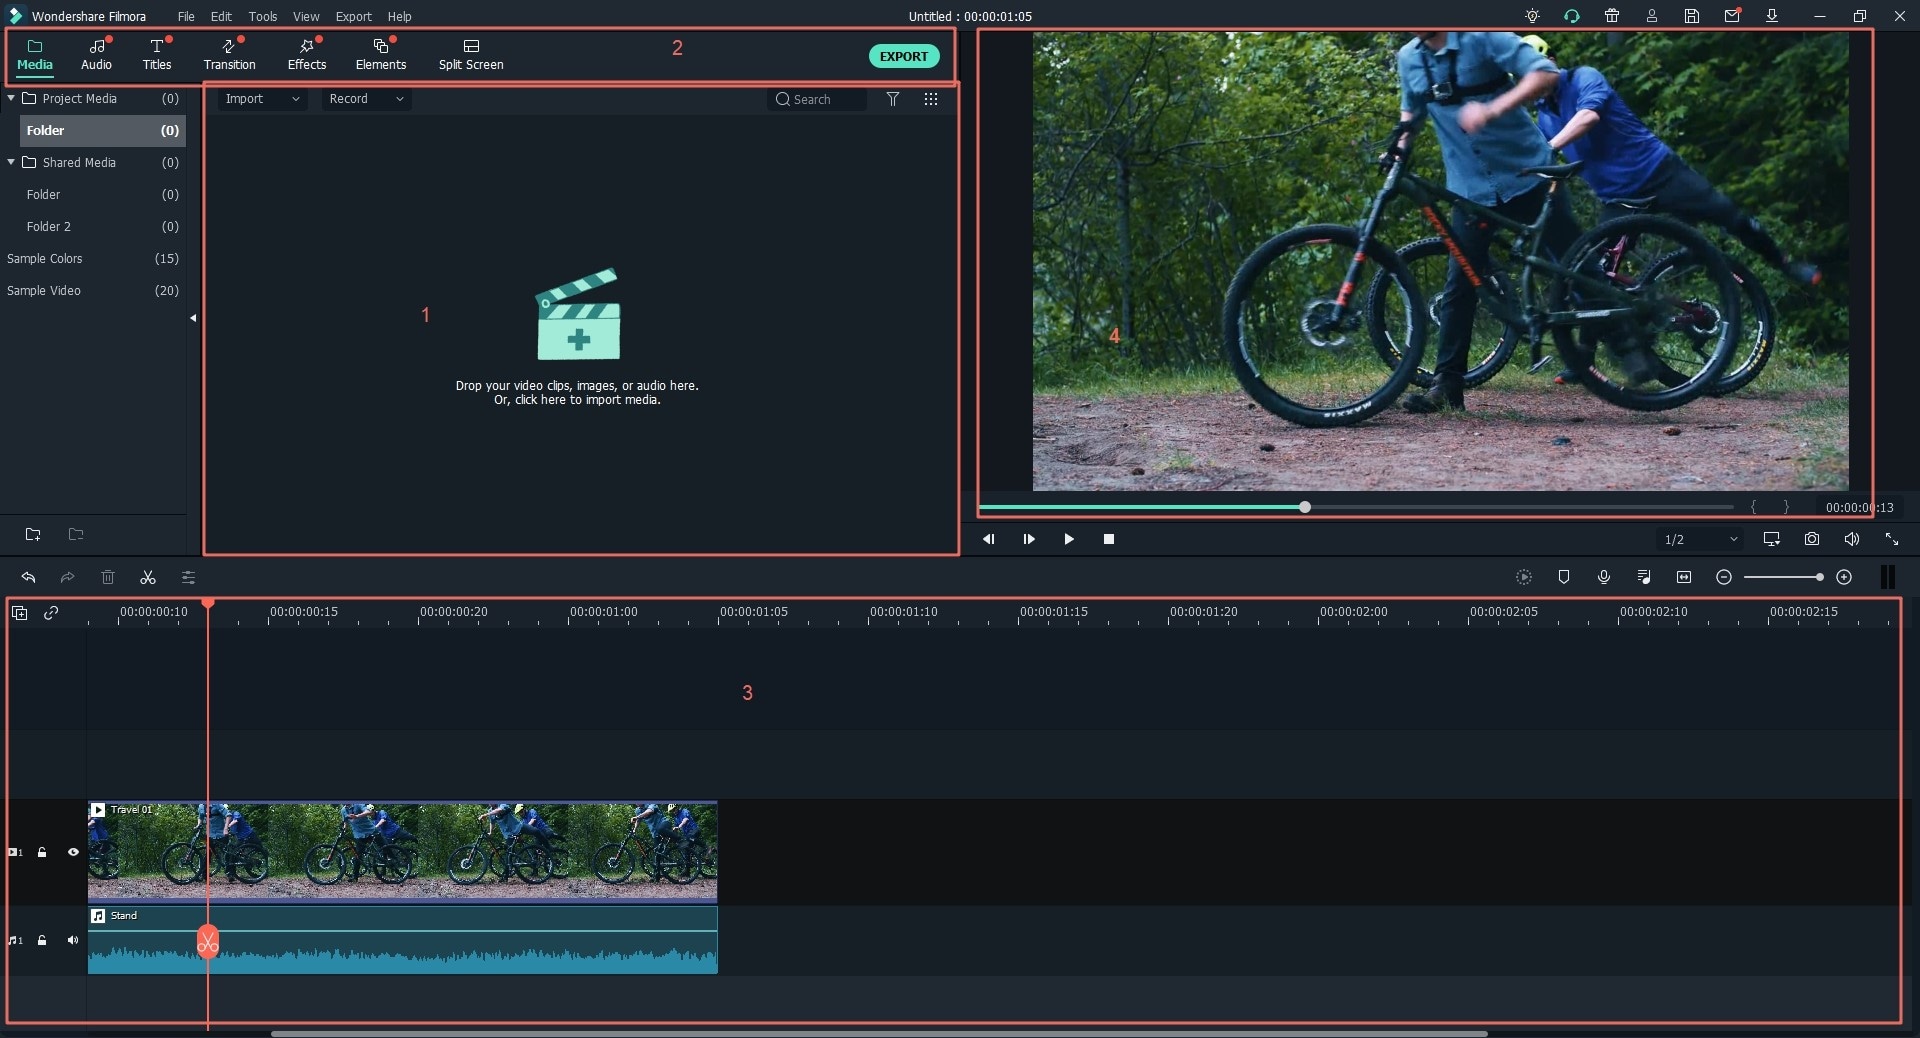
Filmora Video Editor is designed user-friendly for basic editing and advanced editing. No matter what option you're choosing in the primary window, you'll enter into the editing interface.
1. Media Library: You can import media files, including videos, photos, and audio, to the library. It will also display the function icons like transitions, effects, titles, etc. that you can use in your video clips.
2. Toolbar: The toolbar provides you with various editing tools, you can find tools like "Cut", "Speed", "Delete", "Edit", etc. quickly.
3. Timeline: This is the storyboard that you assemble your video project. And you can perform video editing in this section. Filmora Video Editor allows you to add 100 tracks in the timeline.
4. Preview: In the Preview window, you can view and check your video as you like. Here, you can enter a new time code to jump to a specific point in the video without restrictions.

Popular Products


