
Filmora Video Editor
How to Edit Audio, Music or Sound Clip?
Filmora Video Editor provide users with various sound effects and editing tools, so that you can use it to customize and enrich the video performance by yourself. Now, let's check the detailed steps:
- Replace the Original Audio of the Video
Let's have a look on the video tutorial below:
1 Add Background Music (Sound Effect)
There are two ways you can use to add background music to your video: one is to import music file from your local computer; the other is to use the music track from Filmora Video Editor.
- Import Music from Local Computer
Simply click "Import" button to browse for audio files in your computer. When you find the target music or audio file you need, you can select it and import it to the Media Library. After that, you can drag and drop the audio into the Audio track in the Timeline for further editing.
- Use Built-in Music from Filmora Video Editor
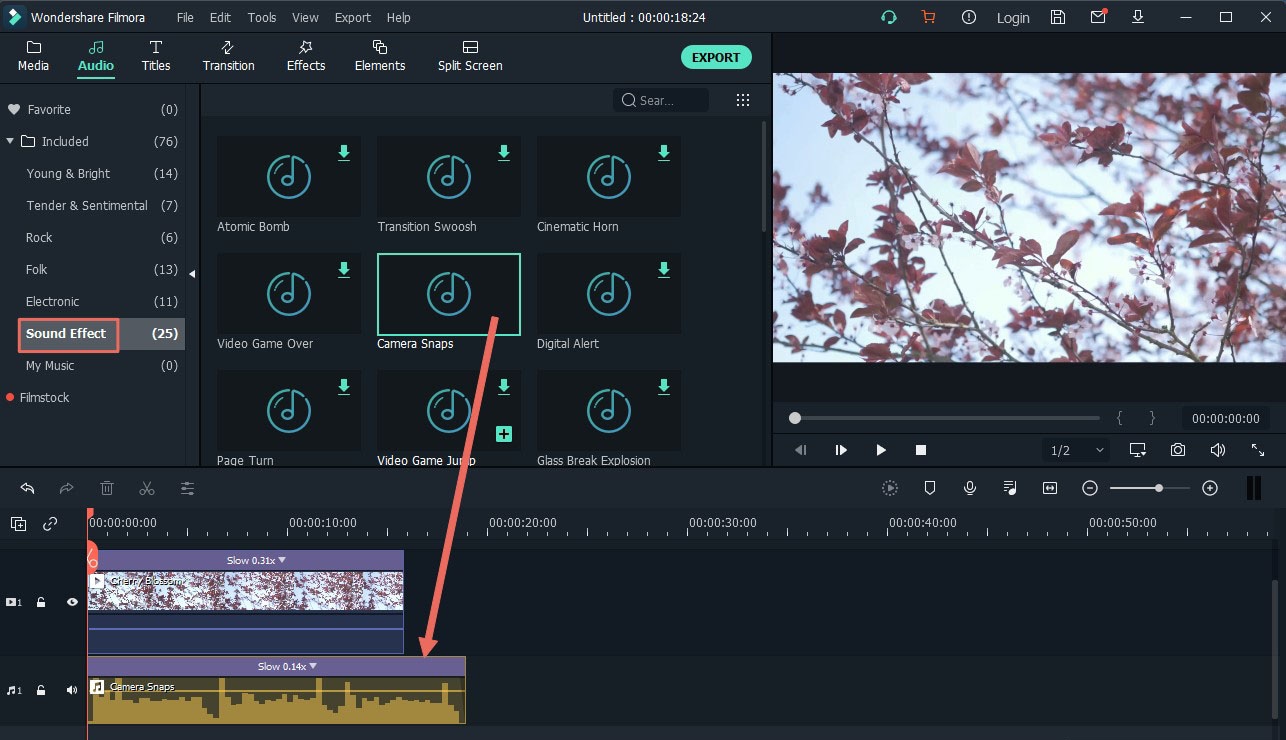
Click on the "Music" tab on the top of the menu, select the sound effect and drag it to the soundtrack in the timeline.
Need to adjust the sound effect?
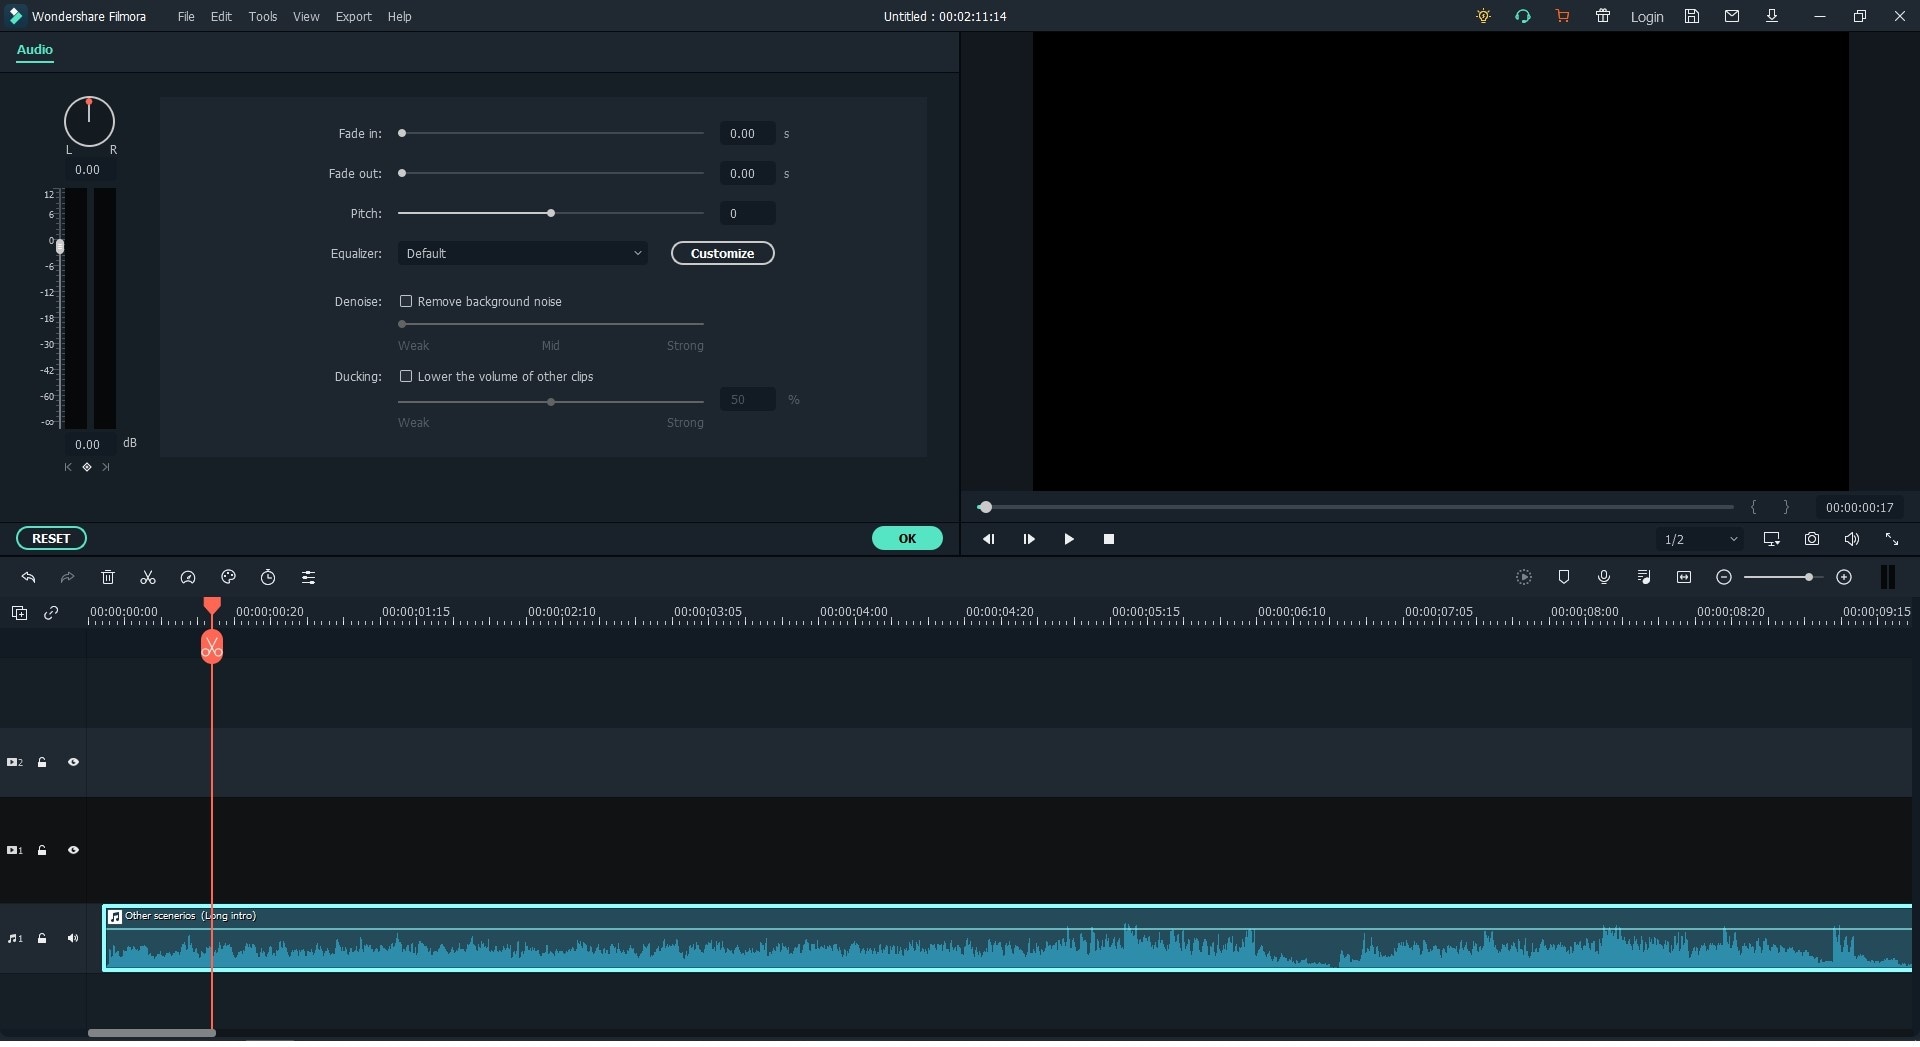
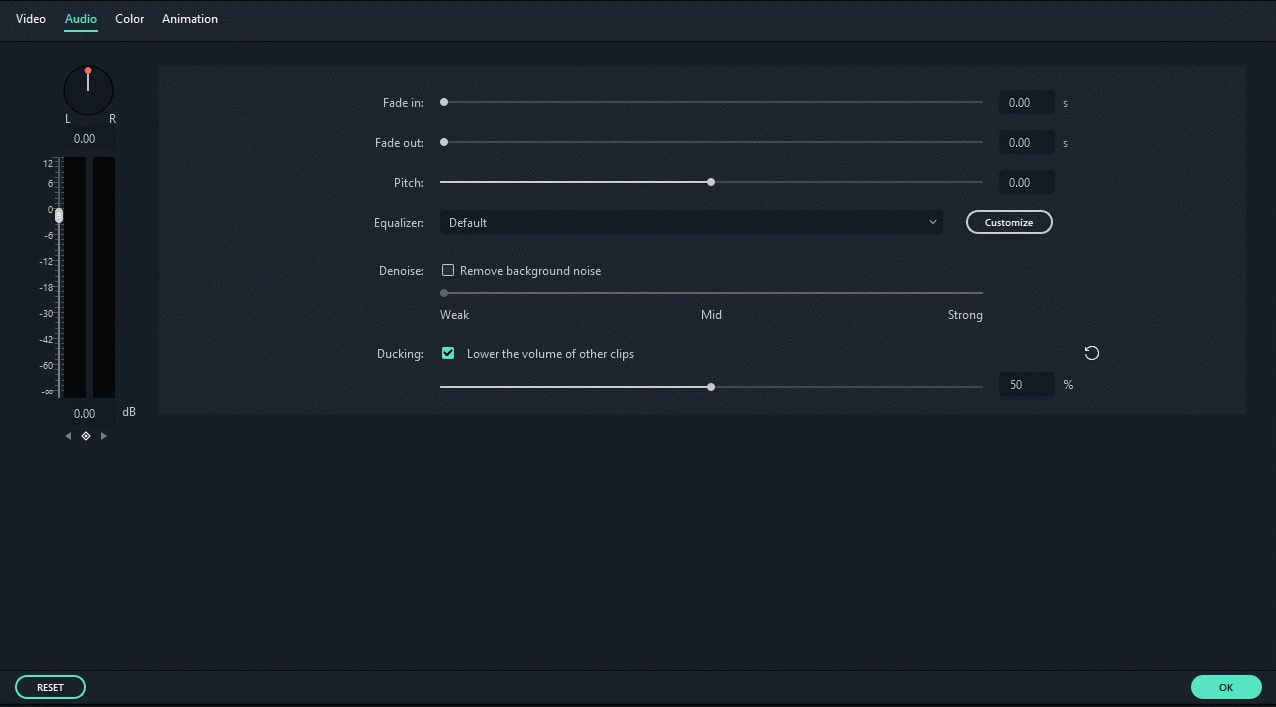
Double click on the soundtrack in the timeline to open the sound editing window. You can adjust the sound speed, fade in and fade out, volume, and more. And you can also remove background noise.
2 Split Audio
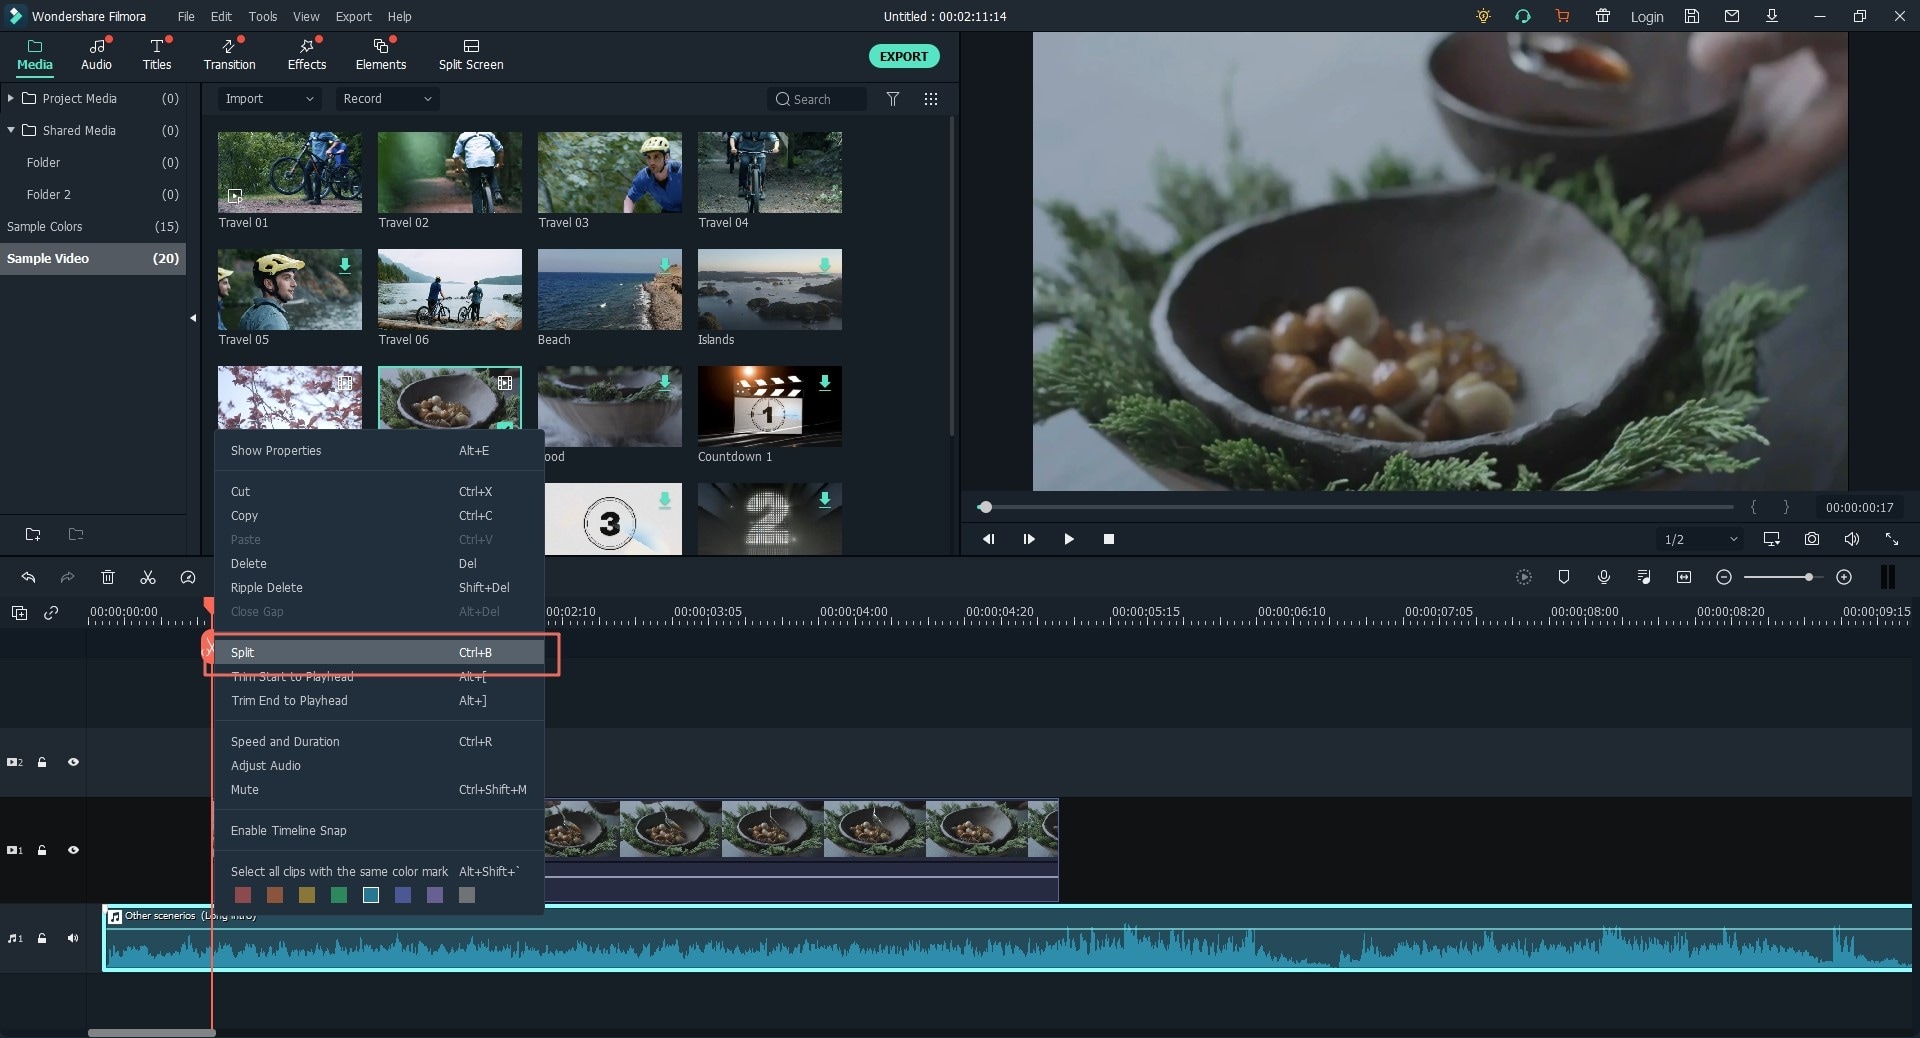
Move the slider to the audio part you want to split, right click on the music track in the timeline, and then select "Split" to split the audio. You can also click on the "Scissor" icon to split the audio.
3 Adjust Audio
Filmora Video Editor allows you to adjust the default audio settings. Double click the audio in the timeline, and the audio control panel will be opened. You can adjust the Speed, Volume, Fade in/out, and Pitch settings.

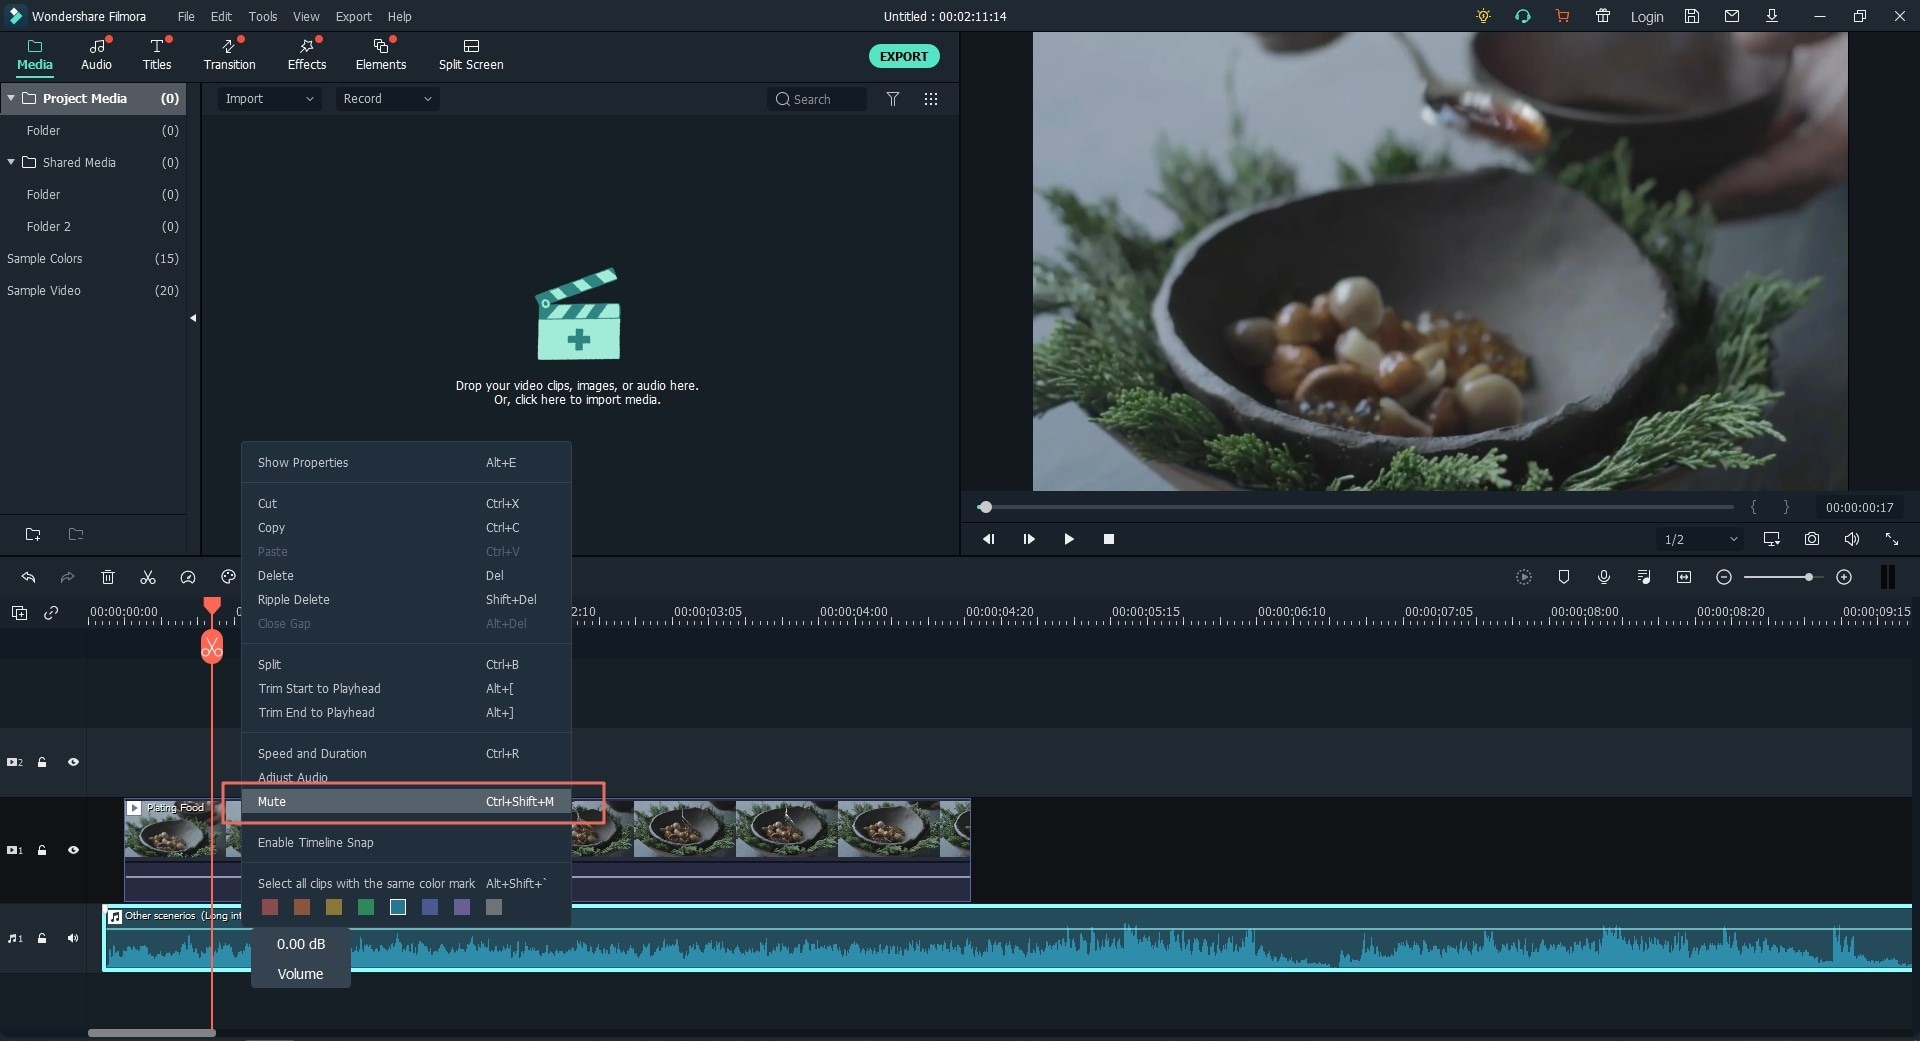
4 Mute Video Clip
Right-click on the video in the timeline and select "Mute".
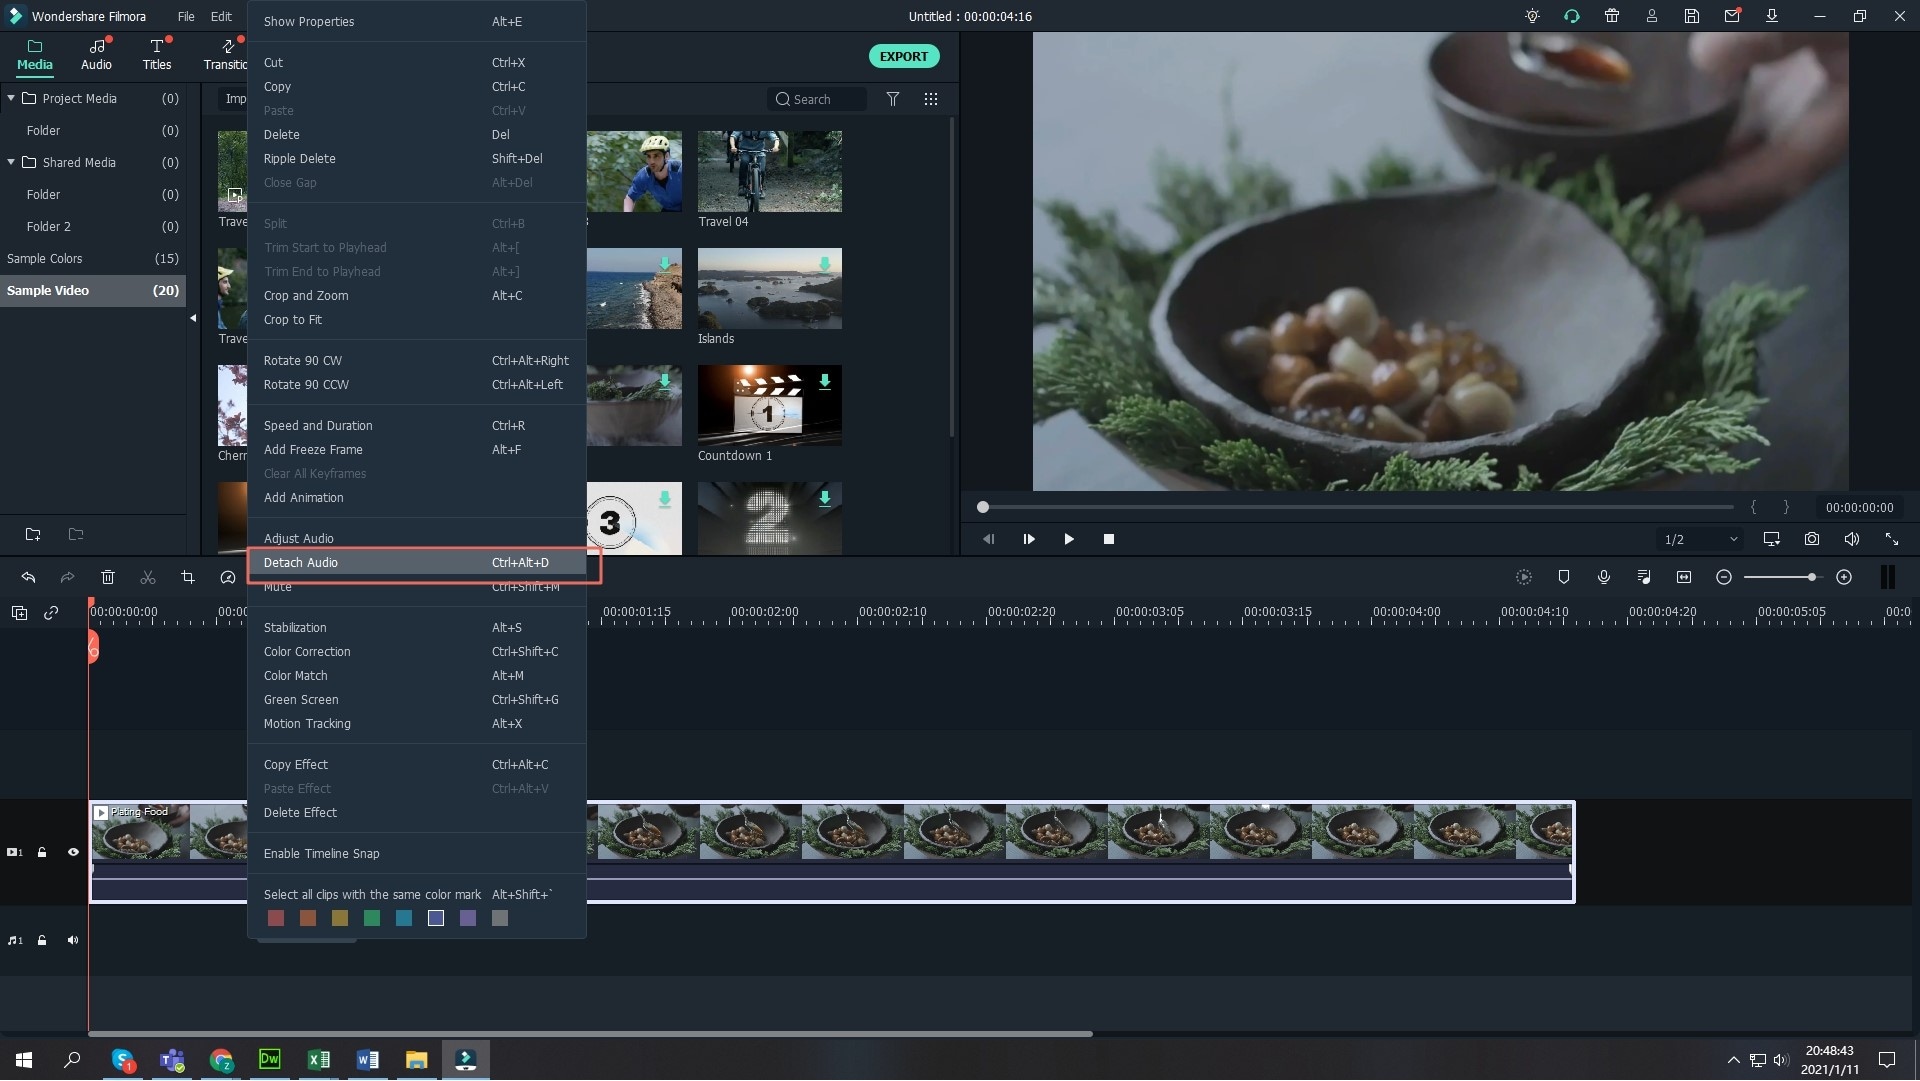
5 Detach Audio from Video
Right-click on the video in the timeline and select the option "Detach Audio".
6 Trim Audio File
After you detach the audio, it will be added to timeline automatically. And then you can move cursor at the begging or end of the audio track to trim it.

7 Customize Timeline Track Controls
- Add New Tracks
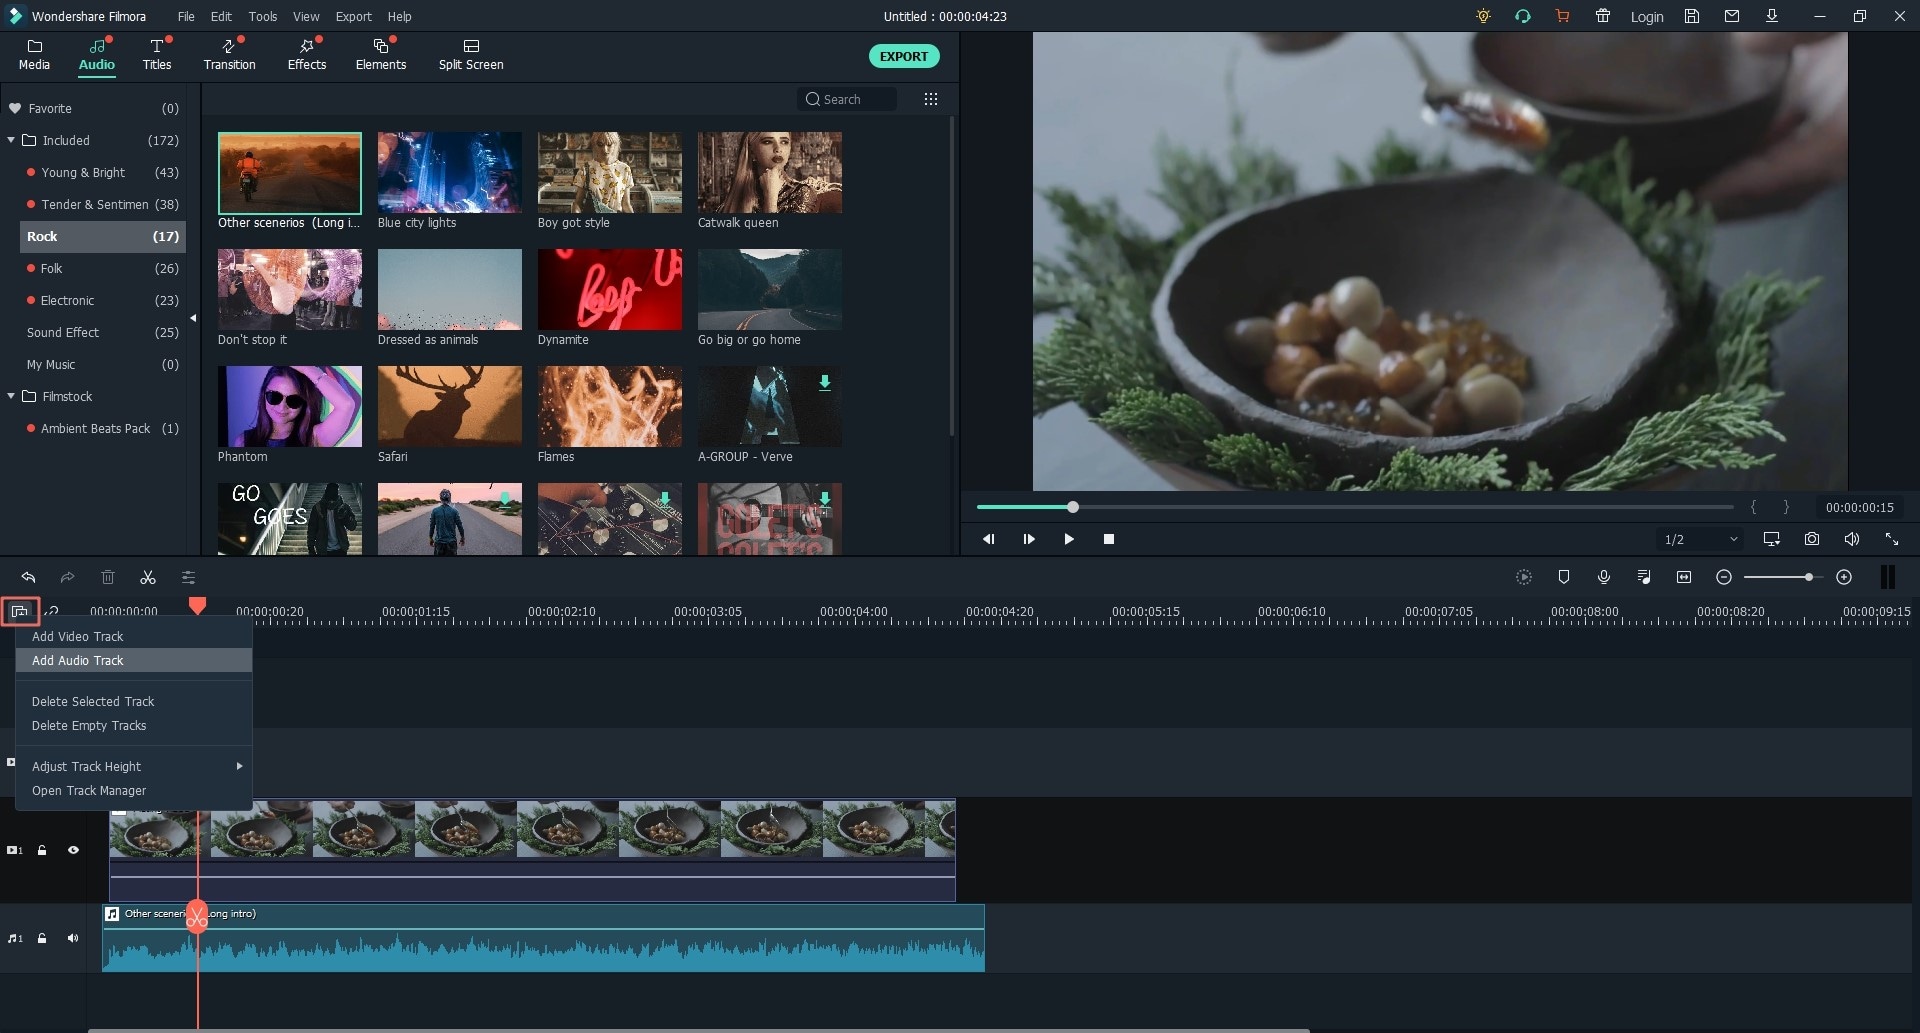
Filmora Video Editor allows you to add 100 tracks in the timeline. You can click "+" button in the left upper corner of the timeline and select "Add Video Track" or "Add Audio Track".
If you wish to add multiple tracks at one time, you can click "+" icon and choose "Open Track Manager", then add the tracks you need at the same time.
- Delete Empty Tracks
If you wish to delete the empty track, you can press "+" icon and choose "Delete Empty Tracks" to remove all empty tracks directly.
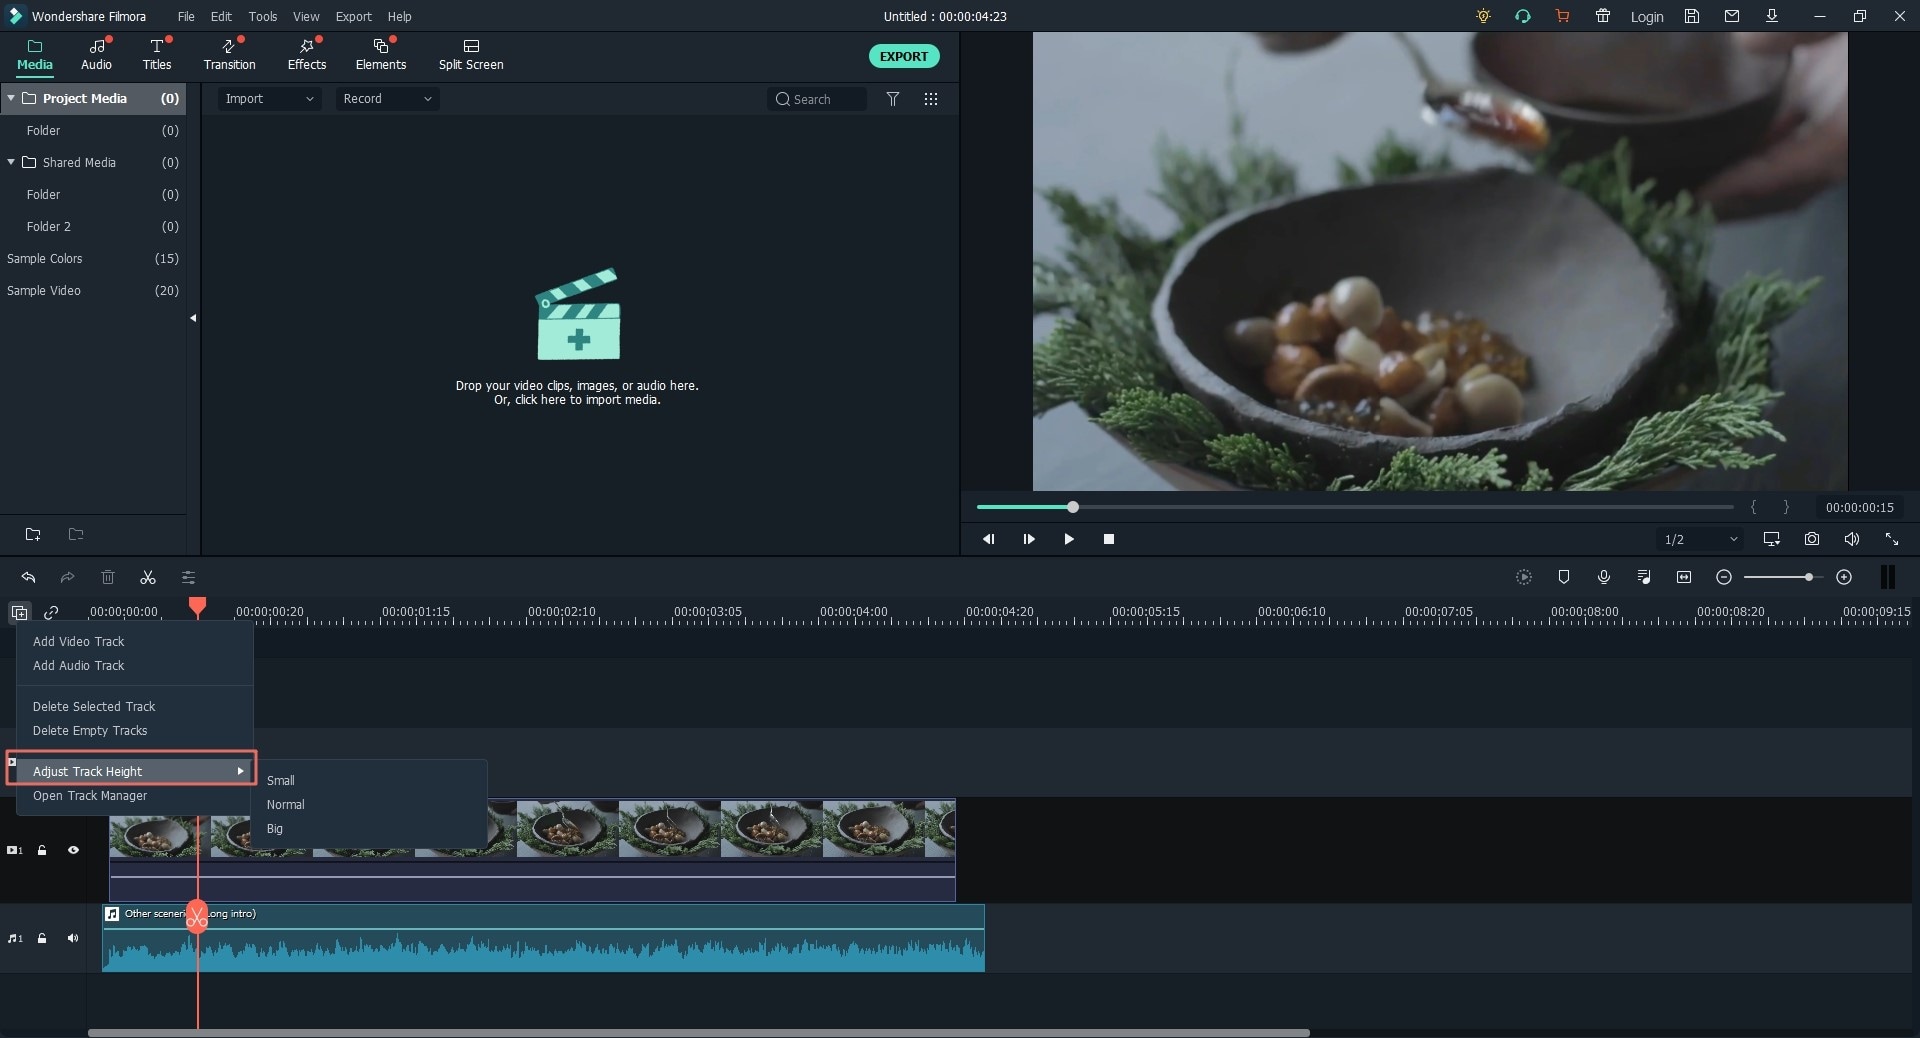
- Adjust Track Height
Click "+" icon in the left upper corner of the Timeline, then you have 3 options: Small, Normal and Big.
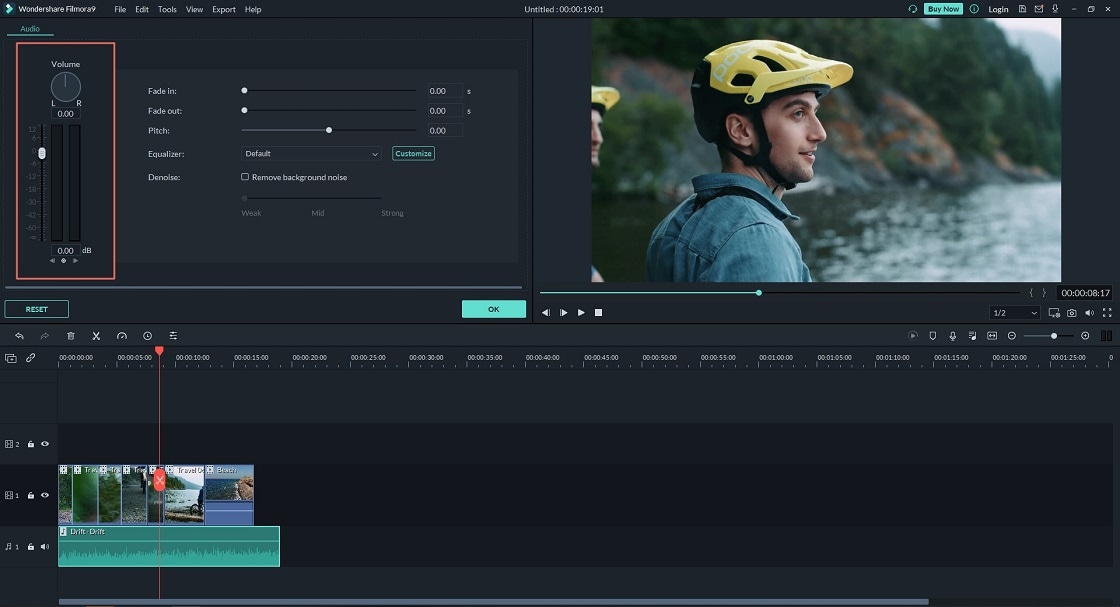
8 Adjust Audio Volume
Double-click on the audio in the timeline to enable the audio Inspector window first > go to the Volume tab. From there, you can drag the slider up or down to adjust the audio volume.
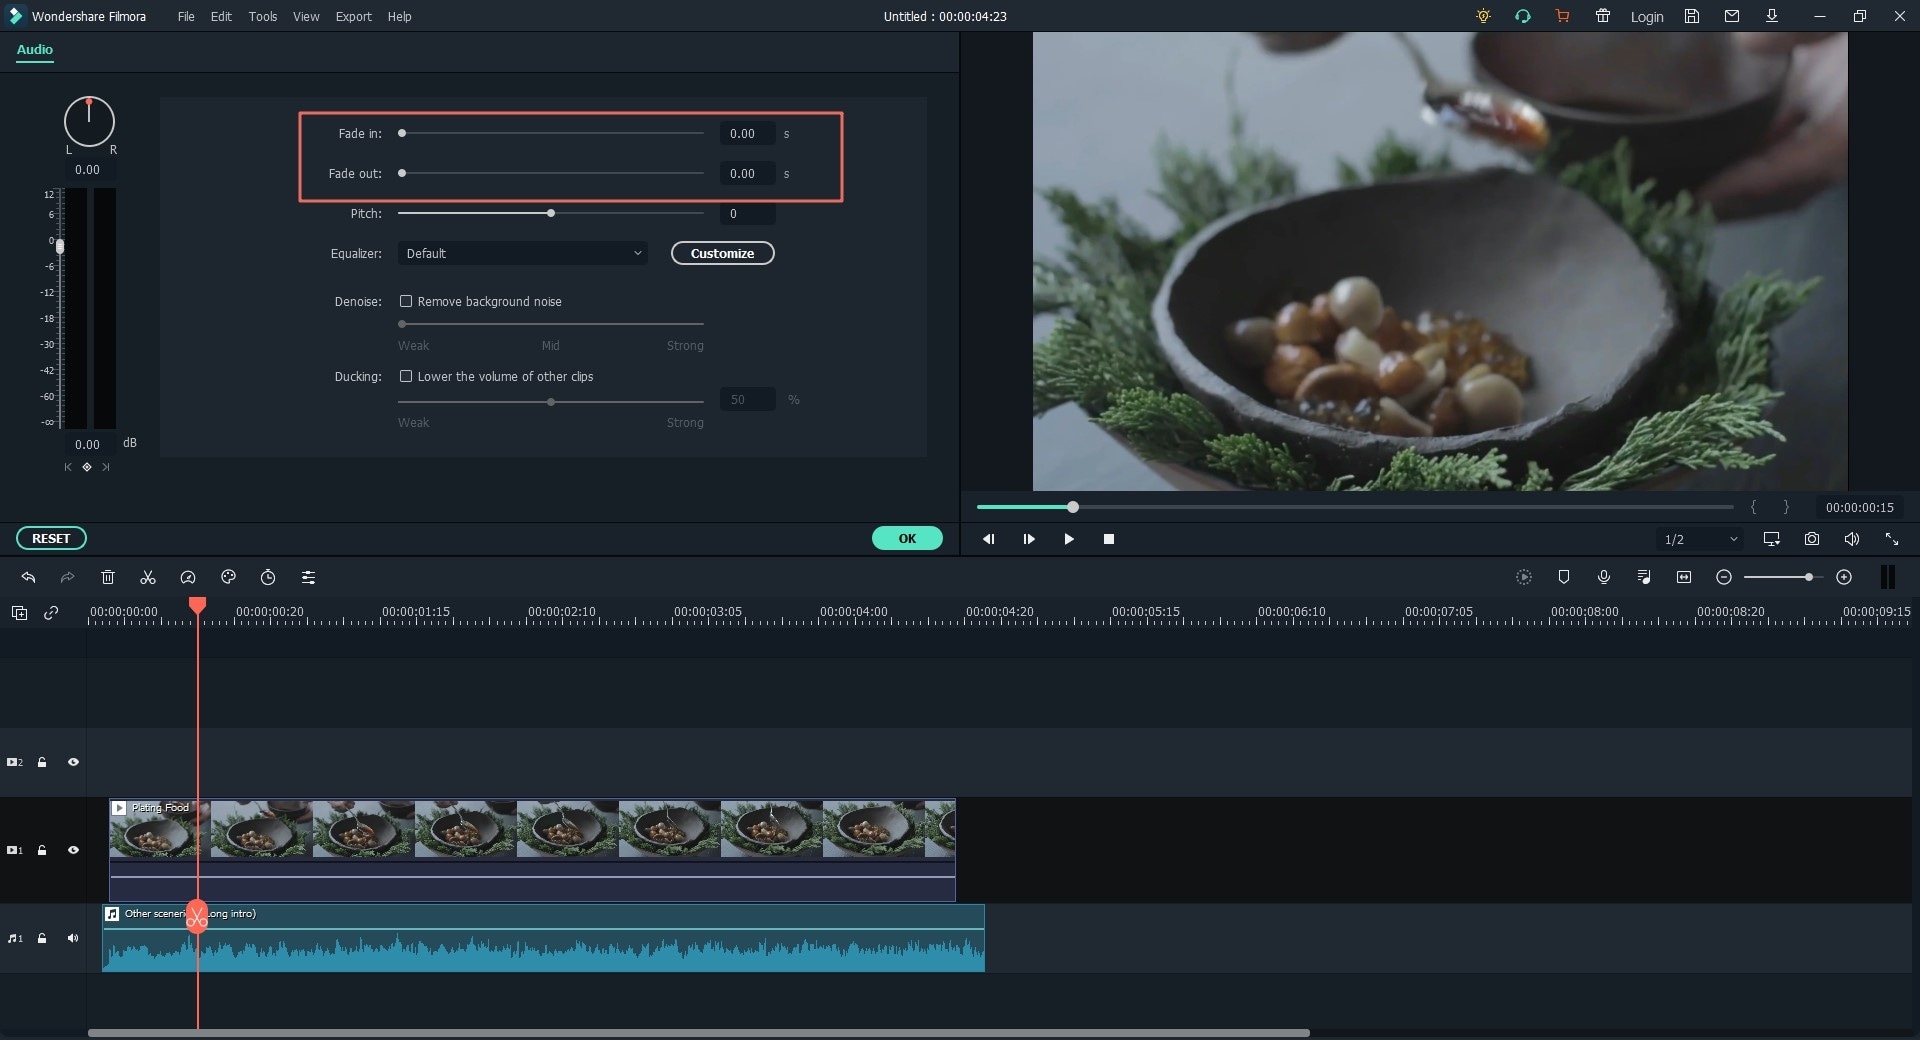
9 Fade in/out Music
Double click on the audio in the timeline, and in the audio inspector window, drag the slider in the Fade in/out tab to apply Fade in or Fade out effect.
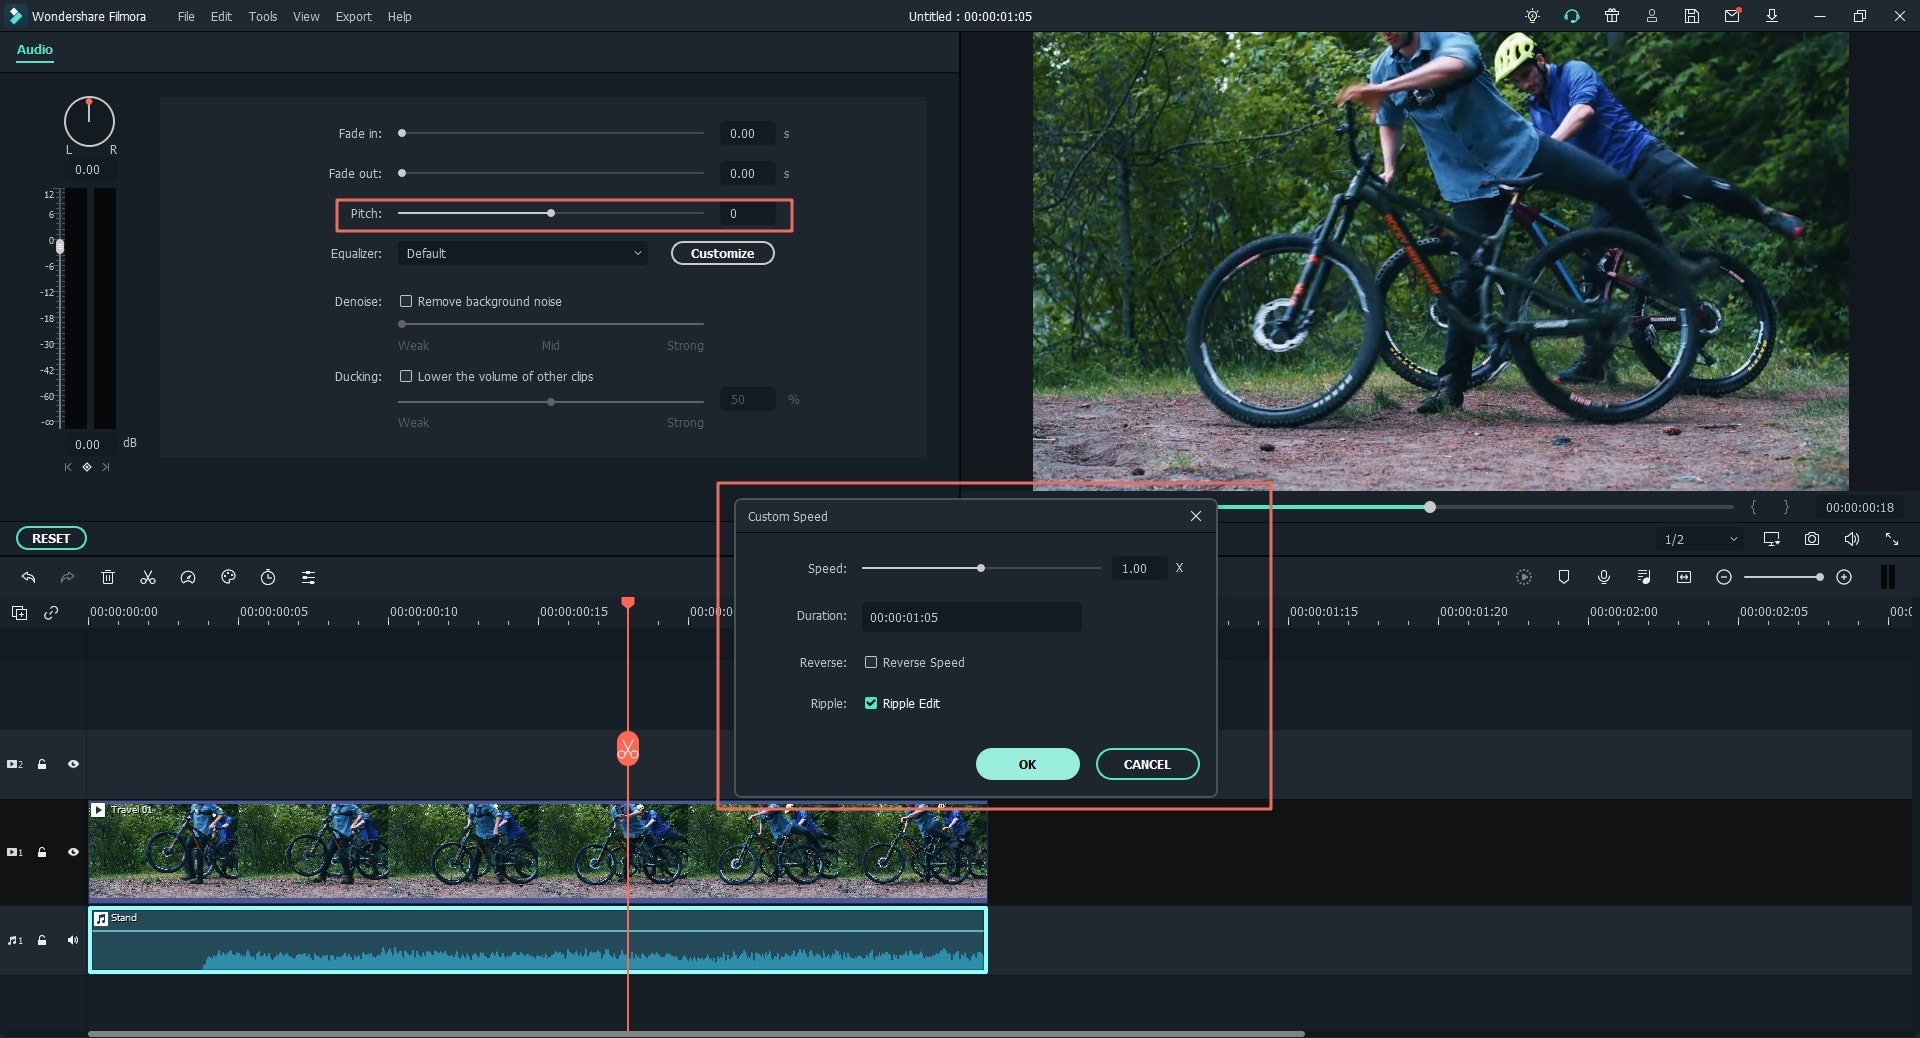
10 Speed and Pitch Adjustments
First click on the audio in the timeline, and find the Pitch option on the audio inspector window. Adjust the audio speed and pitch by moving the slider. And then click "OK" to confirm.
11 Replace the Original Audio of the Video
Follow the below steps to replace the original audio from the video:
1. Import the video and audio files to media library in the program. And drag the video to the timeline.
2. Right click on the video and select the option of "Audio Detach". And the video and audio will be separated.
3. Click on the audio in the timeline and click "Delete" to remove the original audio.
4. Drag the audio from the media library to the timeline. And export the video with new audio track.
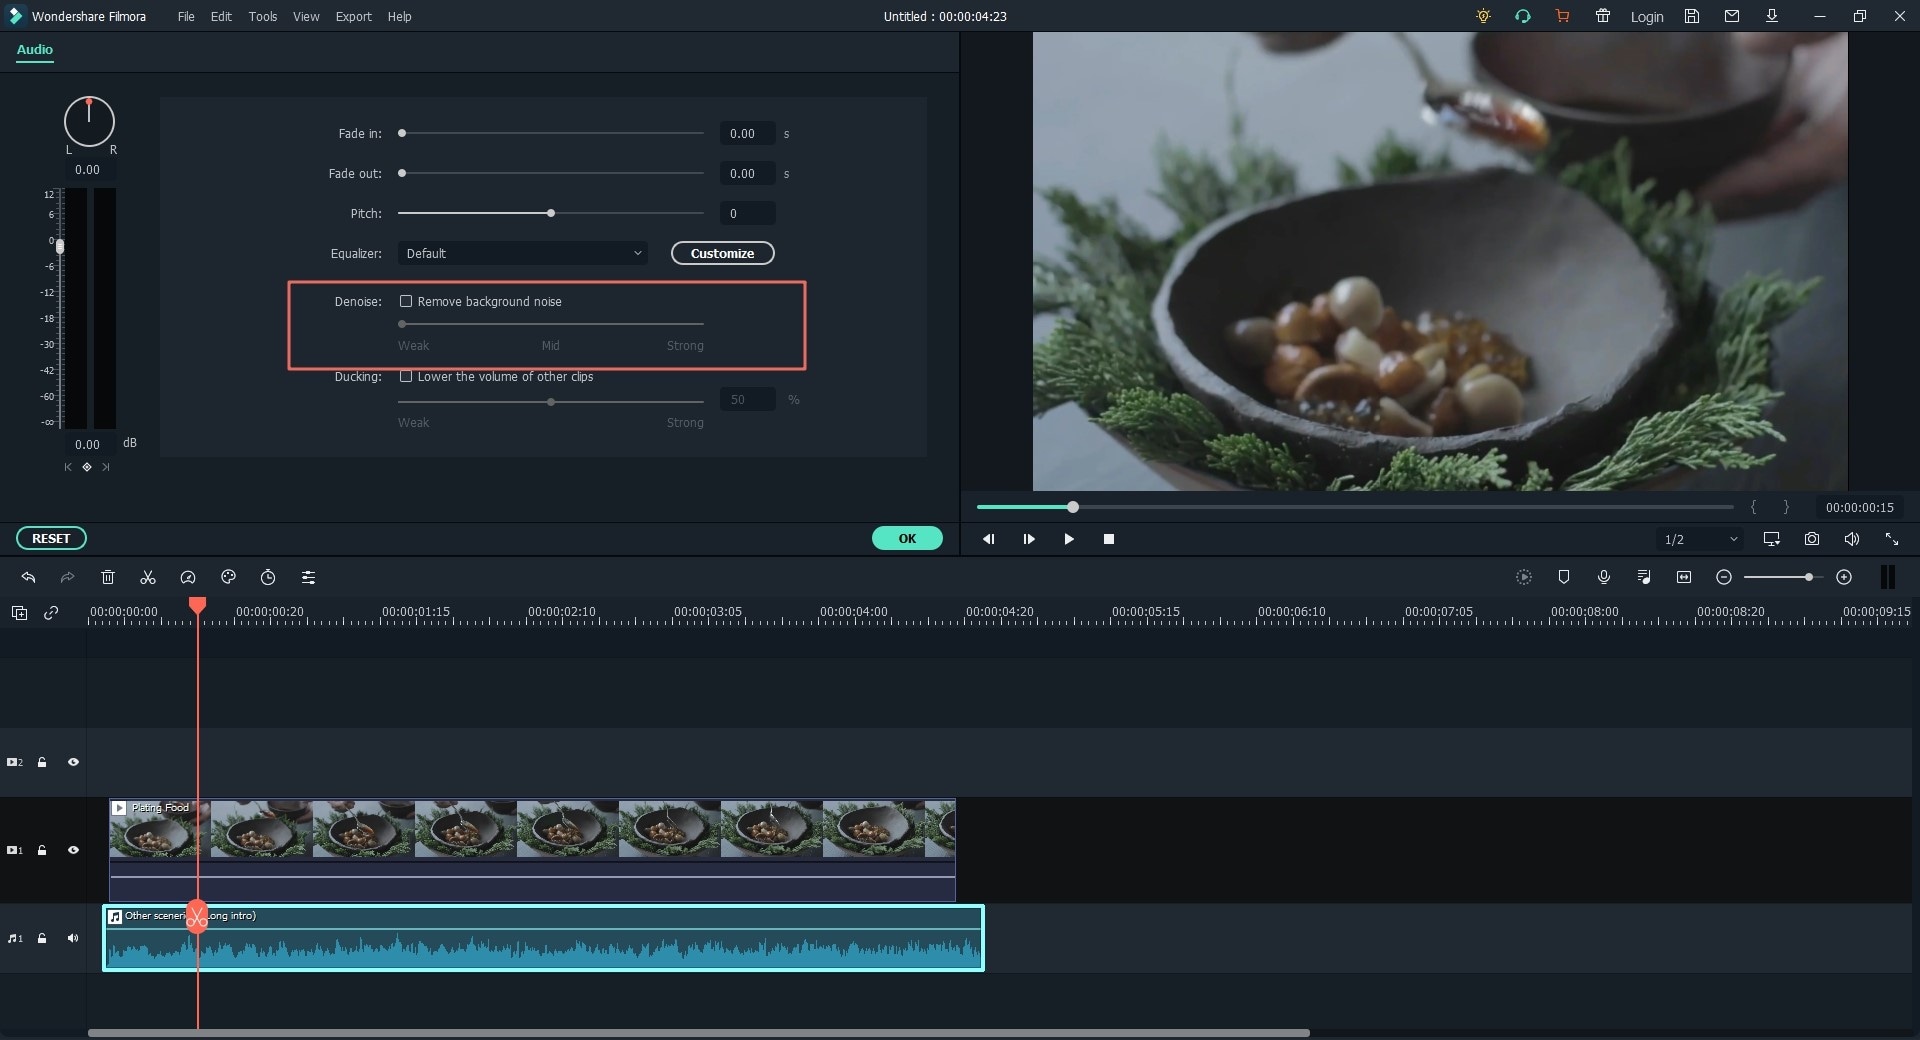
12 Audio Denoise
Double click on the audio in the timeline. In the opened audio inspector window, check the "Remove background noise" option and slide between weak, mid and strong to de-noise the audio.
13 Audio Equalizer
The Audio Equalizer feature in Filmora Video Editor allows you to adjust the audio to achieve a good mix of sound. So that to allow different vocals and instruments to sound good together.
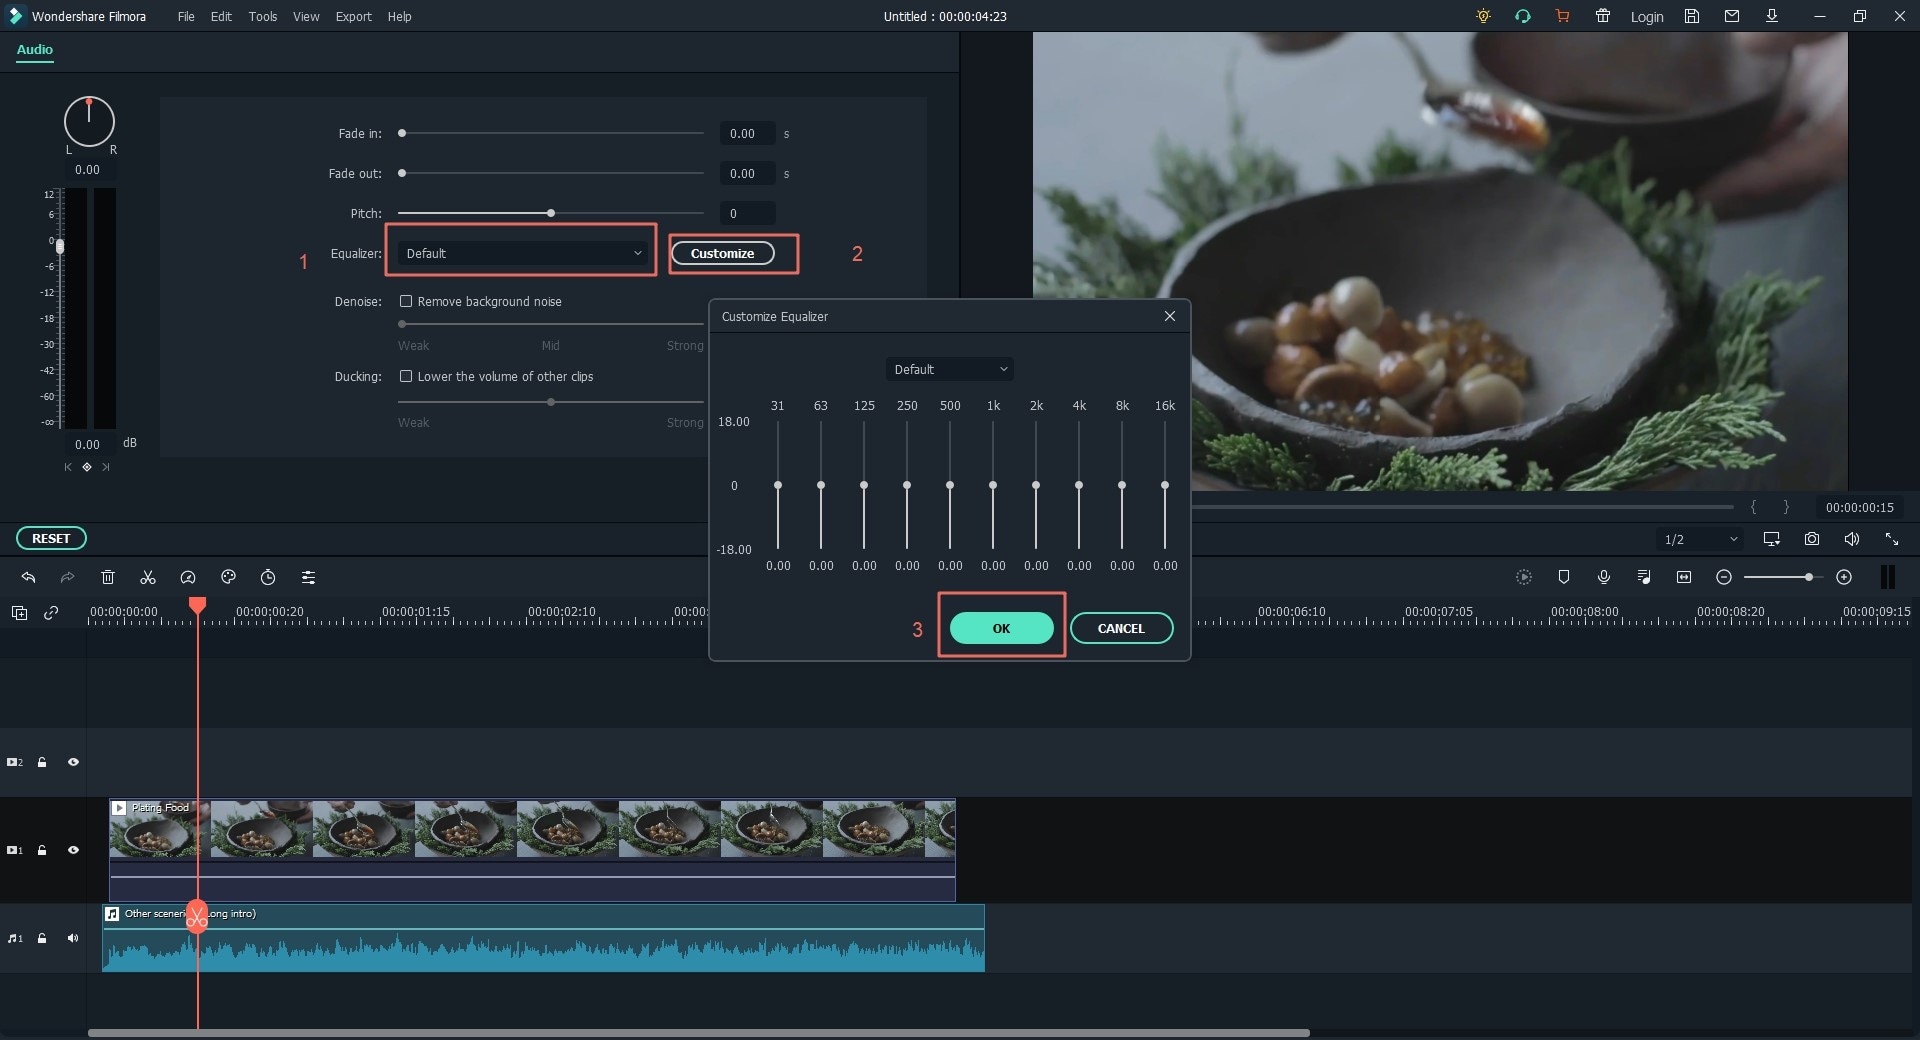
To adjust audio equalizer, open the audio inspector window by double clicking the audio in the timeline. And then in the "Equalizer" tab select the options including Default, Pop, Rock' n' Roll, Soft, Classic, Low Bass, Sparkle, Ska, Country, Techno, Hard Rock, Acoustic, Custom, Folk, Blues. You can also click on the "Customize" button to do advanced settings.
14 Audio Mixer
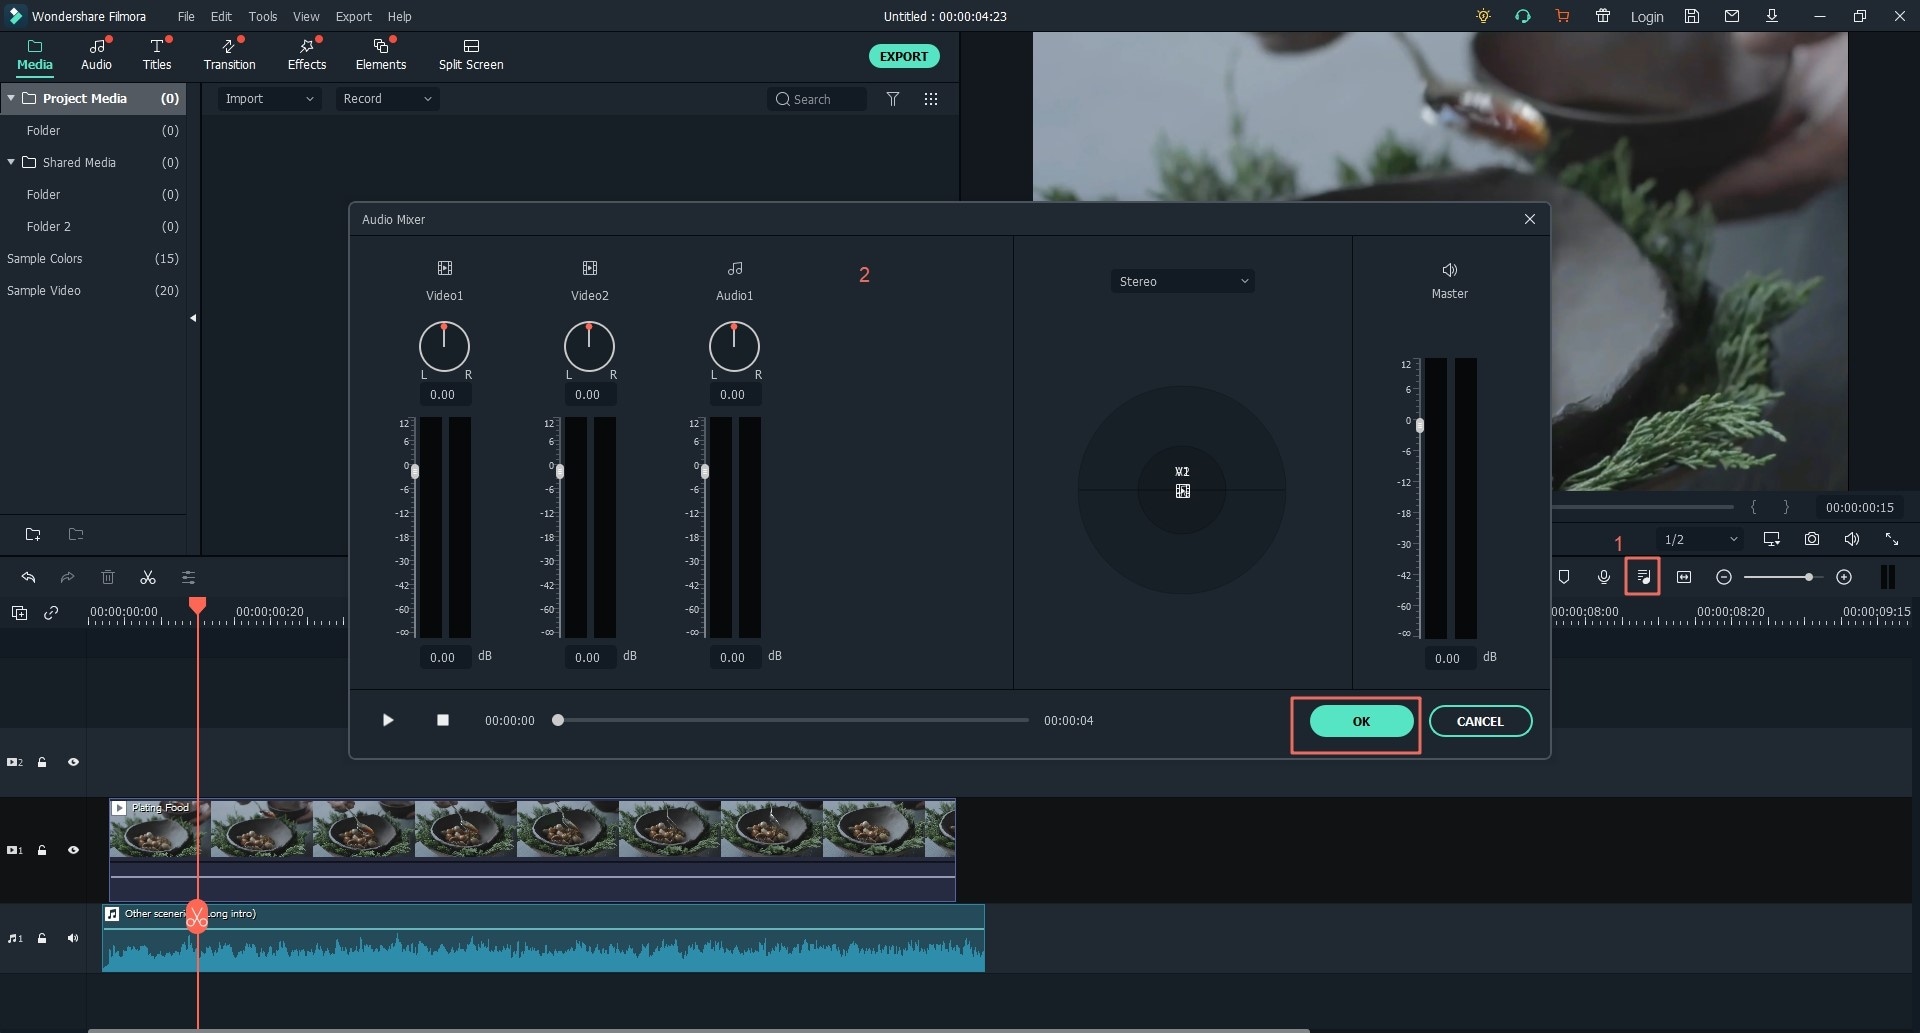
To enable the "Audio Mixer" feature in Filmora Video Editor, you can click on the "Audio Mixer" button in the toolbar. And in the pop-up window, the tracks are highlighted in purple. You can roll the small circle in the pan to switch the sound. Or you can click on the "Master" button to adjust the master volume to be higher or lower.
When the settings are done, click "OK" button
15 Audio Ducking
Audio ducking means reducing the volume, such as background music, to make your conversation clearer. The steps to use are as follows:
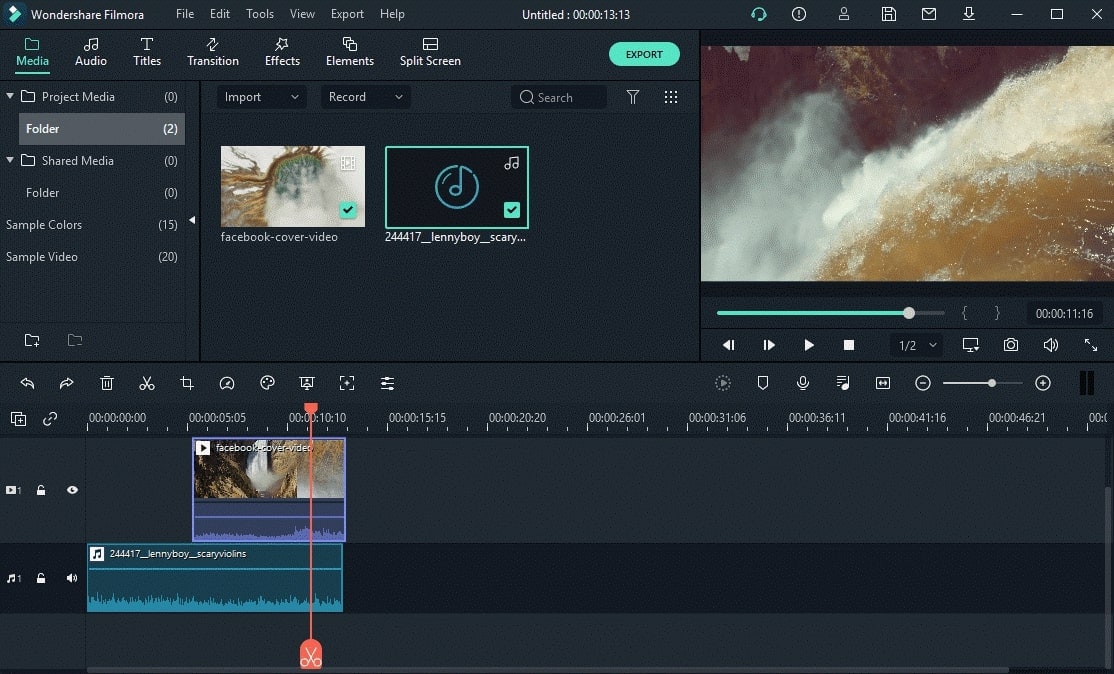
Select one or more clips for which you want to implement the avoid ducking.
Note: You will choose the clips that you want to hear more clearly, not the ones you want to lower the volume.
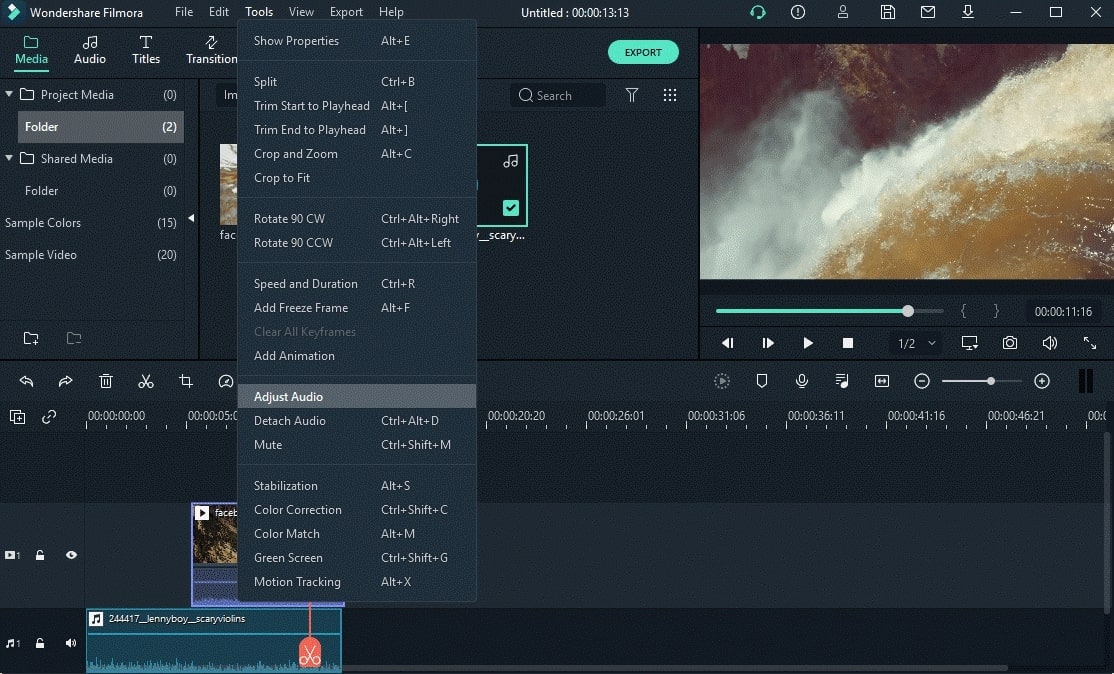
Right-click and select Adjust Audio.
Check the box next to decrease the volume of other clips. You can use the pop-up slider to adjust the reduced volume.
Popular Products


