

Filmora Video Editor
How to Split, Trim, Crop, Combine, Edit, etc. A Video?
In this page, you'll learn how to cut, trim, join, or edit a video file in details. Let's follow the guideline to edit your video files.
- Split Video Clips and Scene Detection
- Add Watermark or Logo to the Video
Now, let's check the video tutorial first:
1 How to Split Video Clips and Use Scene Detection?
There are two ways to split a large video to several clips: one is to cut a video directly, the other is to split video using the Scene Detection.
Directly Split Video
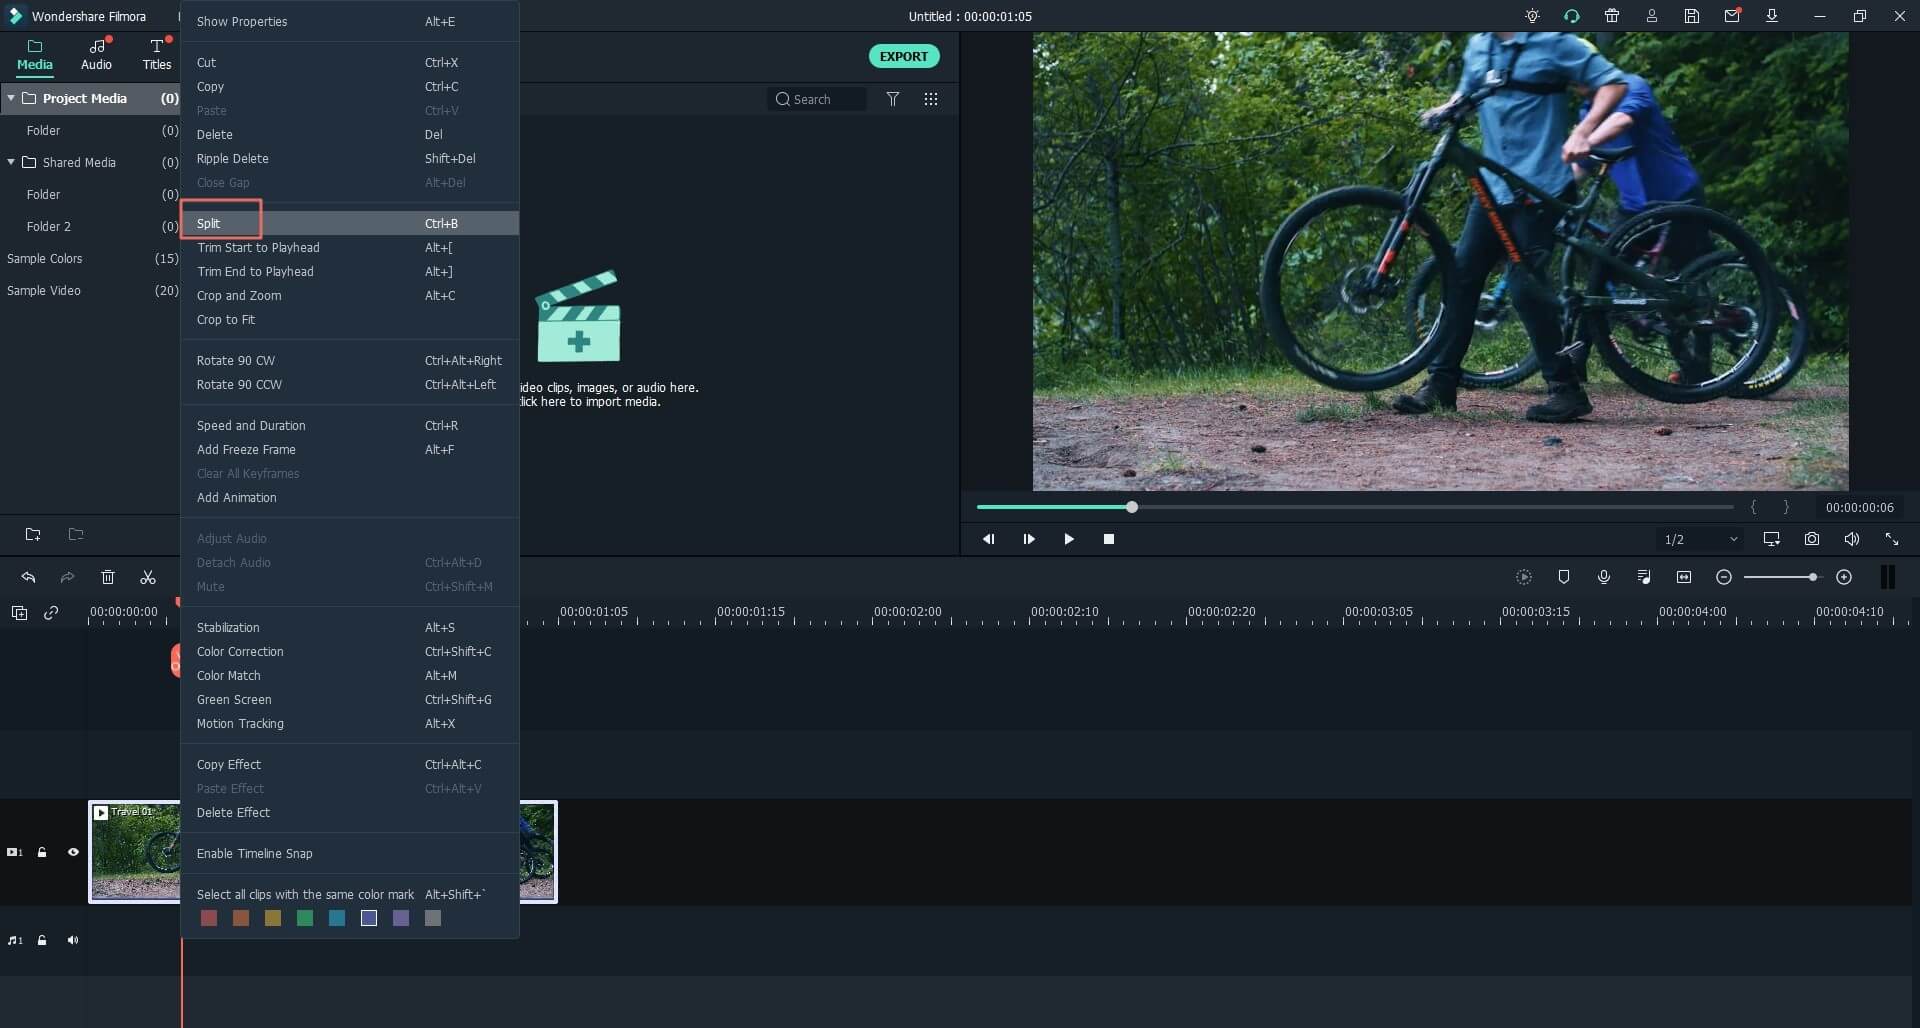
Move the cursor to the position of a video you want to split and click the scissors icon or right-click on the video and select "Split".
Split Video in Scene Detection
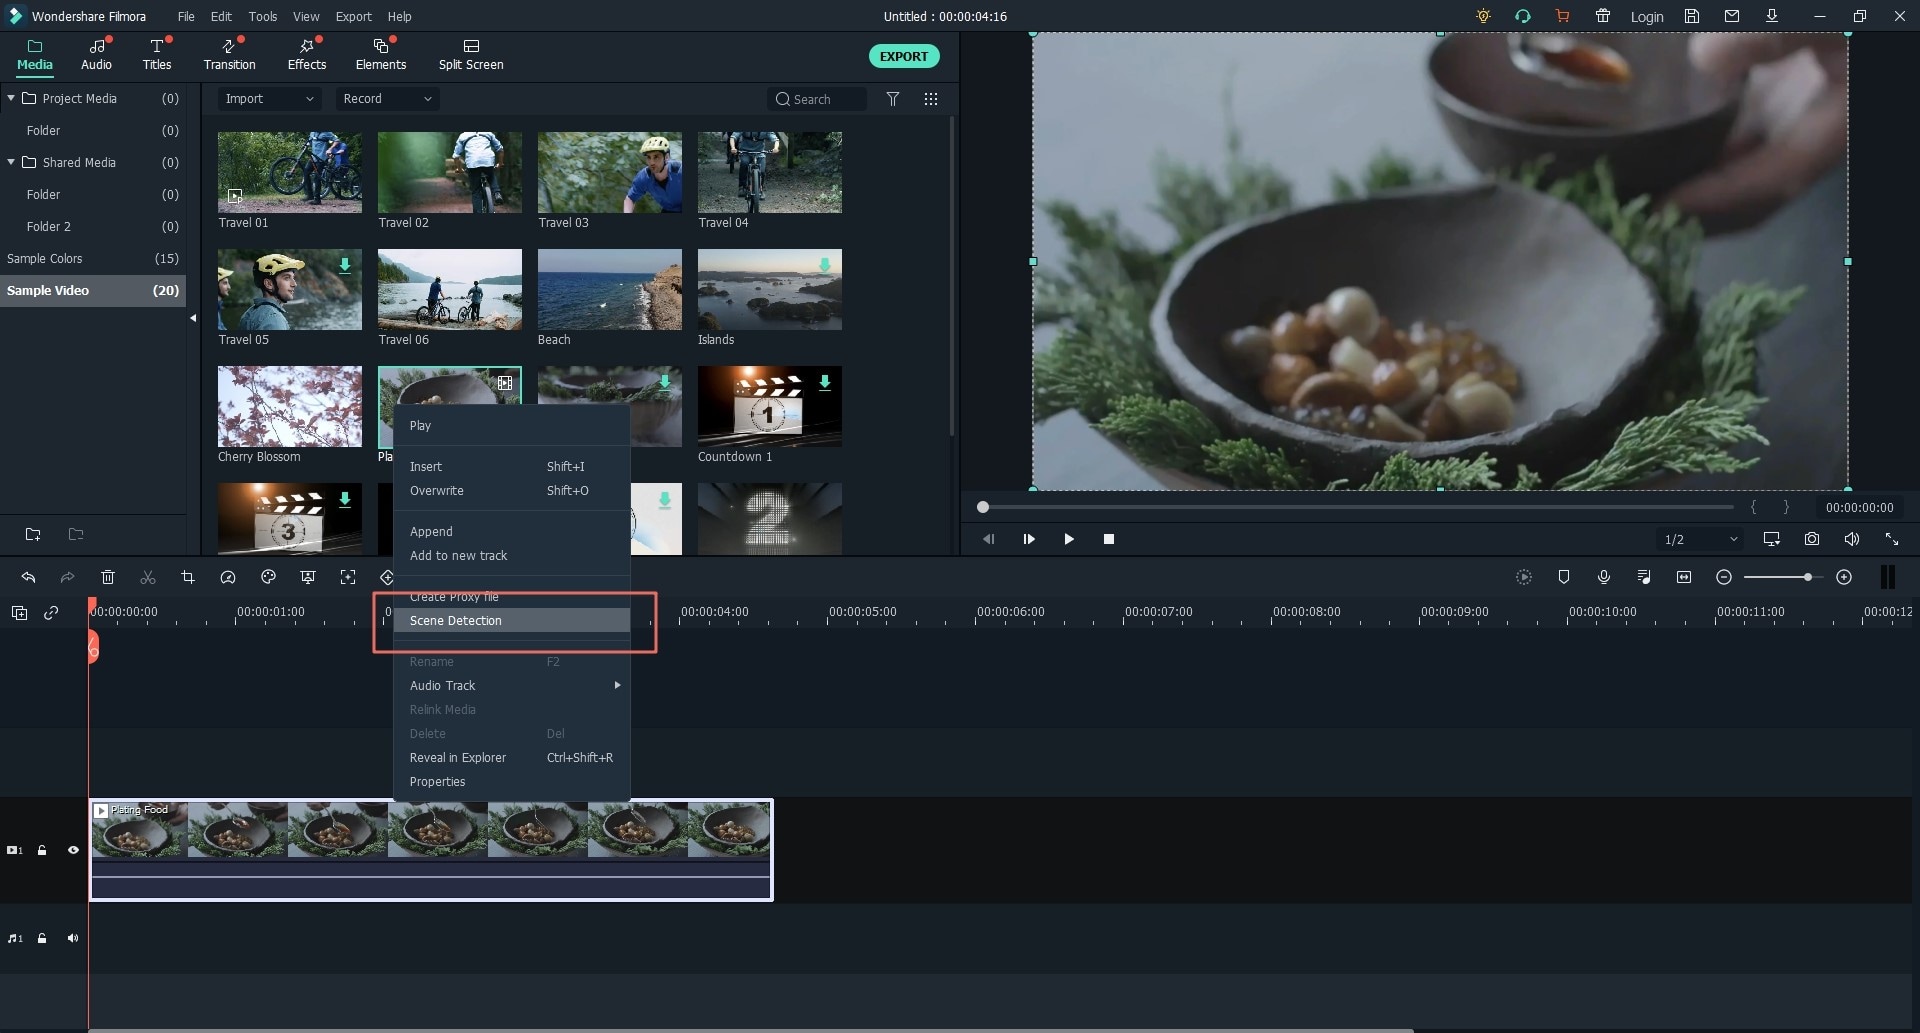
You can split video by using the Scene Detection. In the medial library, right click on the media file, and select the "Scene Detection" option.
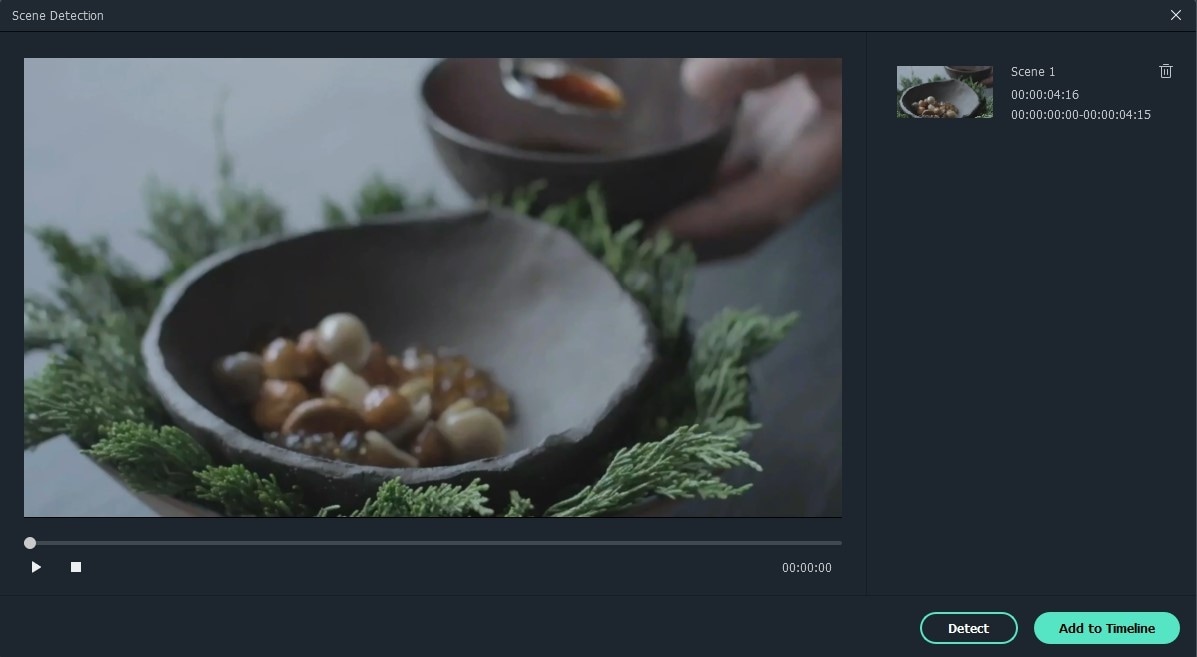
In the pop-up window, you can click on the "Detect" button to let Filmora Video Editor detect the scenes. When finish detecting, you can simply select the unwanted scene and click on the "Delete" button to remove the clip. And then click "Add to Timeline" to apply the scenes to the Timeline for further editing.
2 How to Trim Video Clips?
Trim the Video from the Beginning or the End of the Video
Drag and drop the video to timeline. Move the cursor at the beginning or end of the video clip until you see the pointer. After then move forward or backward the pointer to trim the beginning or end part of the video.

Cut a Middle Section of a Video
To cut a video section, you should firstly make it an independent section. Move the cursor to the beginning and end of the video section you want to cut and click the scissors icon to separate it from the original video clip. After then, right-click on the video and select "Delete".

3 How to Crop Video Clips?
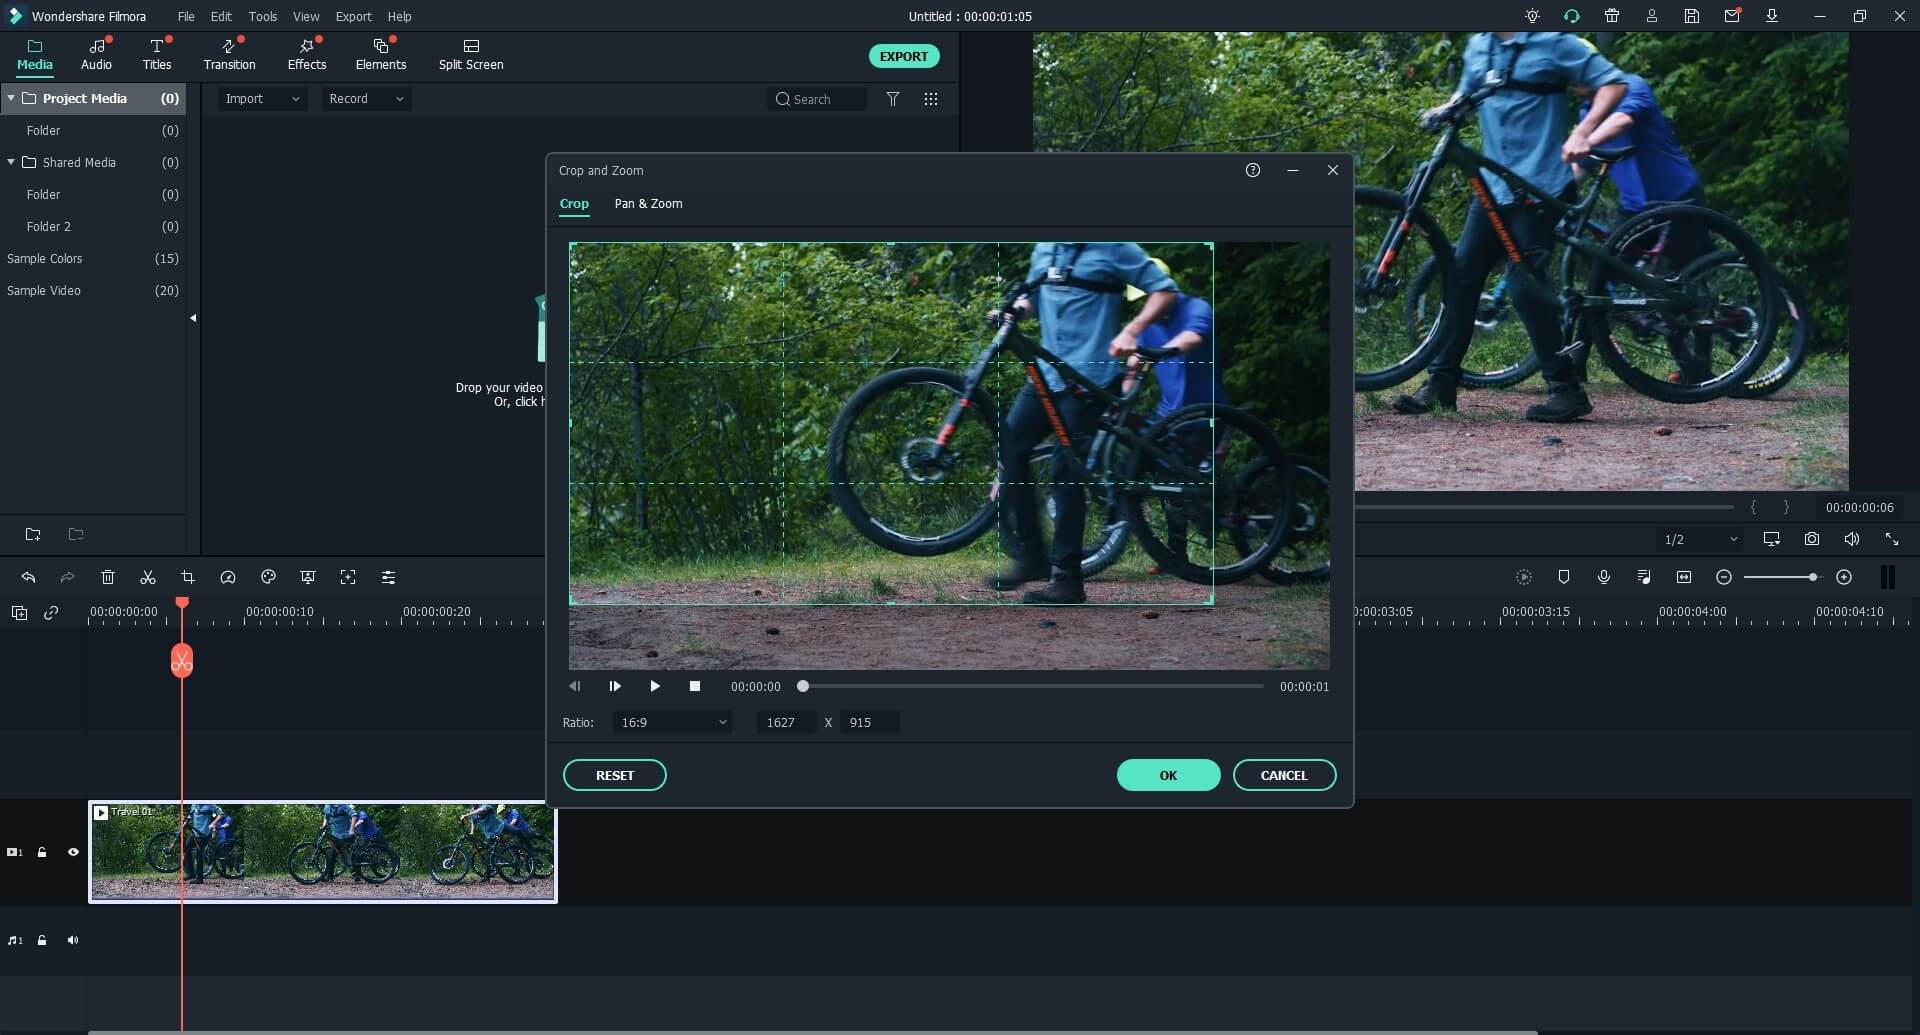
Drop the video in timeline and either click on the "Crop and Zoom" button above the timeline or right-click on the video to select the "Crop and Zoom" option. A new window will be opened.
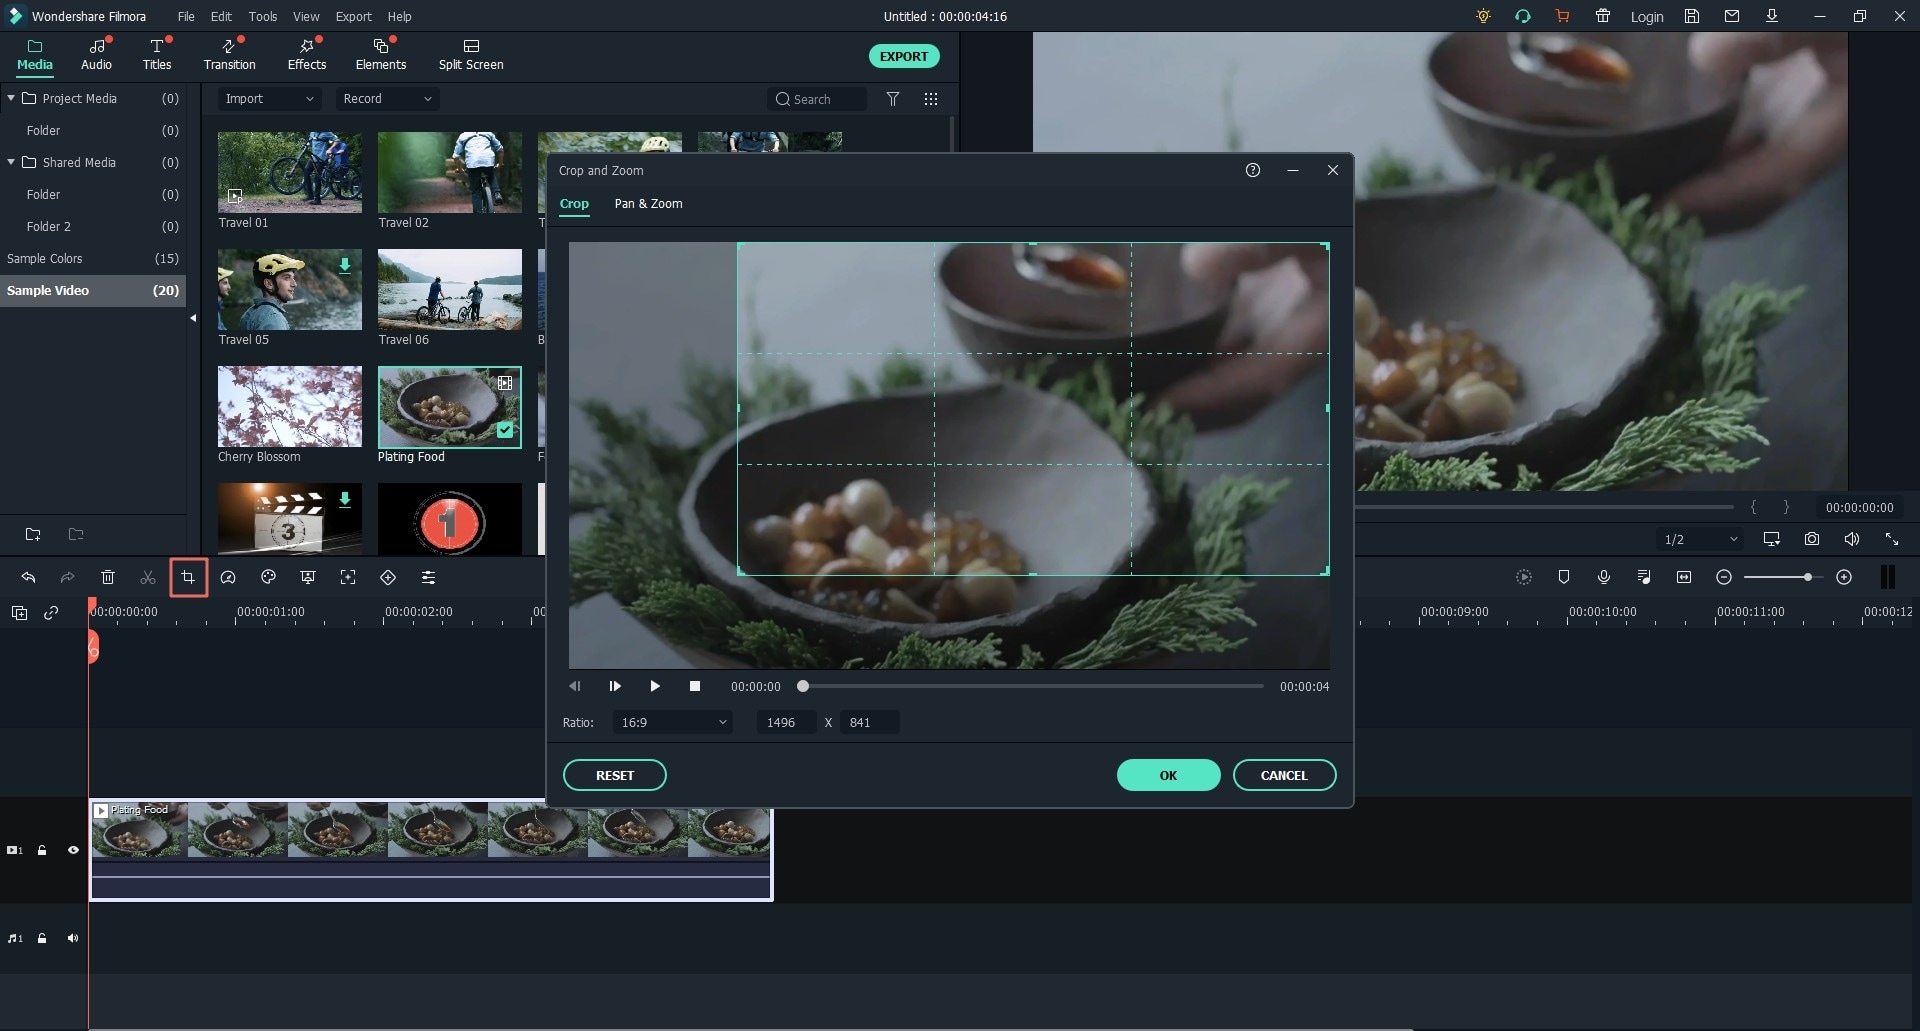
In the new window, check the frame you for the video: 16:9, 9:16, 4:3, 1:1 or customize a frame, then drag the frame over the video to adjust it. After that, click "OK" to save the modifications.
4 How to Rotate Video Clips?
Have shot some videos with your mobile phone in wrong orientation? No worry! Filmora Video Editor helps you to rotate or flip the video in the right degree.
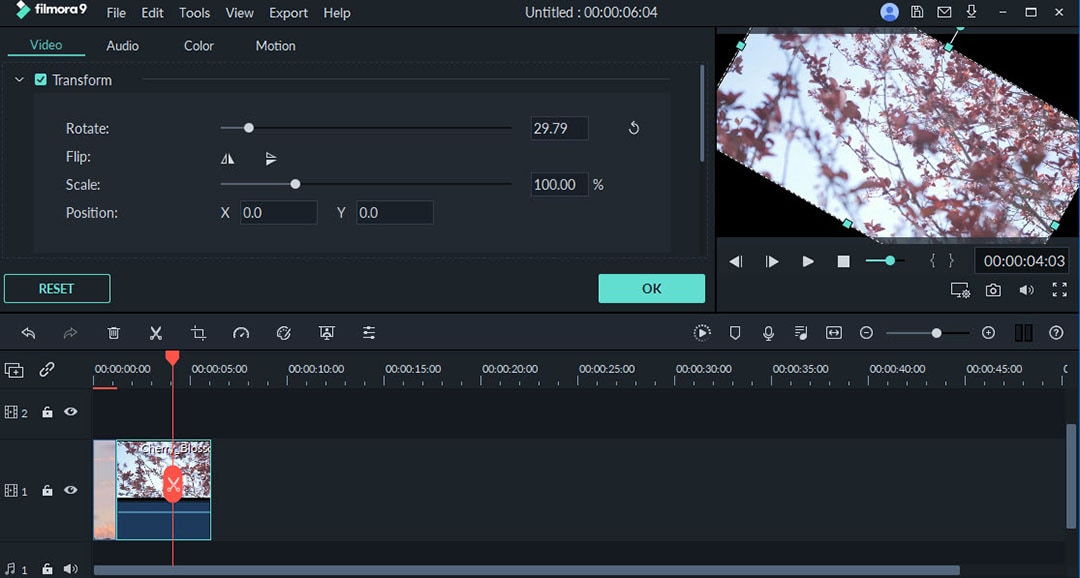
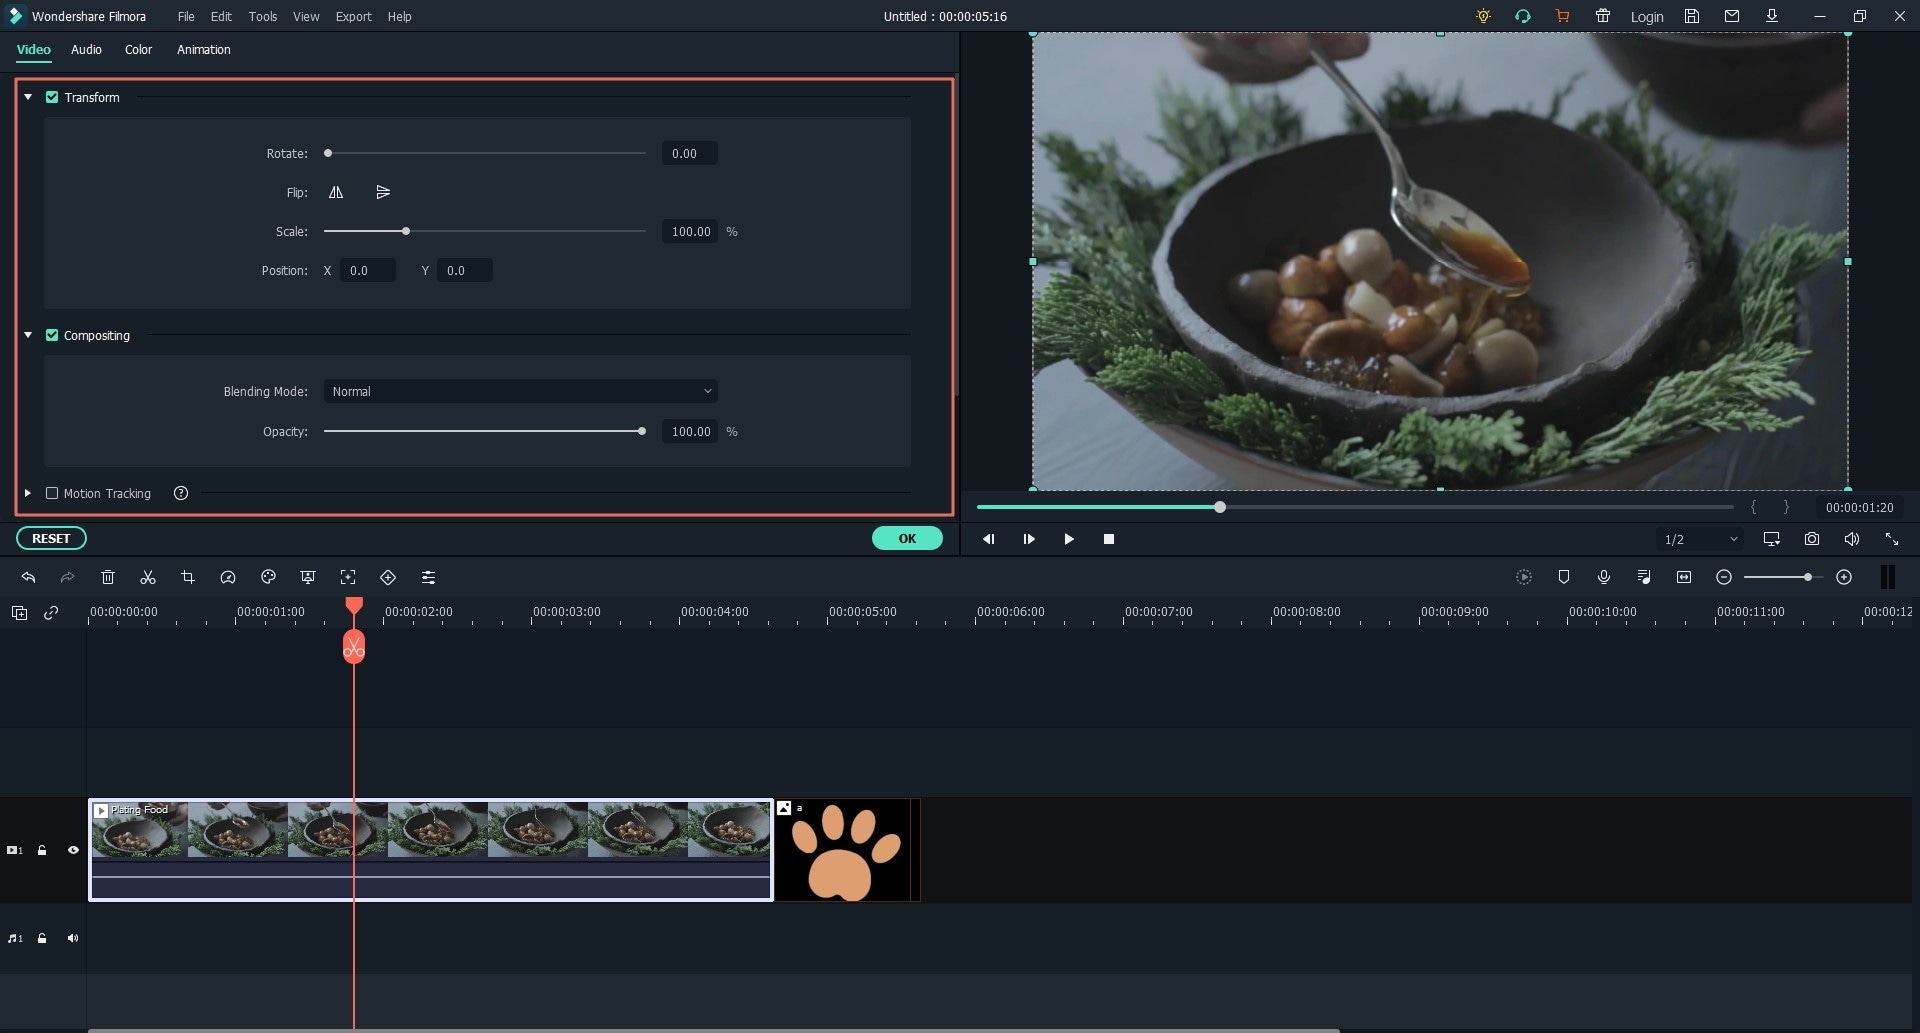
1. Double-click the video clip in the timeline to open the video editing panel.
2. Unfold the "Transform" option, and locate the "Rotate". Here, you can rotate your video by dragging the slide or type any degree in the blank area.
3. You can also click "Flip horizontal" or "Flip vertical" to flip the video.
4. Preview the rotating effects and click "OK" to save the changes.
5 How to Combine Video Clips?
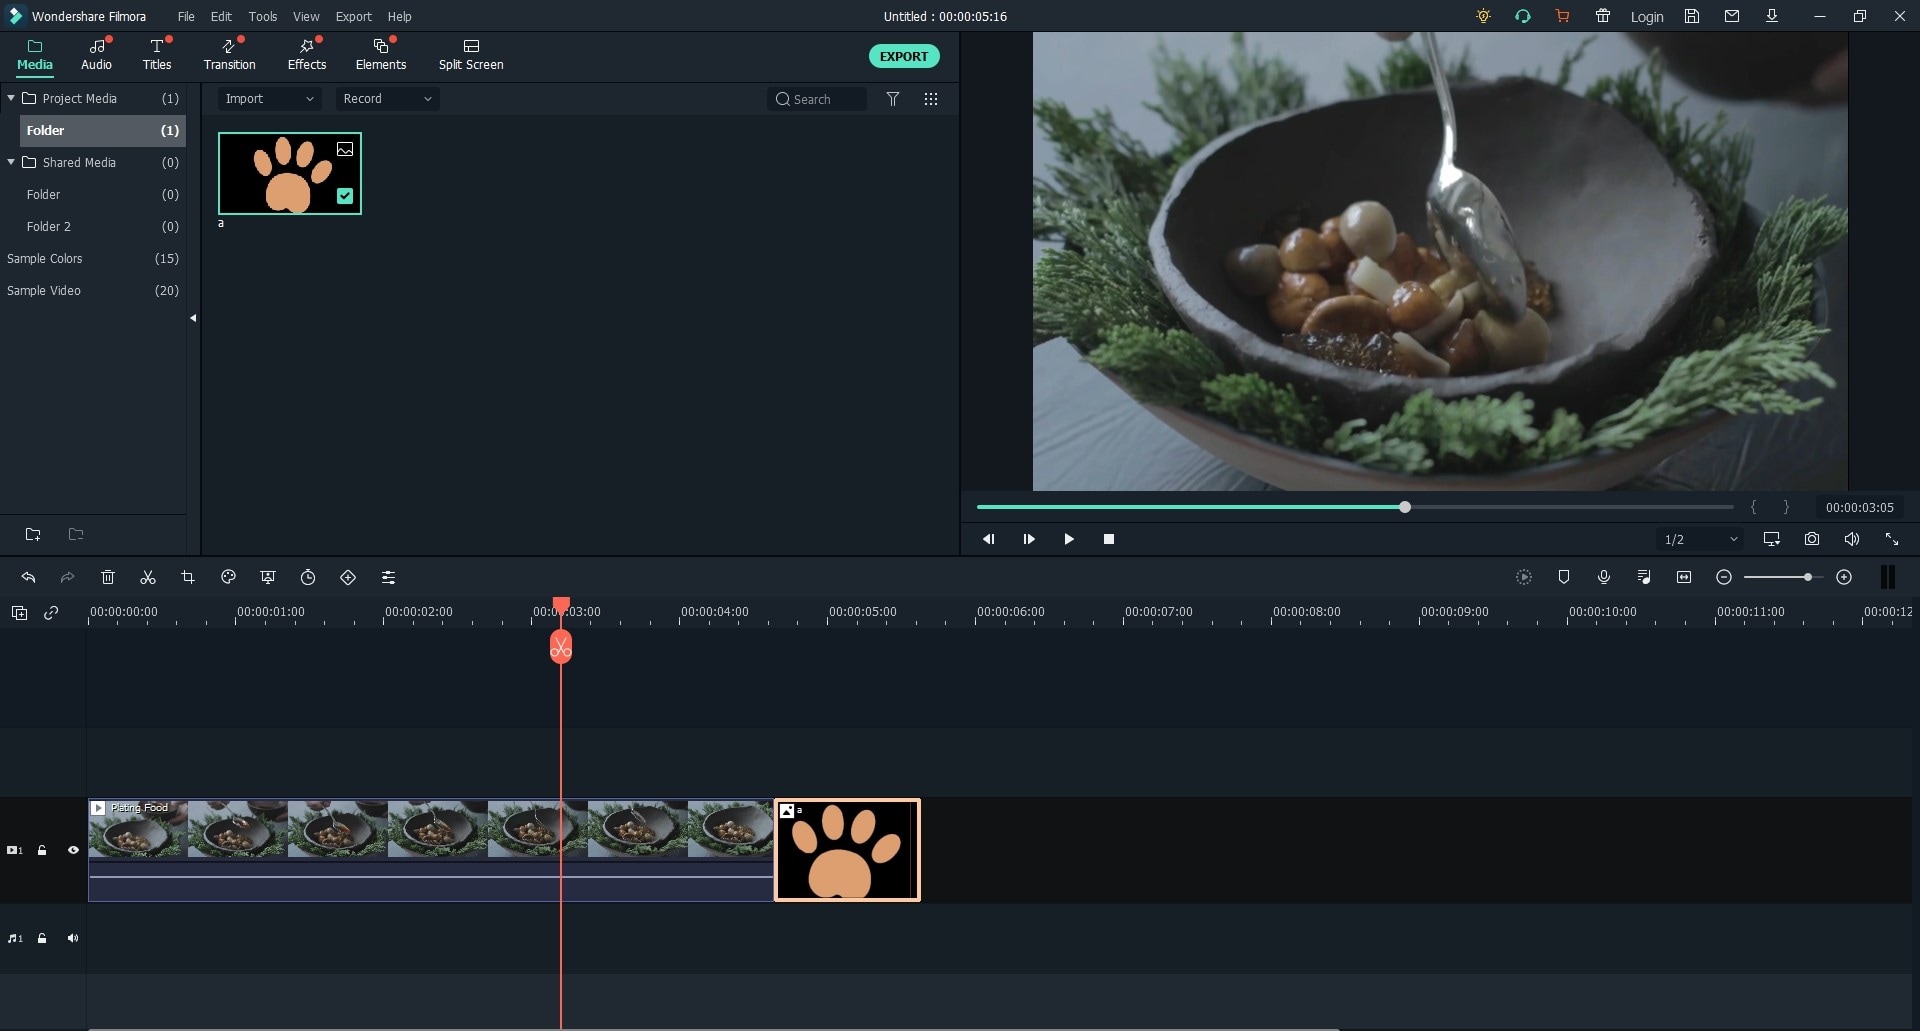
Filmora Video Editor allows you to join several video clips and photos into a video. Combing videos and photos into a single file is simple: drag and drop video clips and photos to timeline in order. When you export them, they will become a single video.
If you want to get detailed guide on how to combine photos to make a video, please check this page to learn more.
6 How to Copy and Paste Video?
Filmora Video Editor allows you to copy and paste clips. And the relative spacing (time and track) will be kept. You can copy and paste the copied clip at the end of the track or insert it to the location you want in the video.
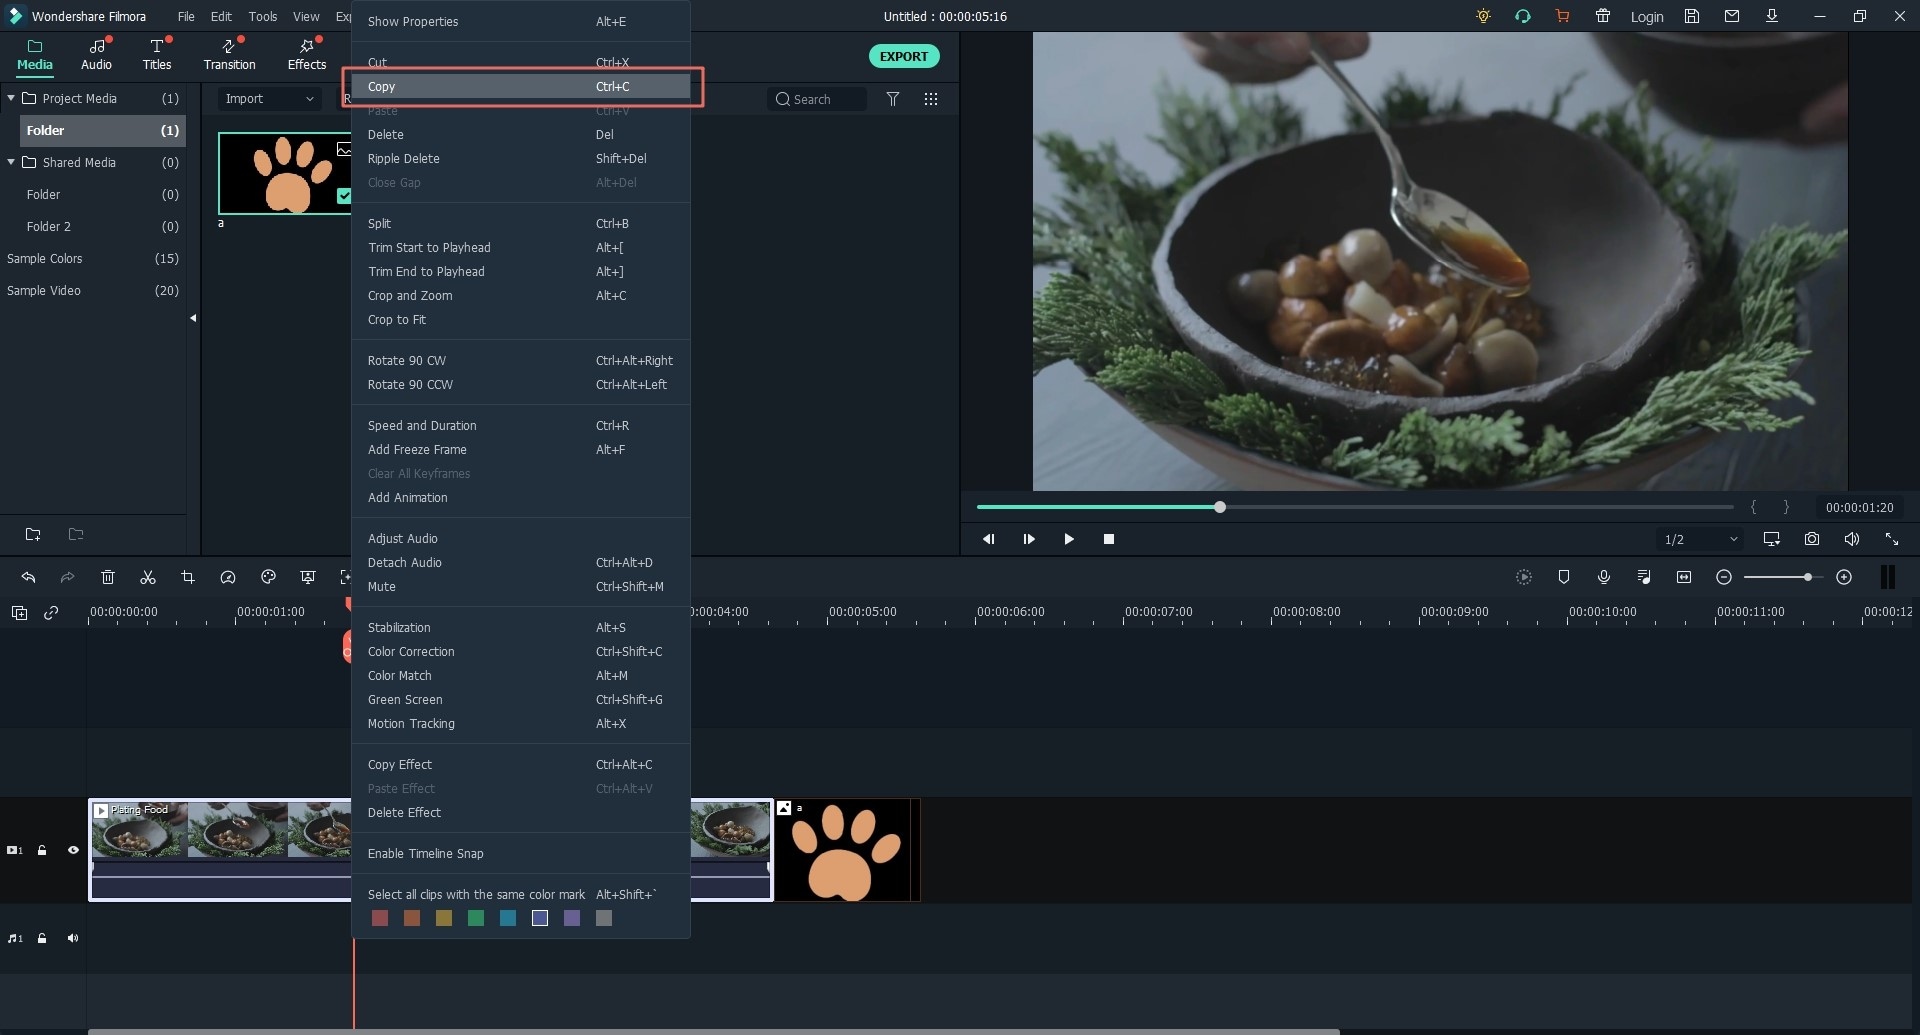
1. Select the clip from the video in the timeline, and right click on the clip to select the "Copy" option.
2. Right click on any location of the video, and select the "Paste" option to insert the clip to the video.
Tips: To copy and paste the clips in the video track, they will just be inserted into the video track, but not overwritten the original video. If you copy and paste PIP clip, the original PIP will be overwritten.
7 How to Enhance Video Quality?
Adjust Brightness, Contrast, Tint and Saturation for the Video
Double-click the video clip in timeline or the "Edit" icon above timeline to enable the Video inspector window. From there, you need to switch to "Color" tab and then you're able to adjust the video brightness, contrast, tint, and saturation as follows.
Change Video Playback Speed
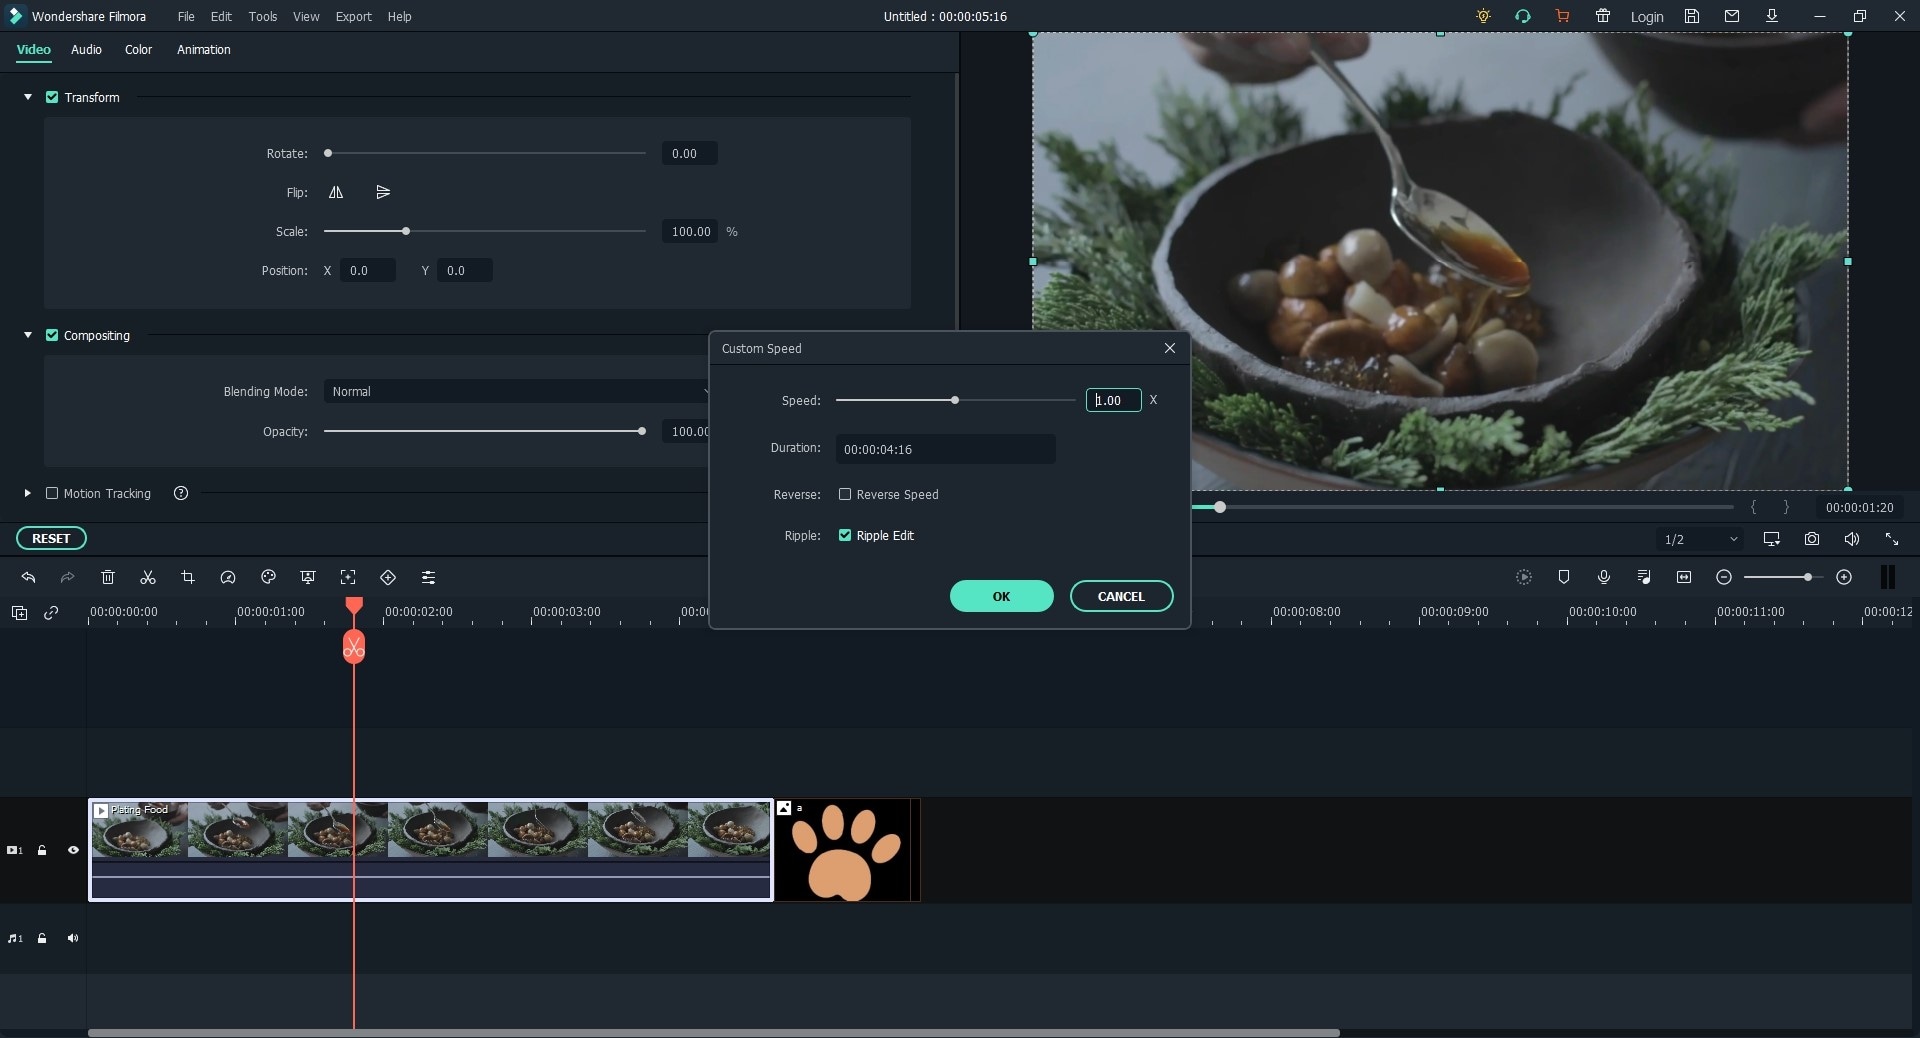
Right-click the video clip you wish to change the playback speed, and choose "Speed and Duration". Then, you can drag the slider in the Speed tab to change the video speed. You can change the video speed to 0.20x, 0.25x, 0.33x, 0.5x, 1.0x, 2.0x,3.0x, 4.0x, 5.0x as you like.
Rearrange the Clip Order in a Video Track
You can simply drag and drop the clip in the timeline to rearrange the clip order in a video track.
Zoom in/Zoom out Timeline
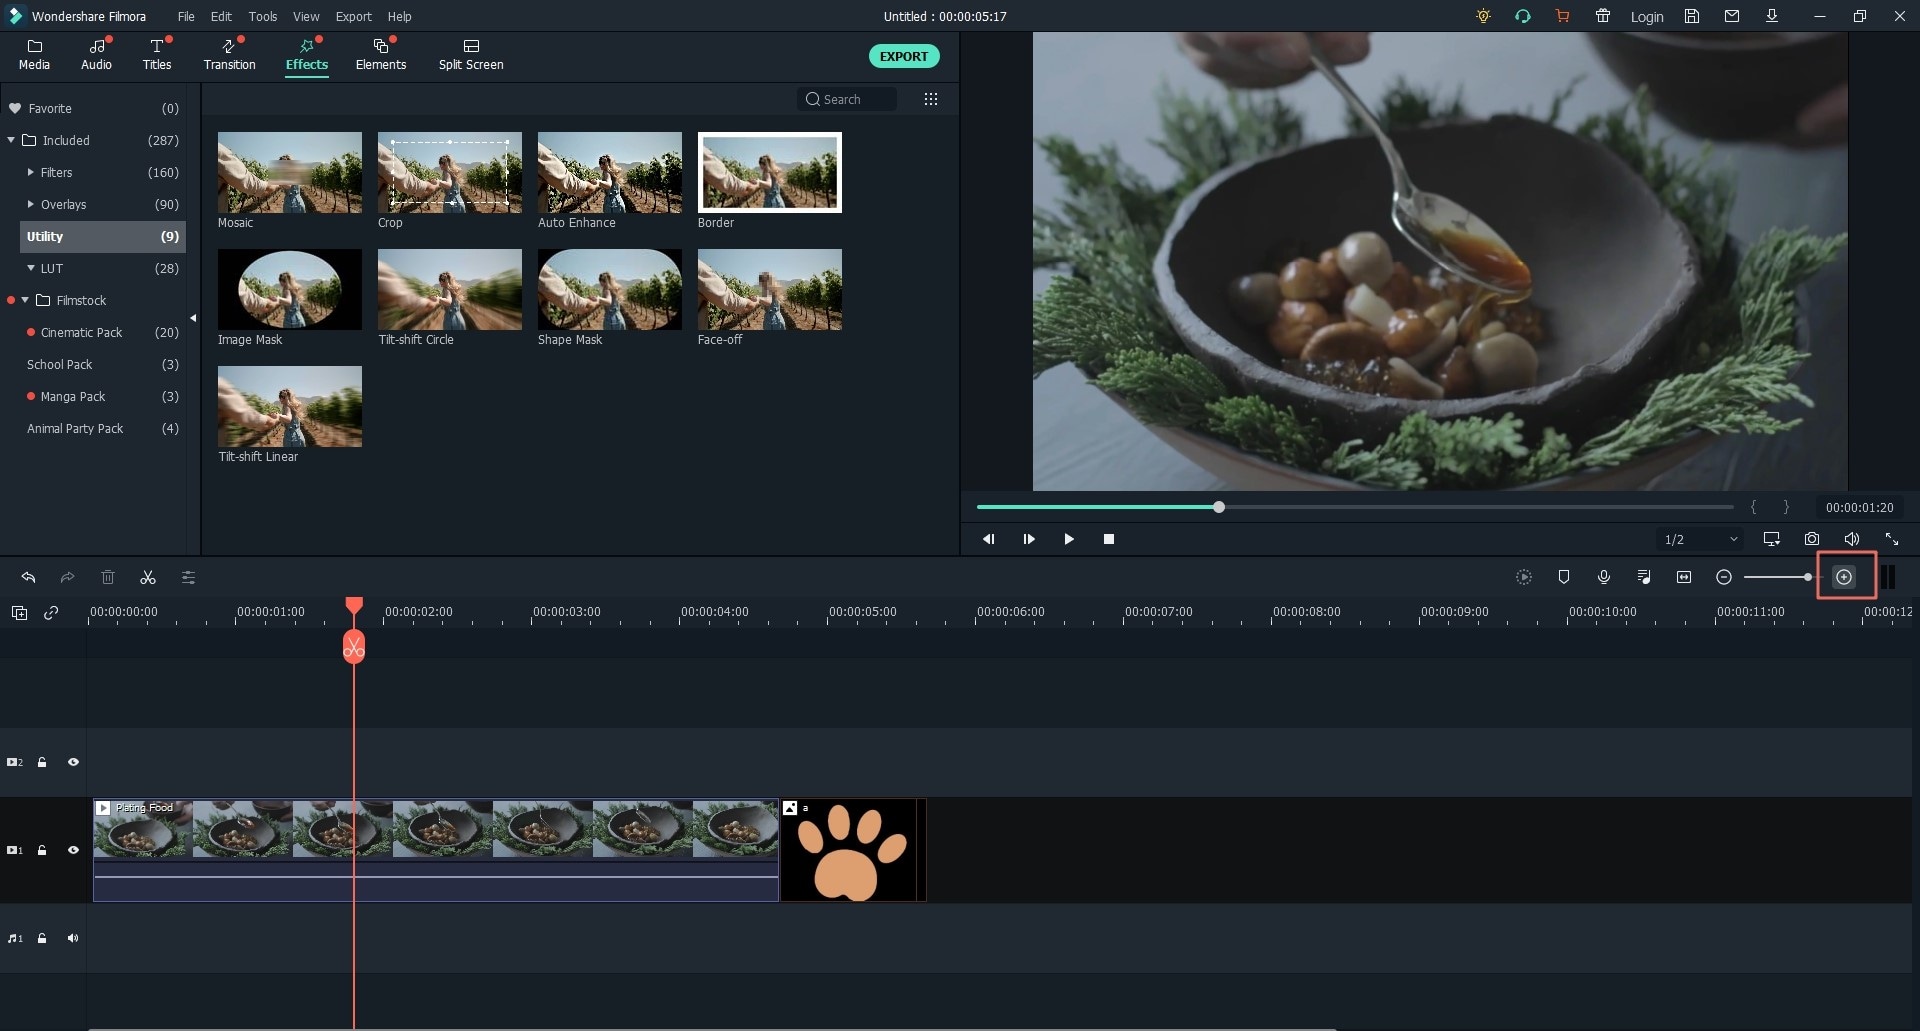
You can find the Zoom in/Zoom out slider on the right corner of the timeline. Just slide to Zoom in and Zoom out the video. Or you can click the "Zoom to Fit the Timeline" button to automatically zoom to fit timeline.
8 Resize the Video
You can resize video in 3 ways:
1. You can drag the video to the timeline and cut the unwanted part to reduce the video size.
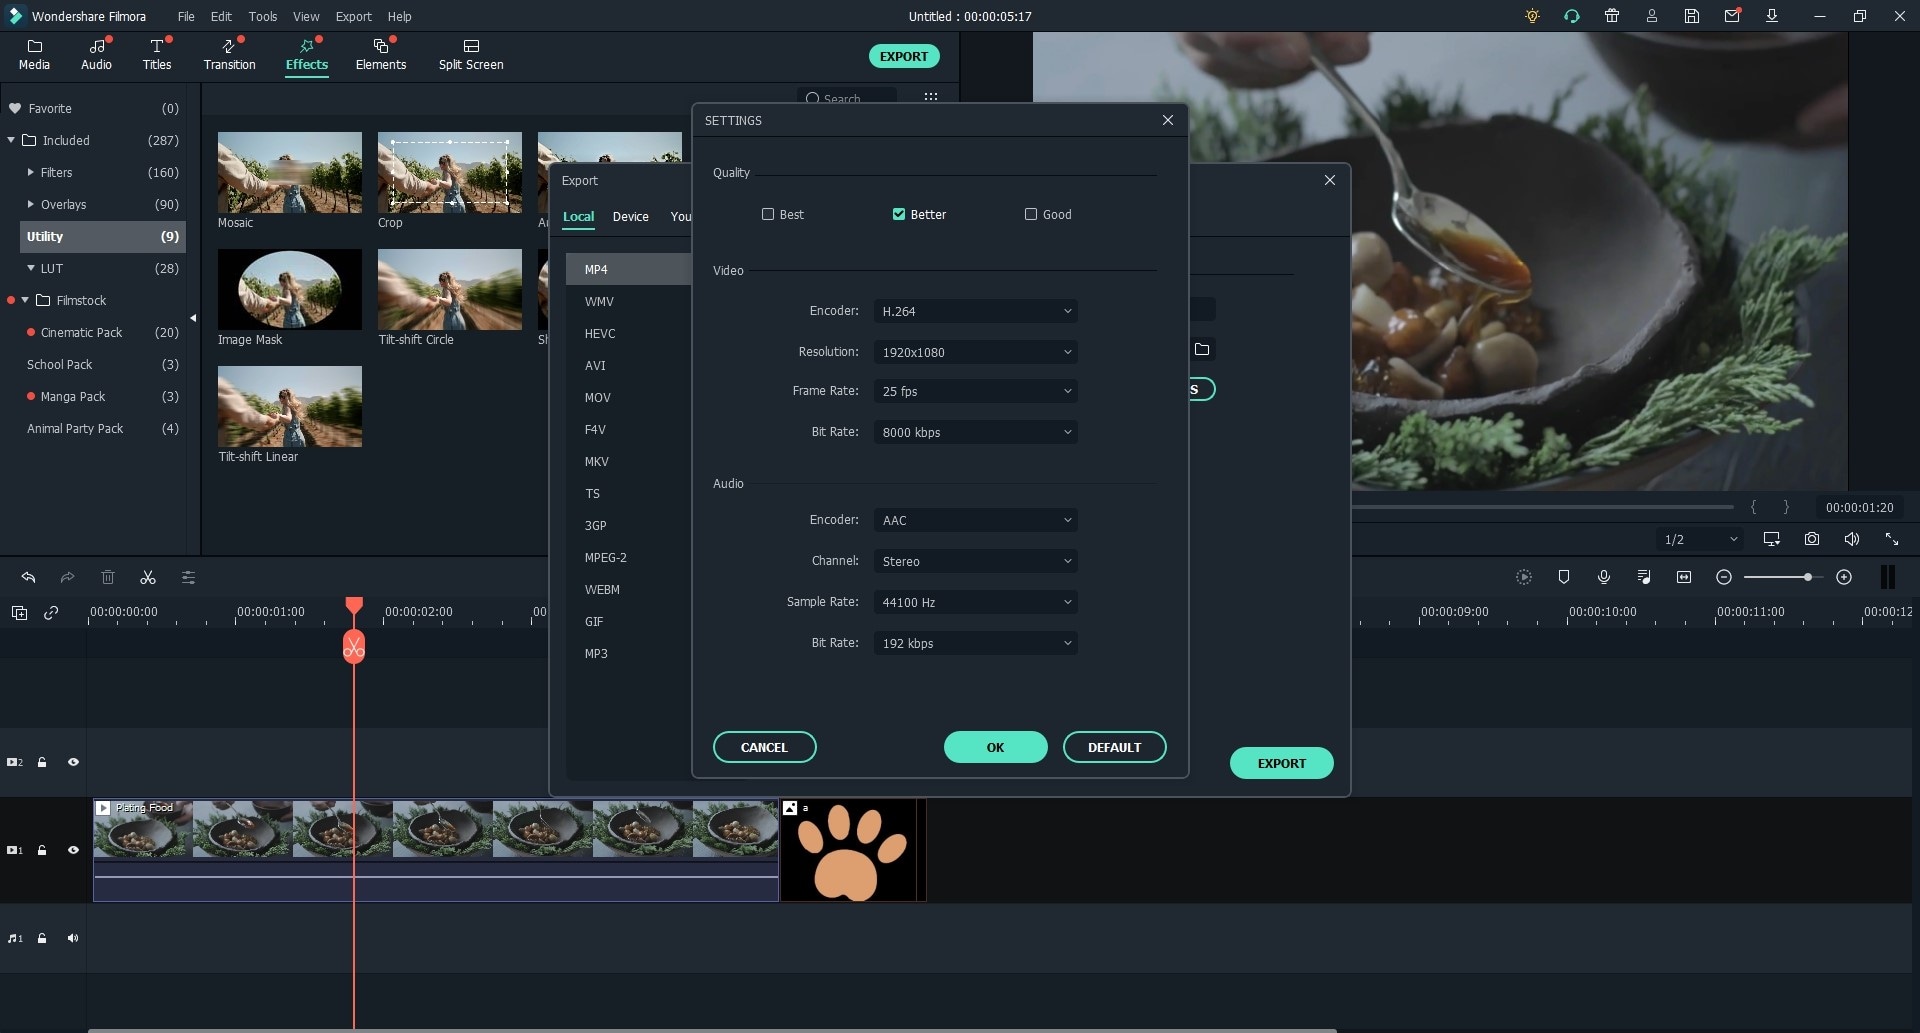
2. You can also go to the output window, and change the video parameter, including resolution, bit rate and frame rate.
3. Another way to resize a video is to crop the video in the timeline and then adjust the resolution.
9 Ripple Edit
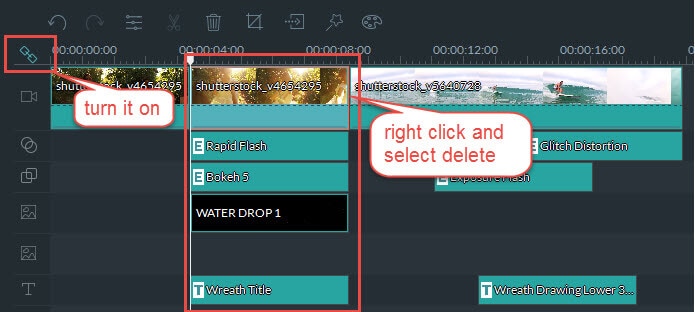
If you enable the "Auto Ripple" on, it will let a single edit ripple to the rest of the video to make everything in the same way you design. When you add a new element to the project, all the added effects will be shifted along as a group. You can click on the "Chain" icon to unlock the combination.

You can also use ripple edit feature to delete ripple without affecting other elements in the video track. Turn the "Auto Ripple" on and select the clip, and then right click to select "Delete", all the applied effects will be deleted. While the other elements will not be affected, and the order of other elements will not be changed.
10 Add Watermark or Logo to Your Video
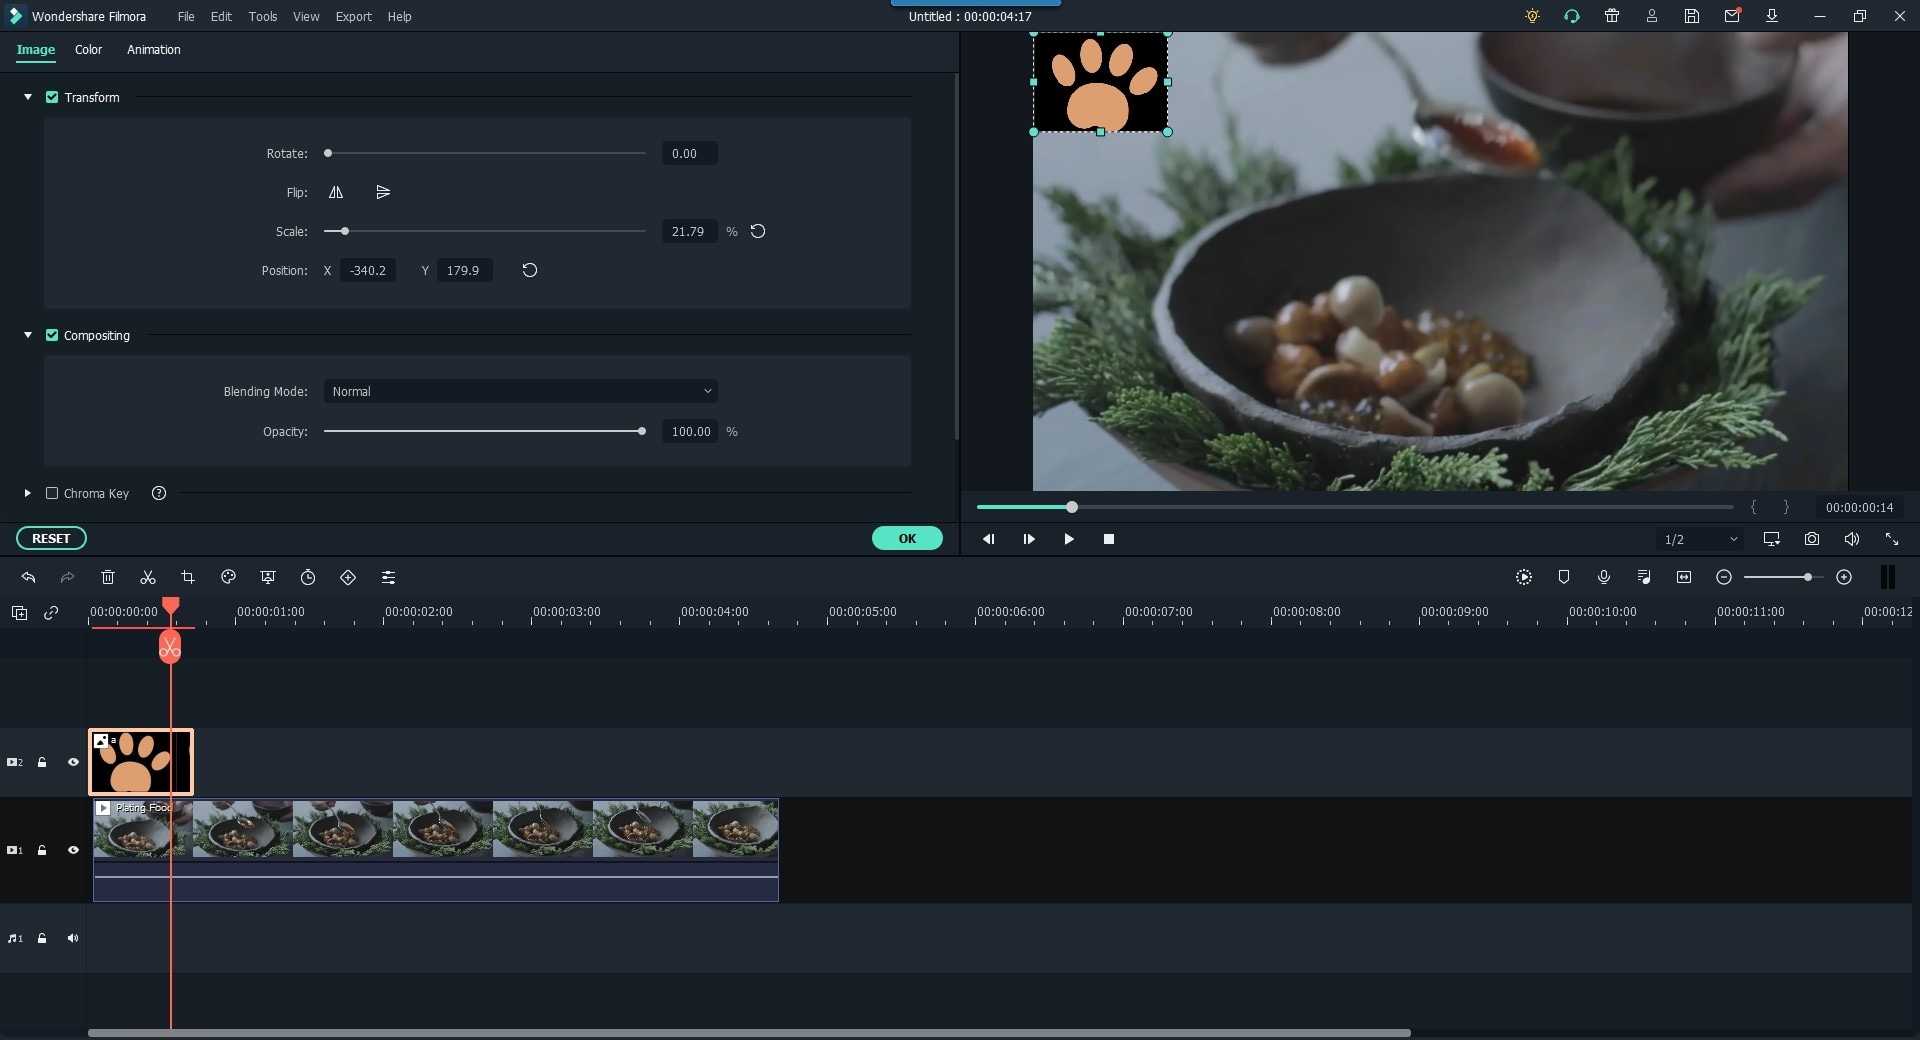
To add a watermark or logo to your target video, you can follow the below steps:
1. Click "Import" button to load the watermark or logo image to the Media Library.
2. Drag the watermark image or logo icon to the PIP track, then double-click on the image to open the editing window.
3. Go to the Preview window to customize the logo position and size, then unfold the option of "Compositing" in the left panel and customize the "Blending Mode" according to your needs. Here, you can choose "Overlay" and drag the slider to change opacity.
4. Click "OK" button to save all editing.
Popular Products


